Installation Guide
Select your car type for the appropriate guide
1. Tesla harness installation
Connecting the comma harness to the Tesla Model 3 / Y autopilot computer
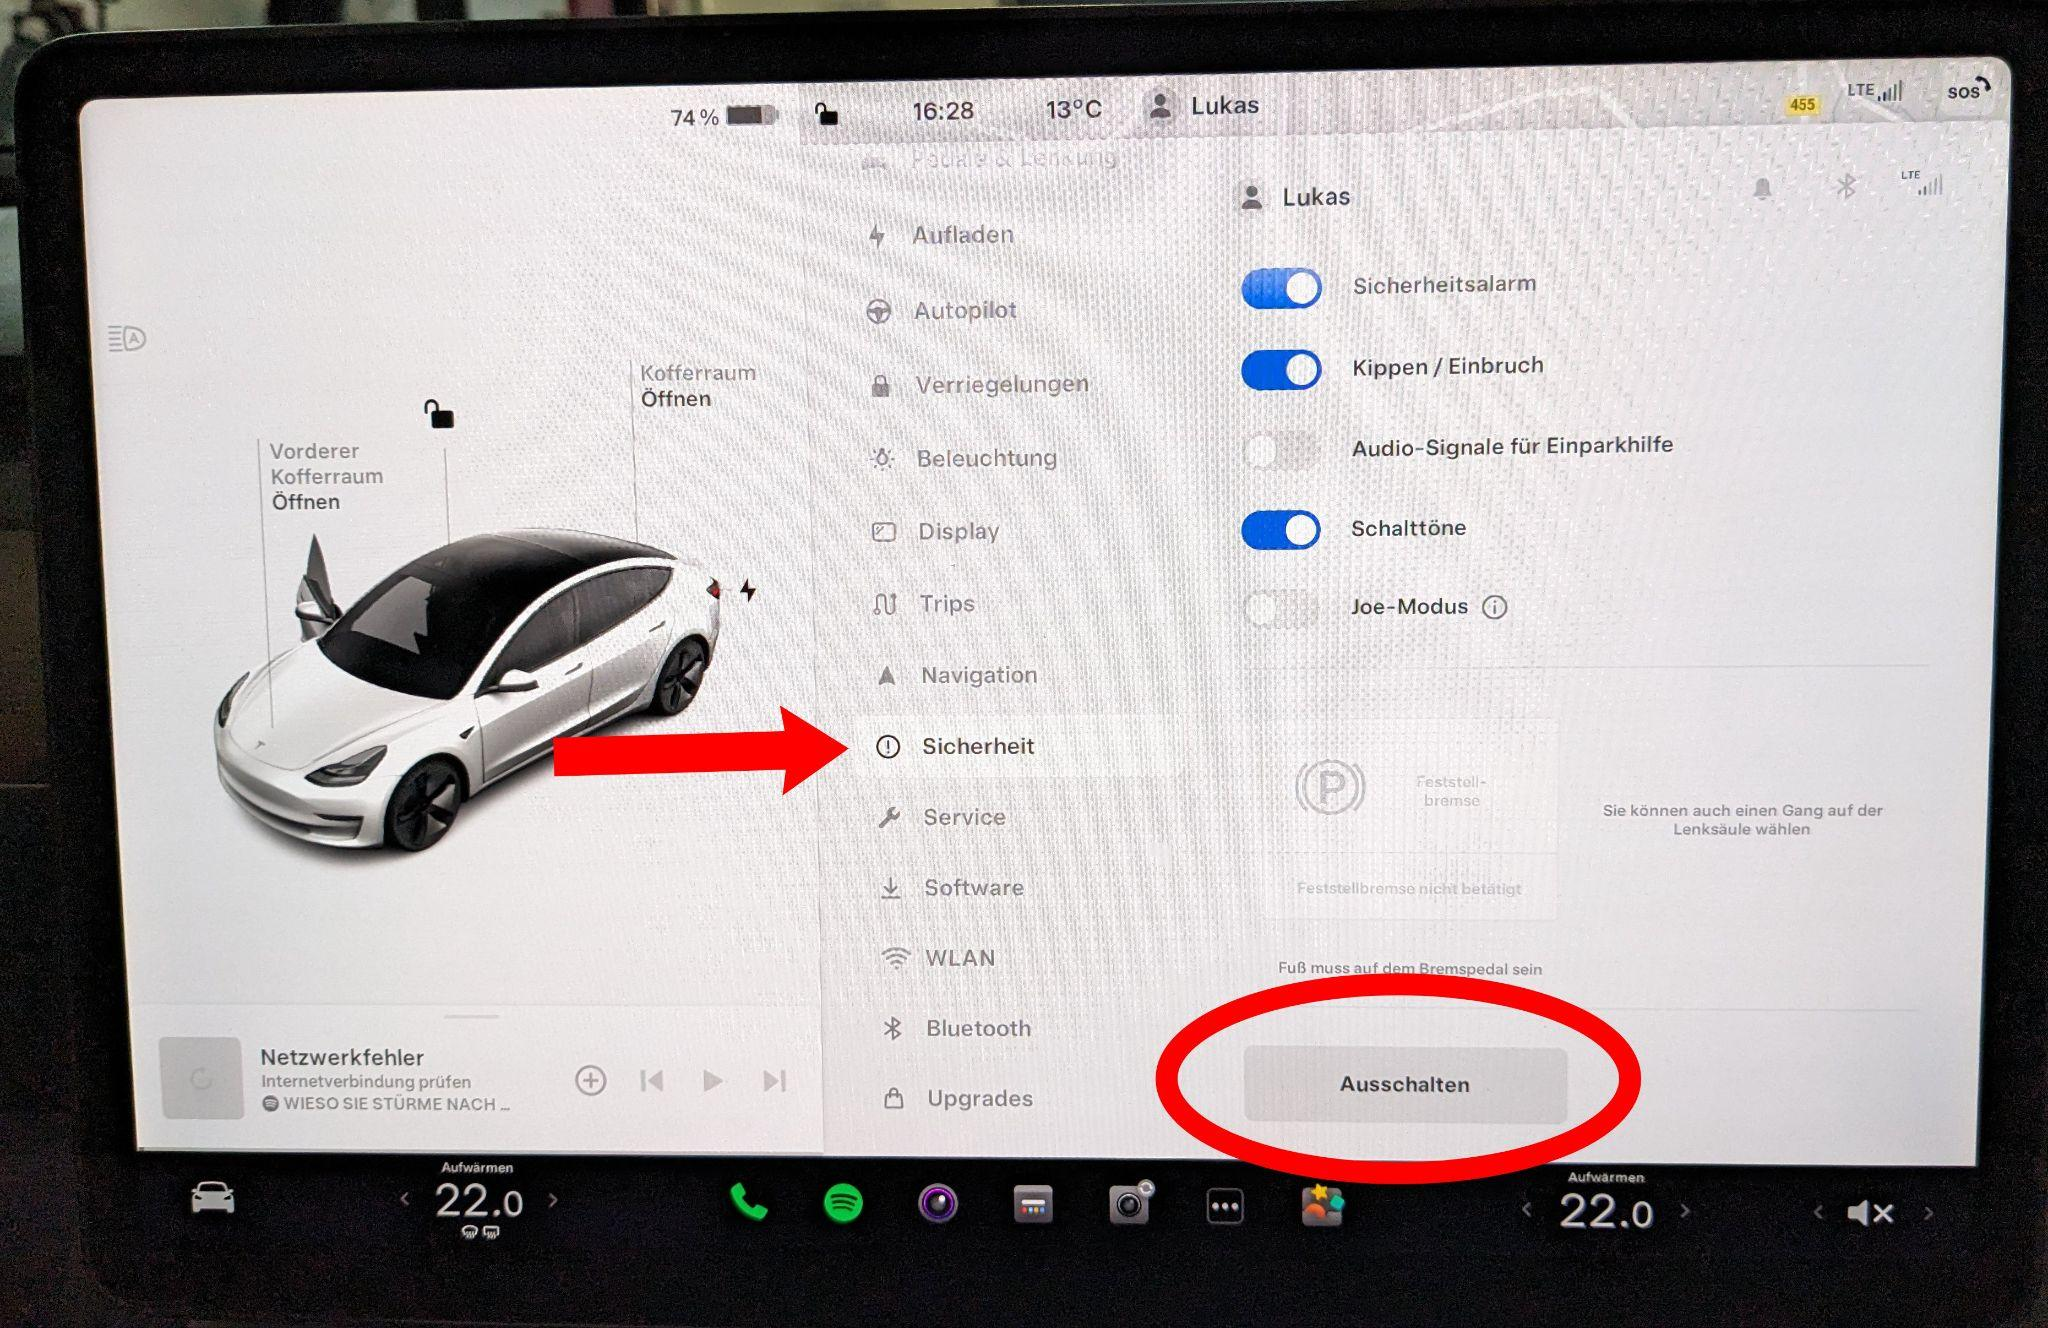
Navigate to the Safety menu and turn off the infotainment system. From this point, do not touch the driver's seat!
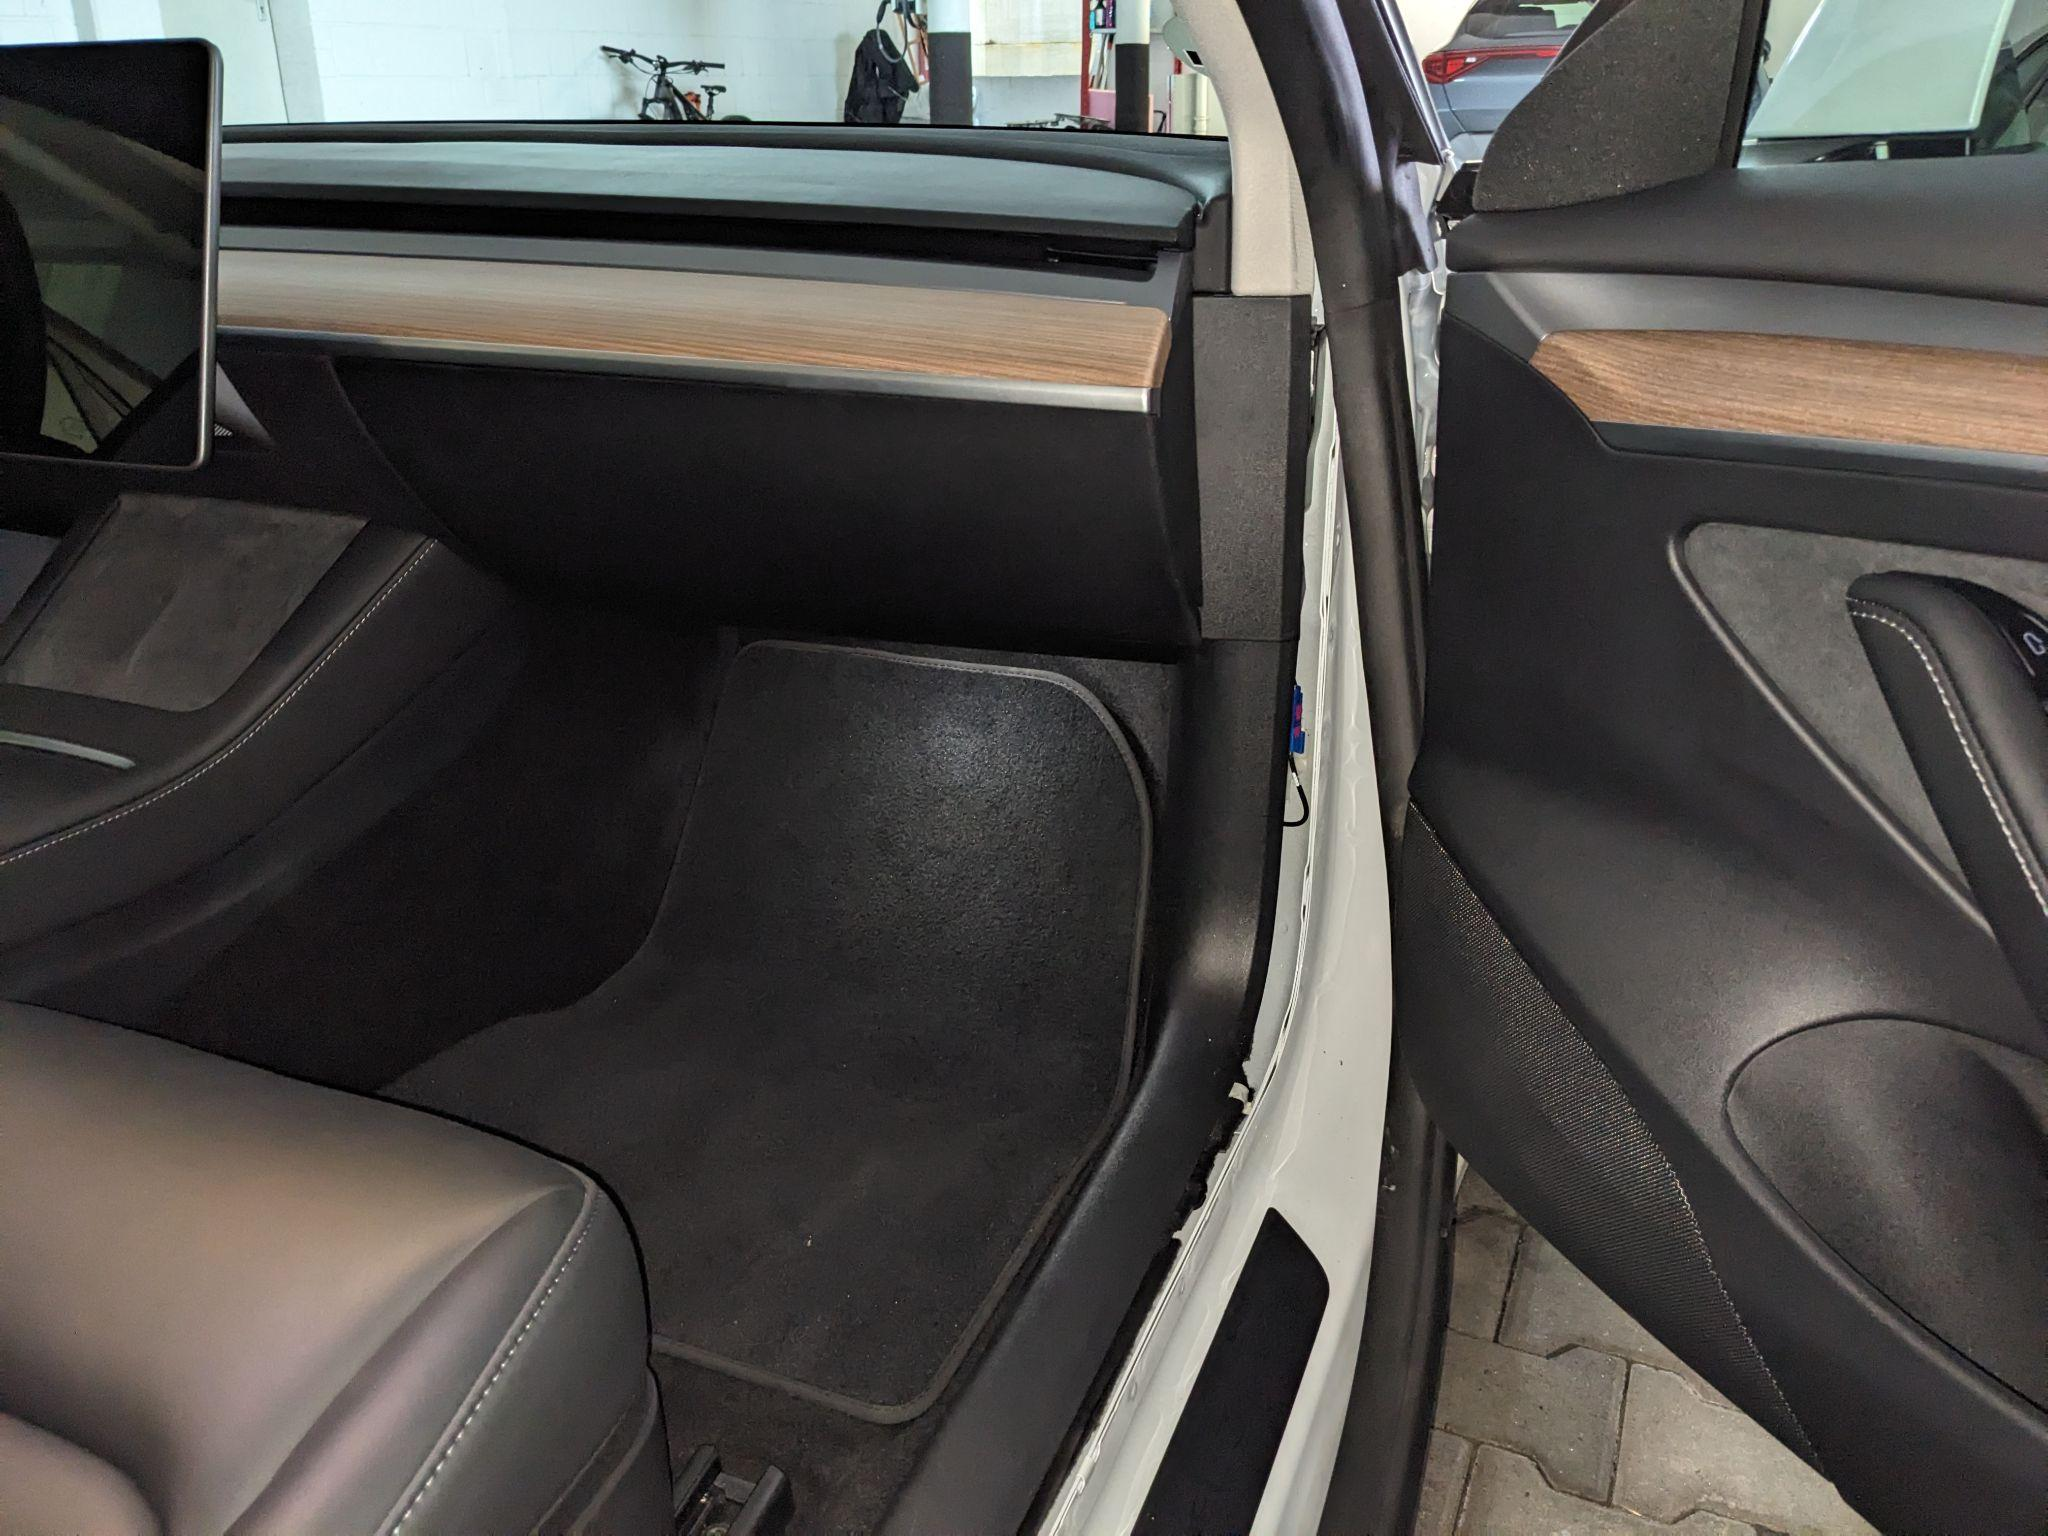
Slightly pull back the door weather stripping.
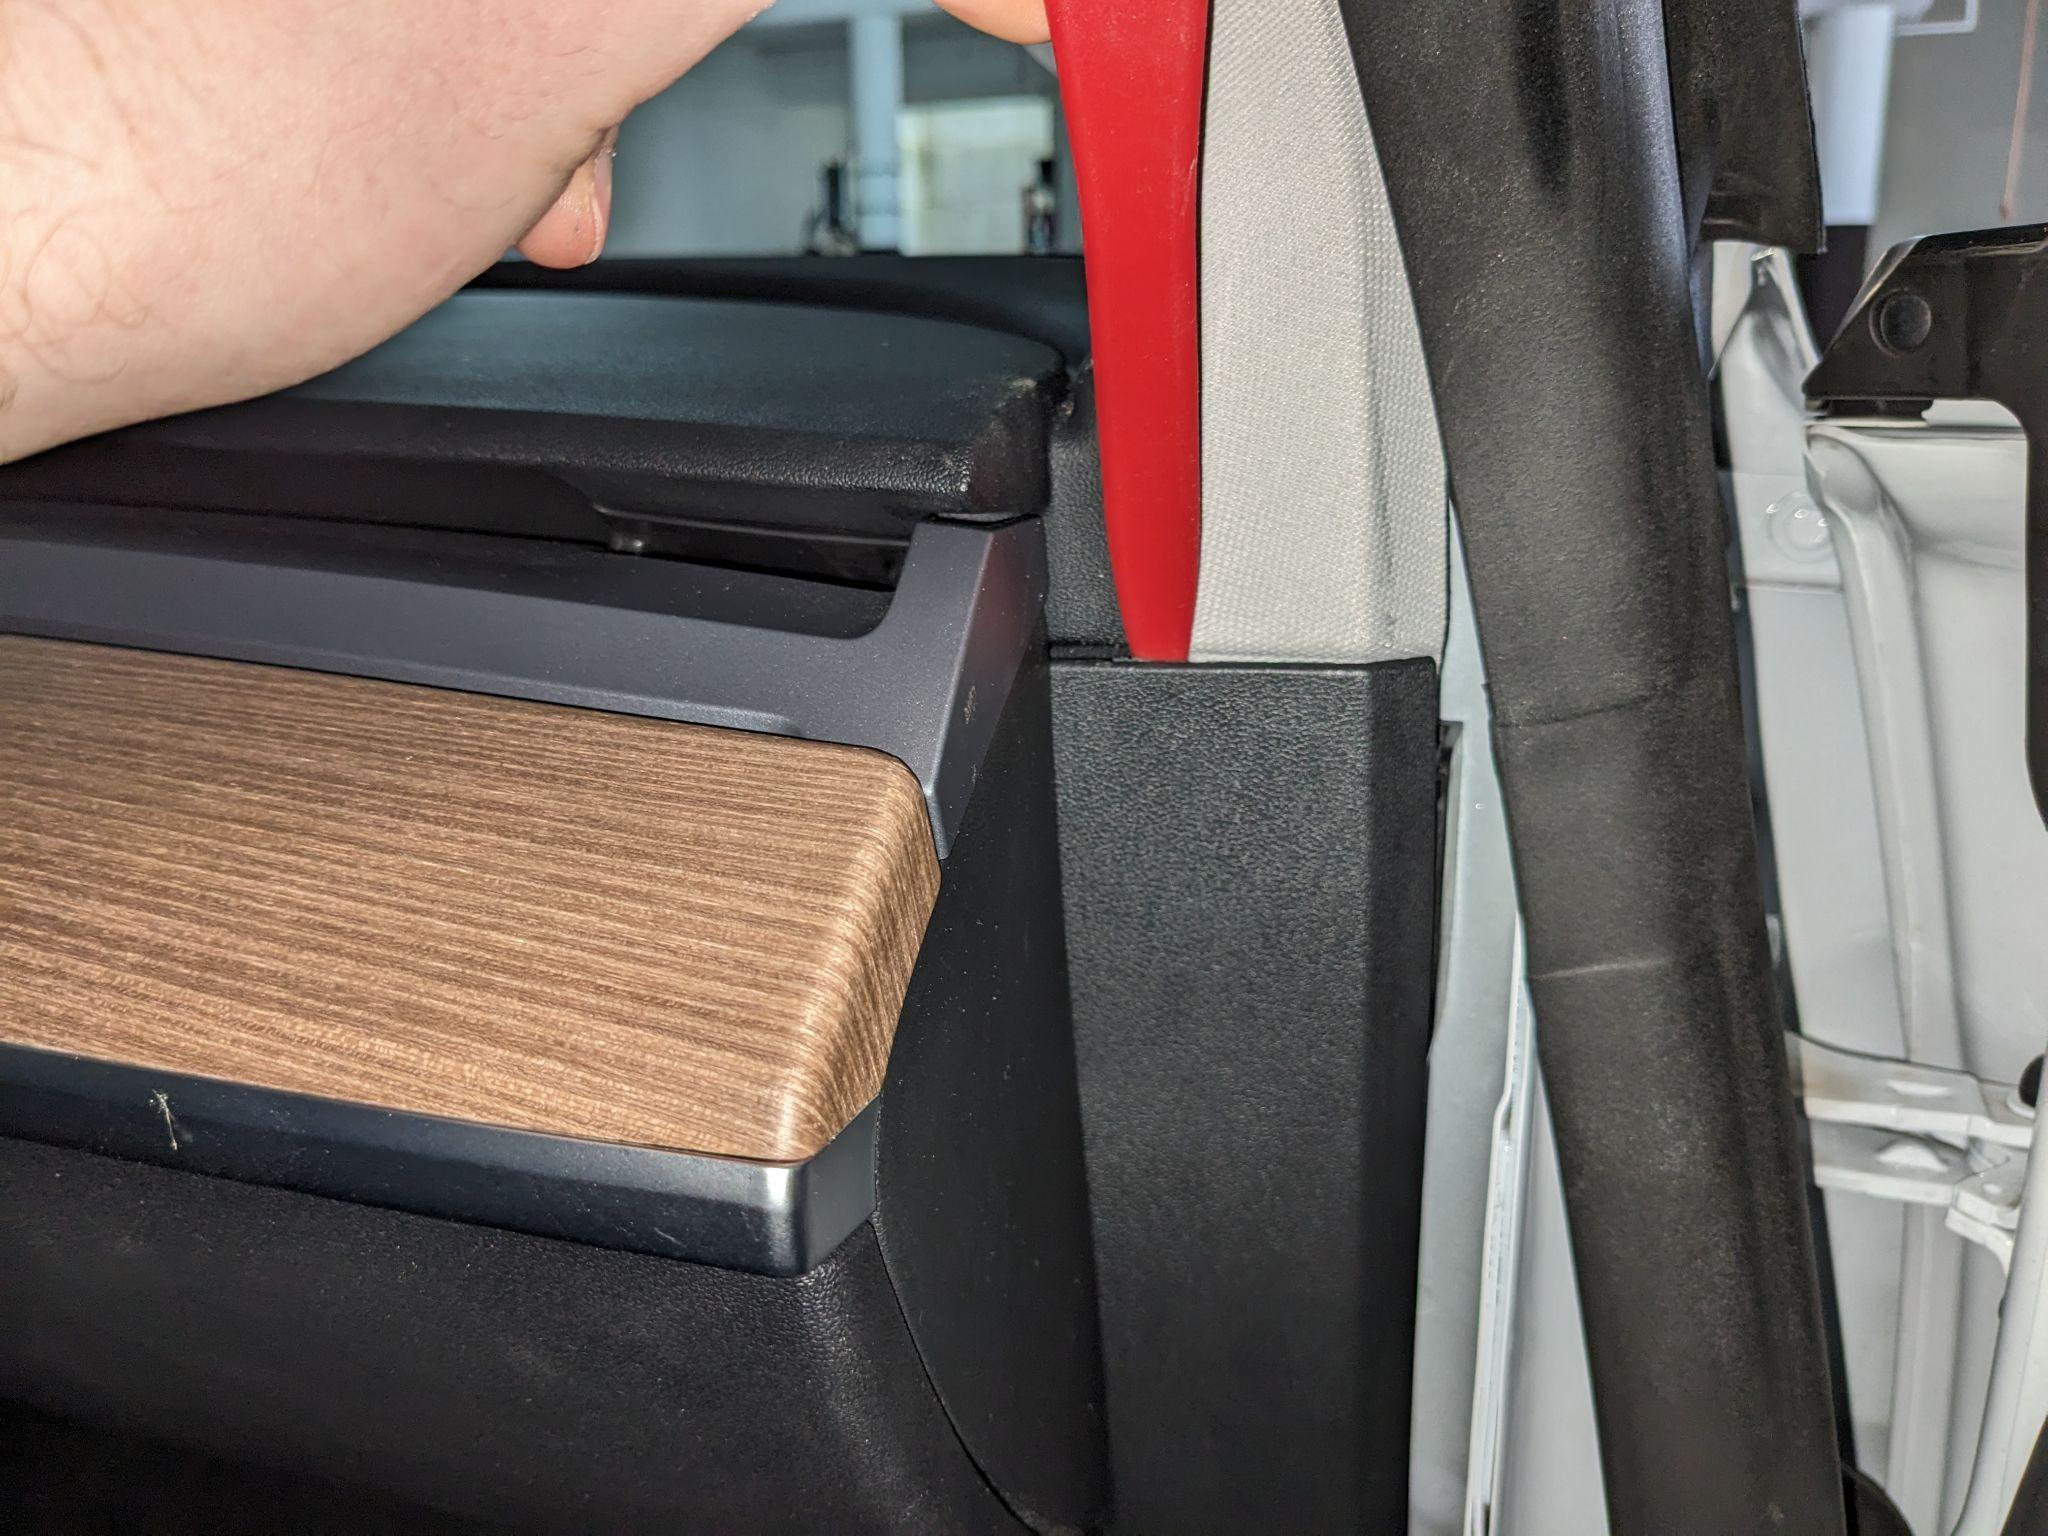
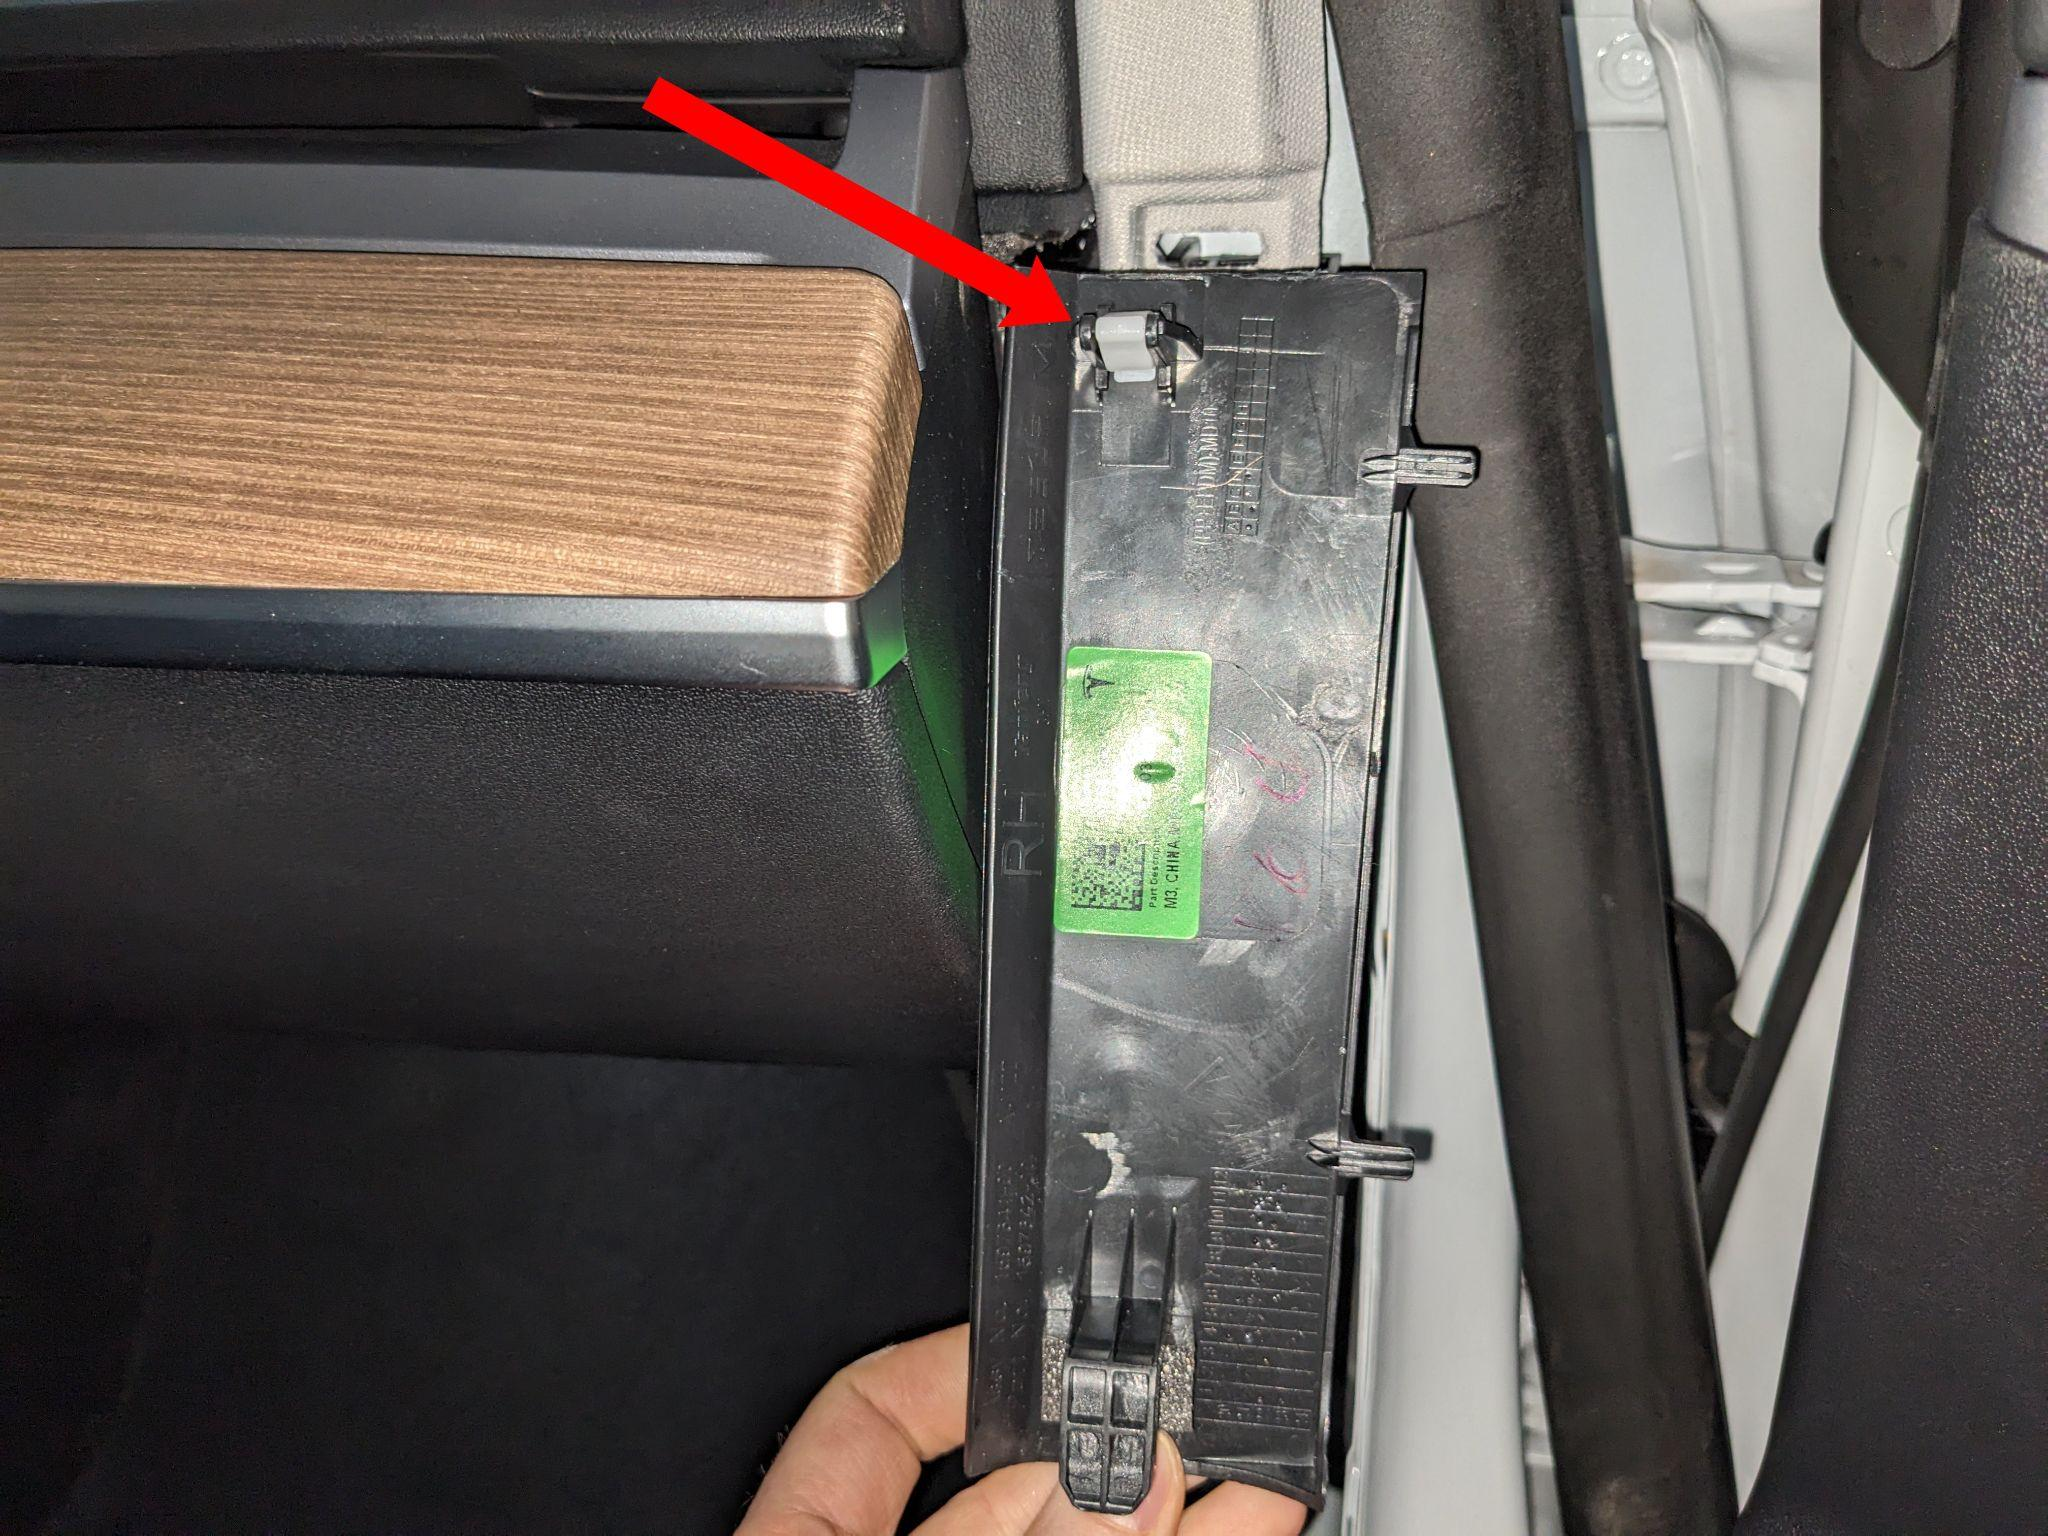
Remove the upper panel next to the door. The panel is mainly held by the marked clip.
Remove the clip that holds the sill cover.
Pull up the sill cover.
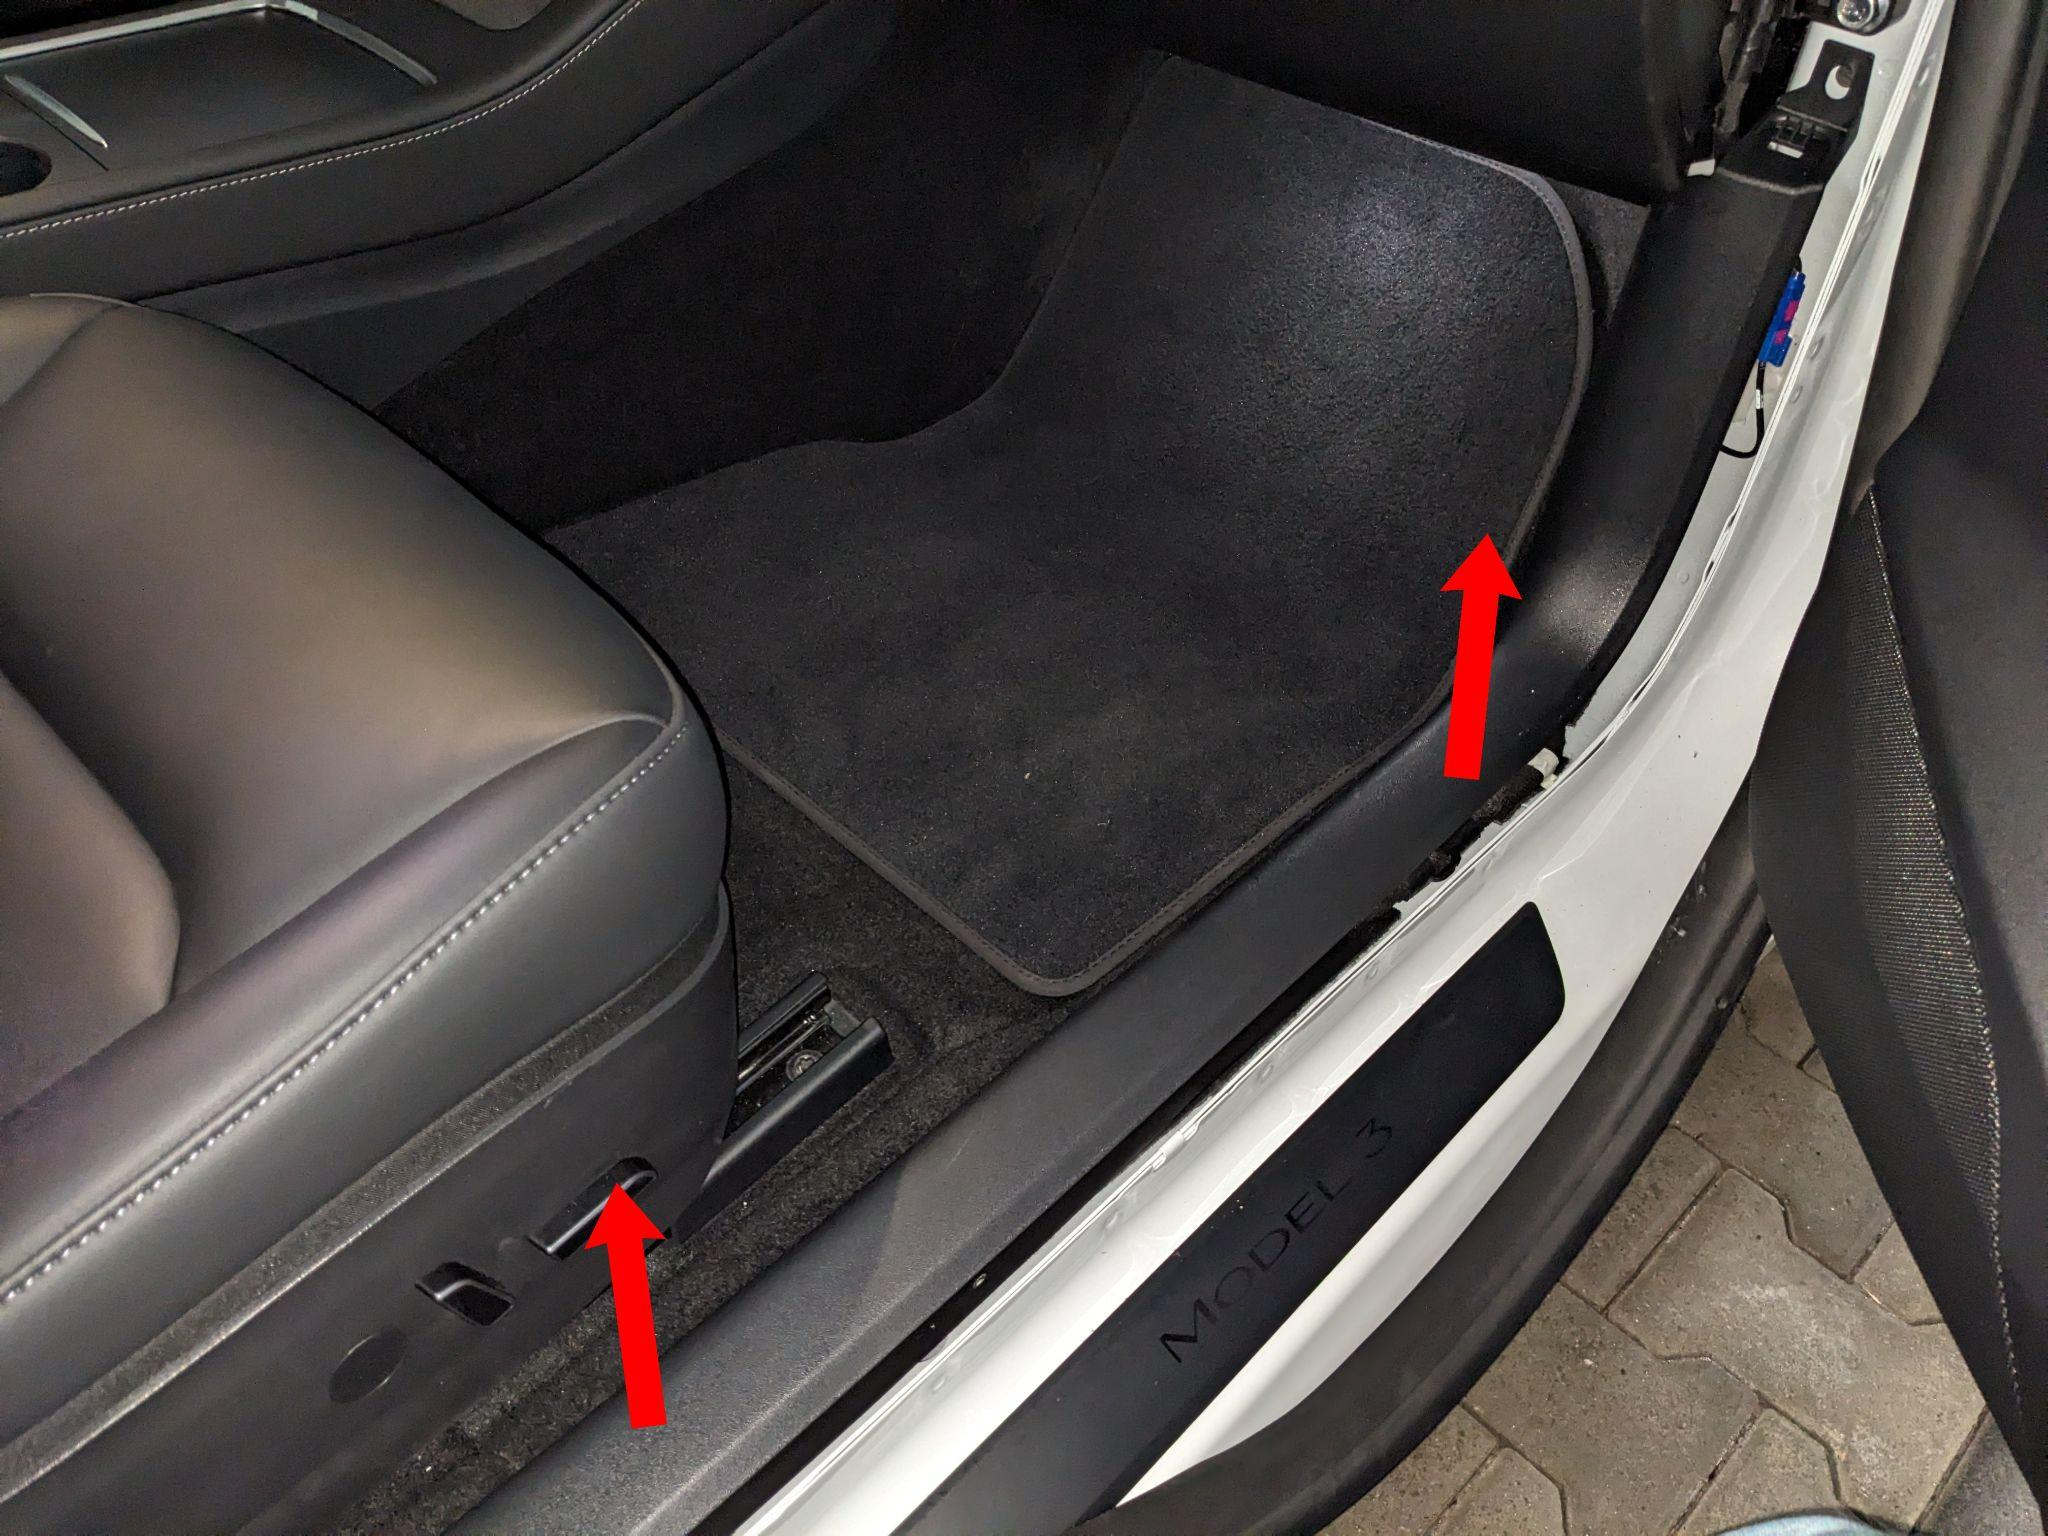
The sill cover is held in place by the marked clips.
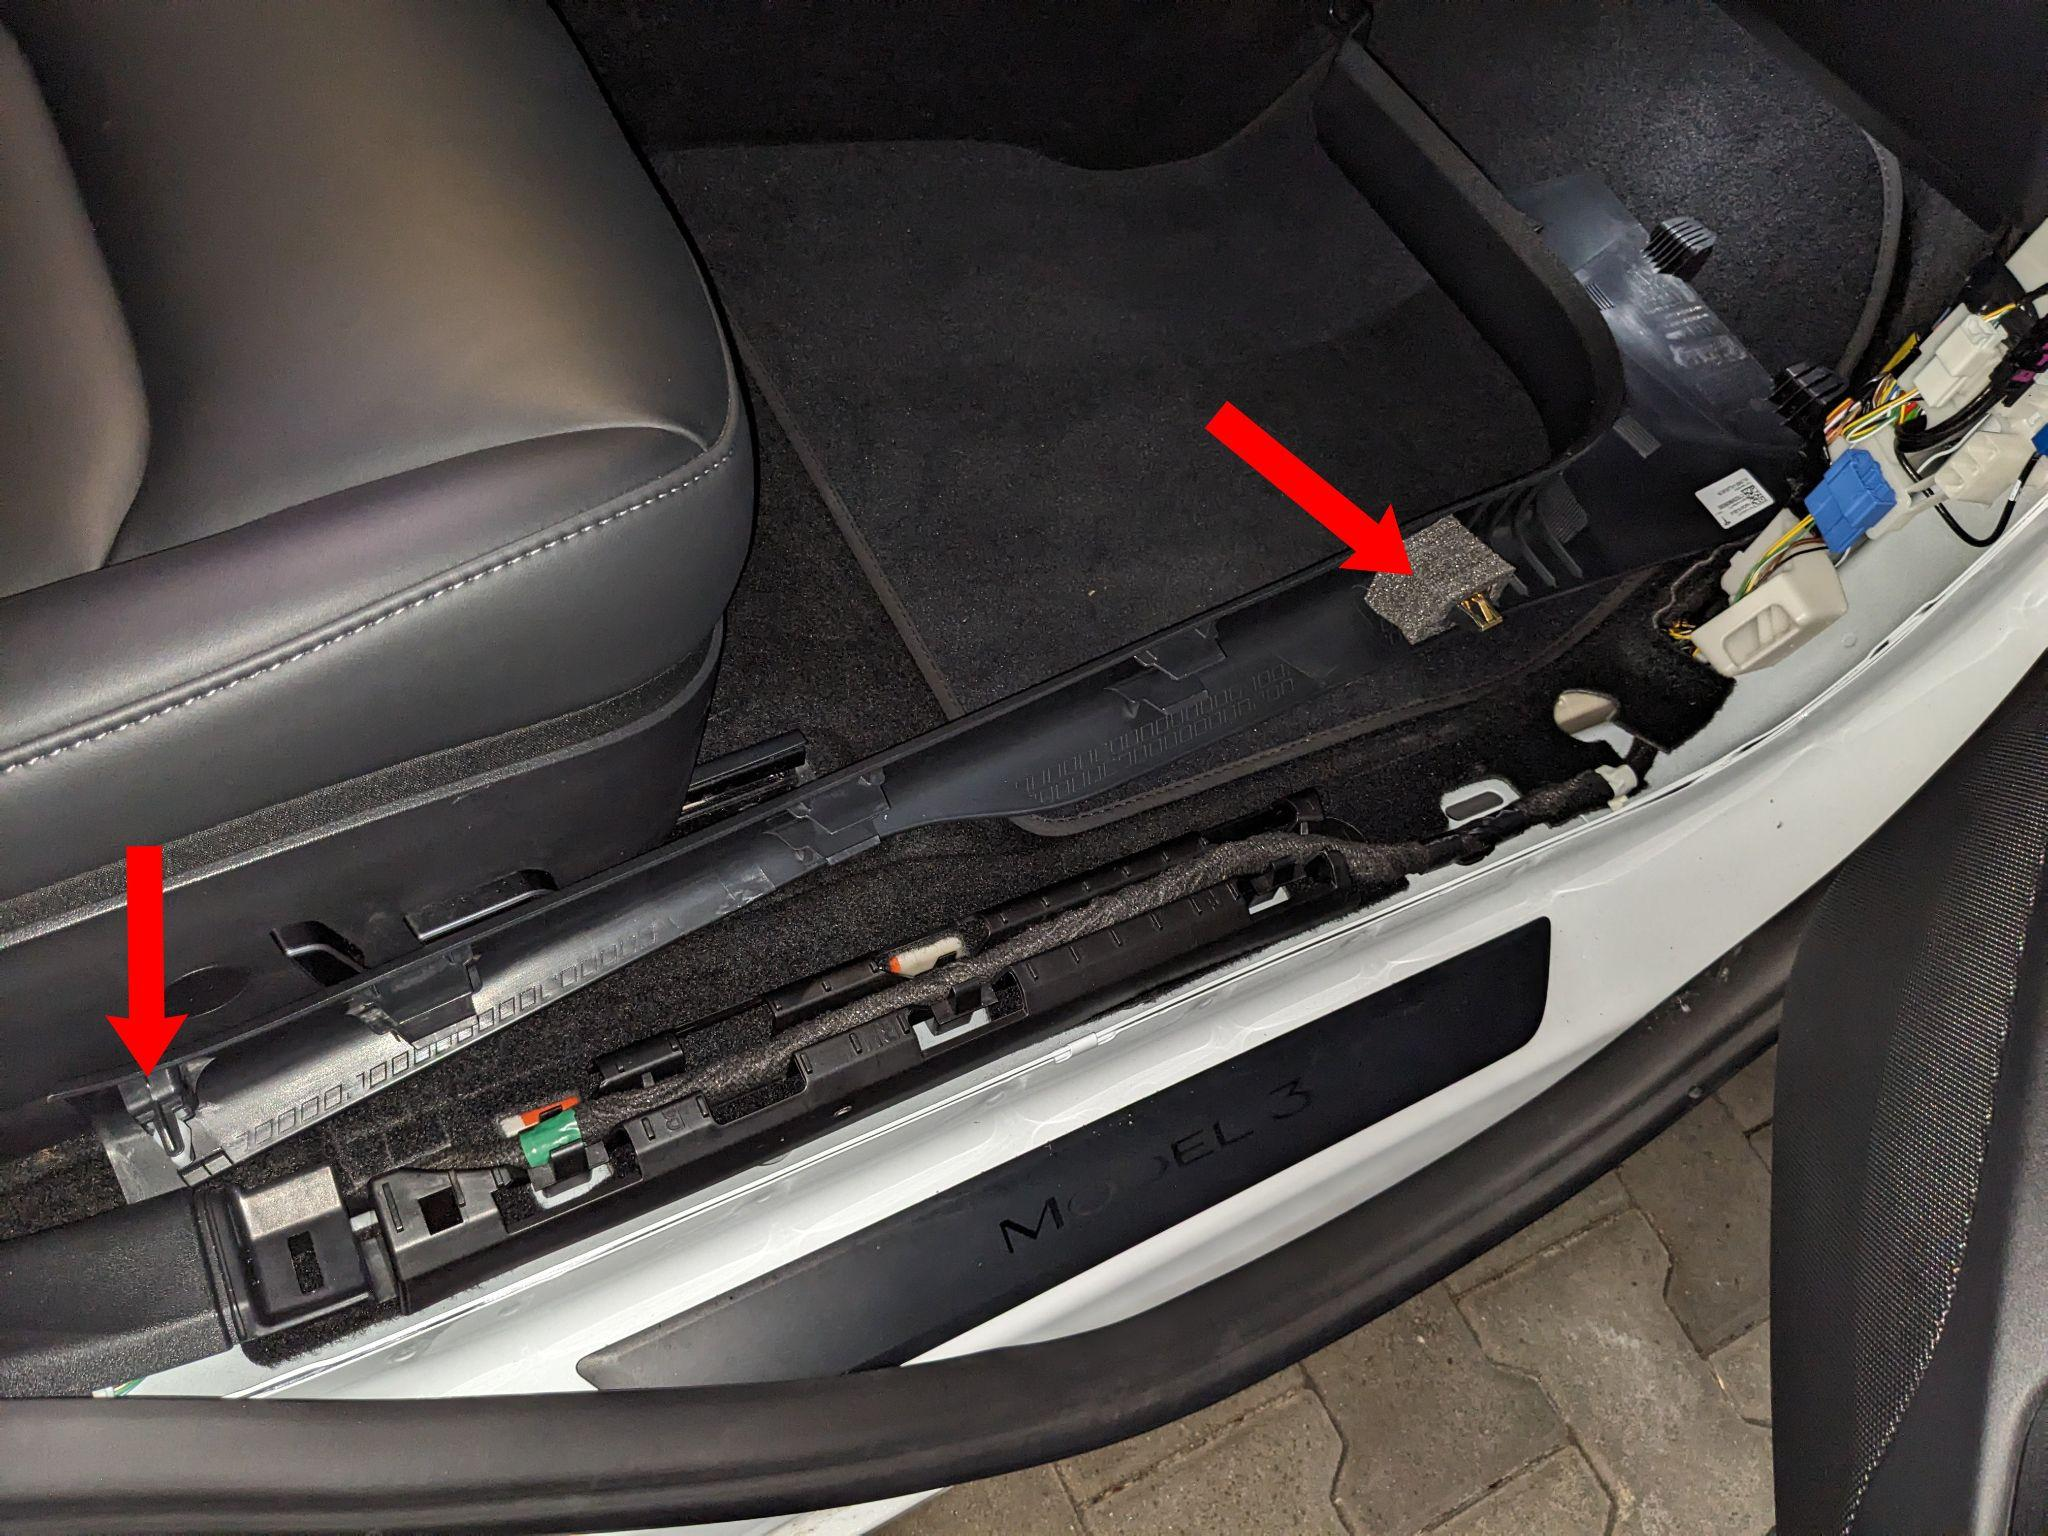
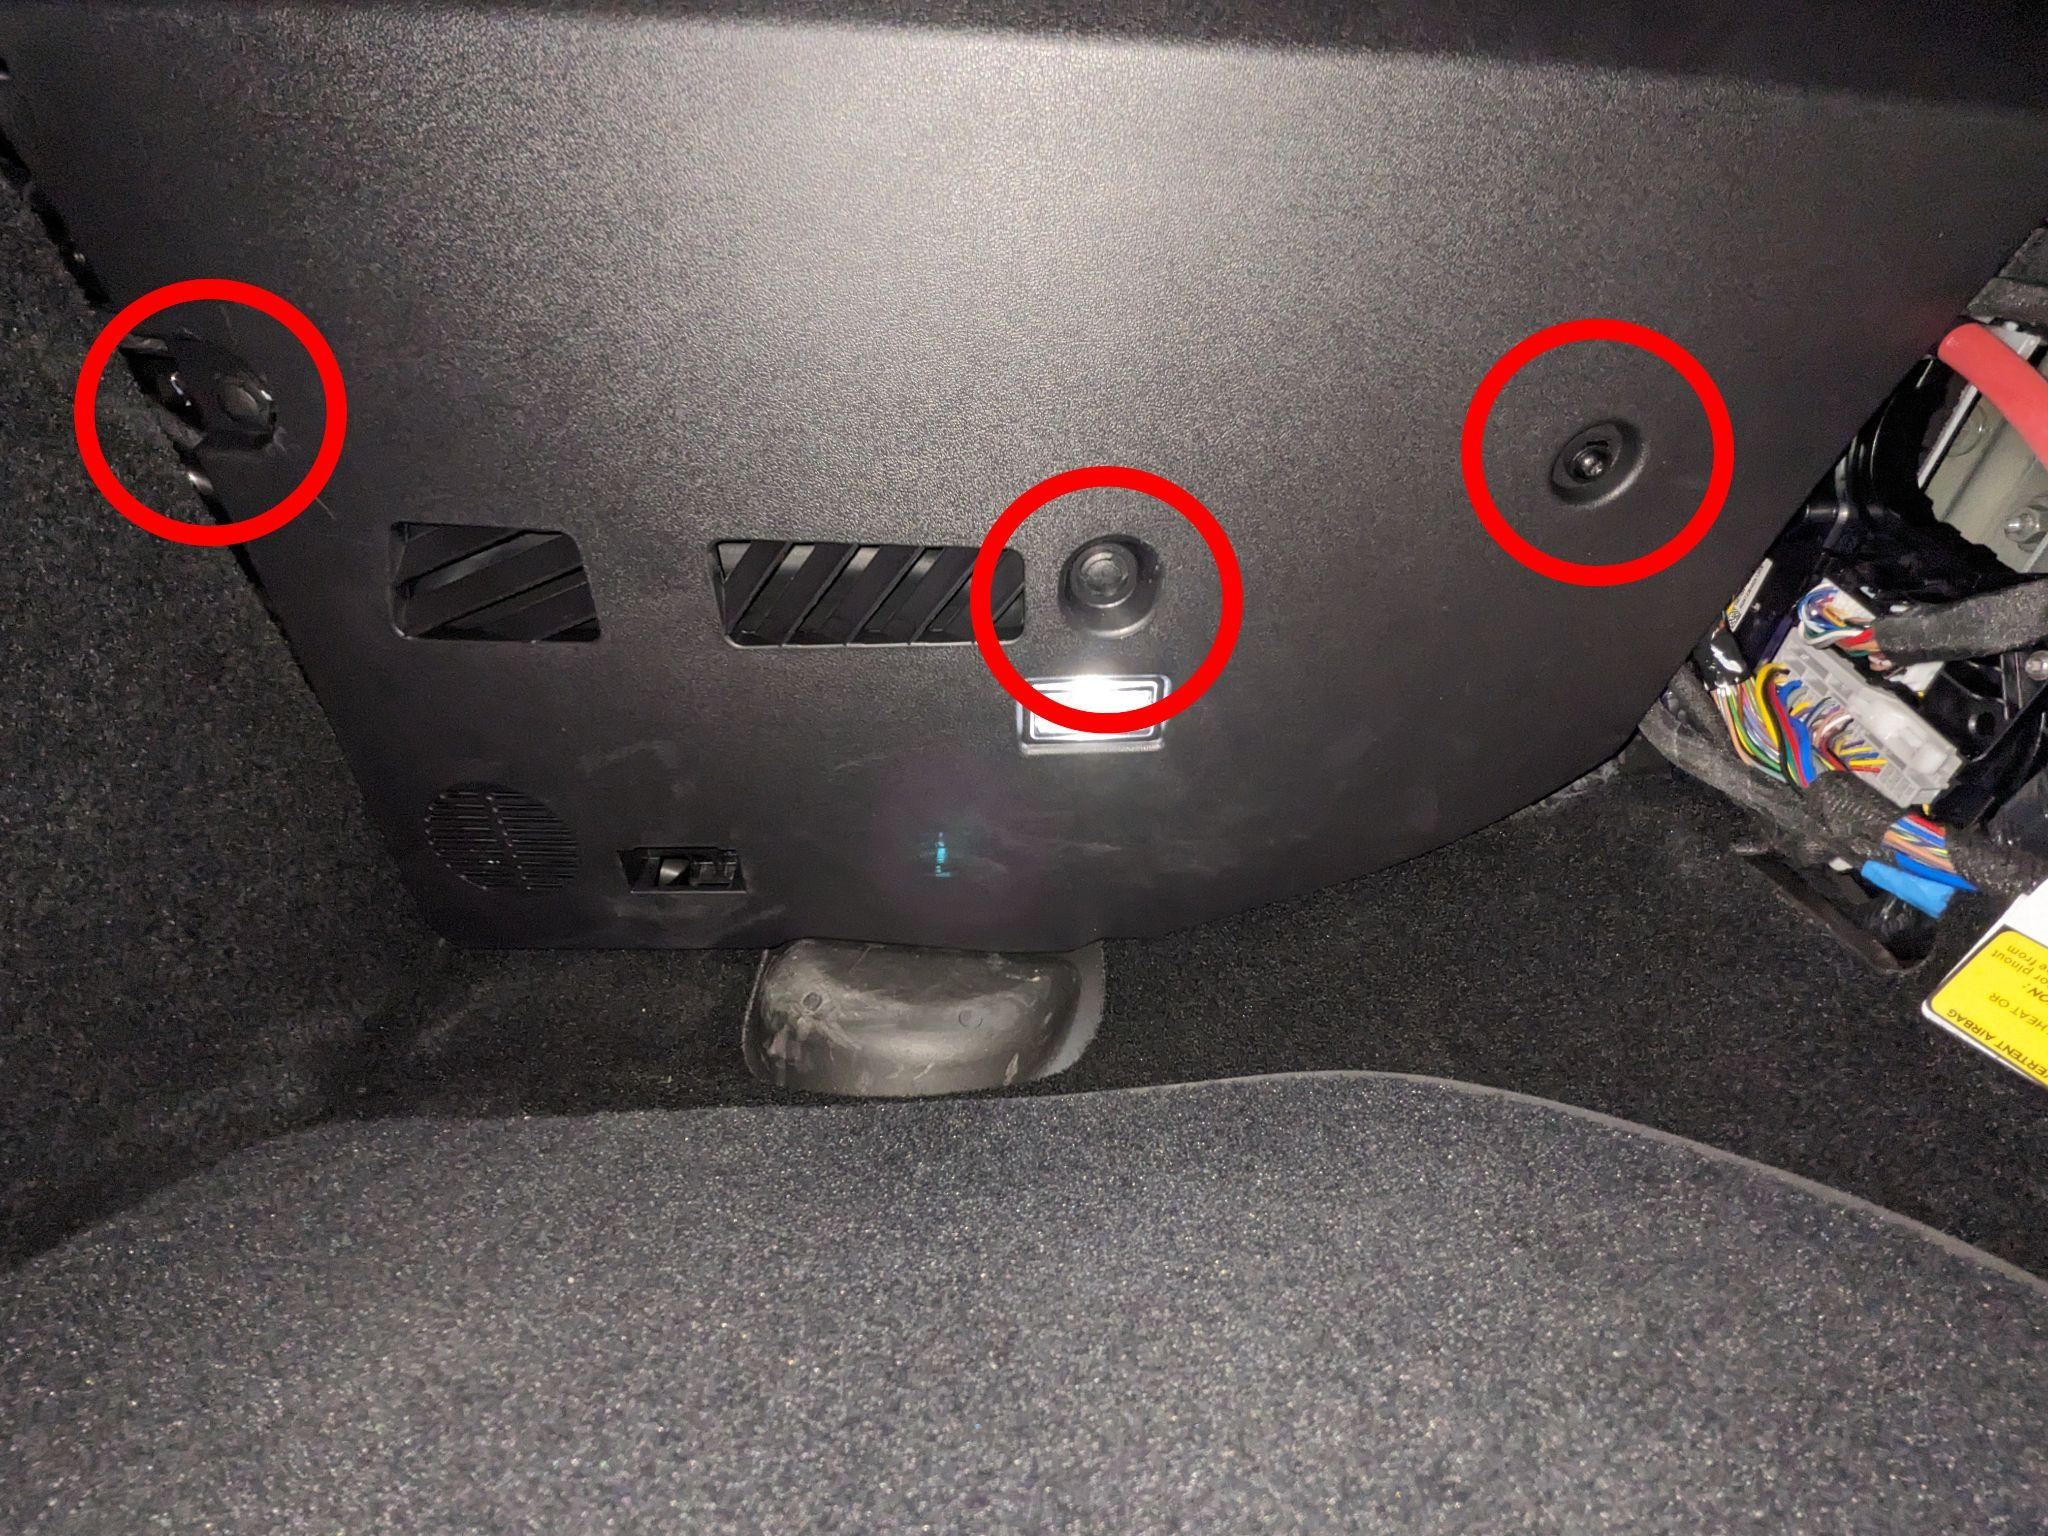
The next step is removing the footwell panel.
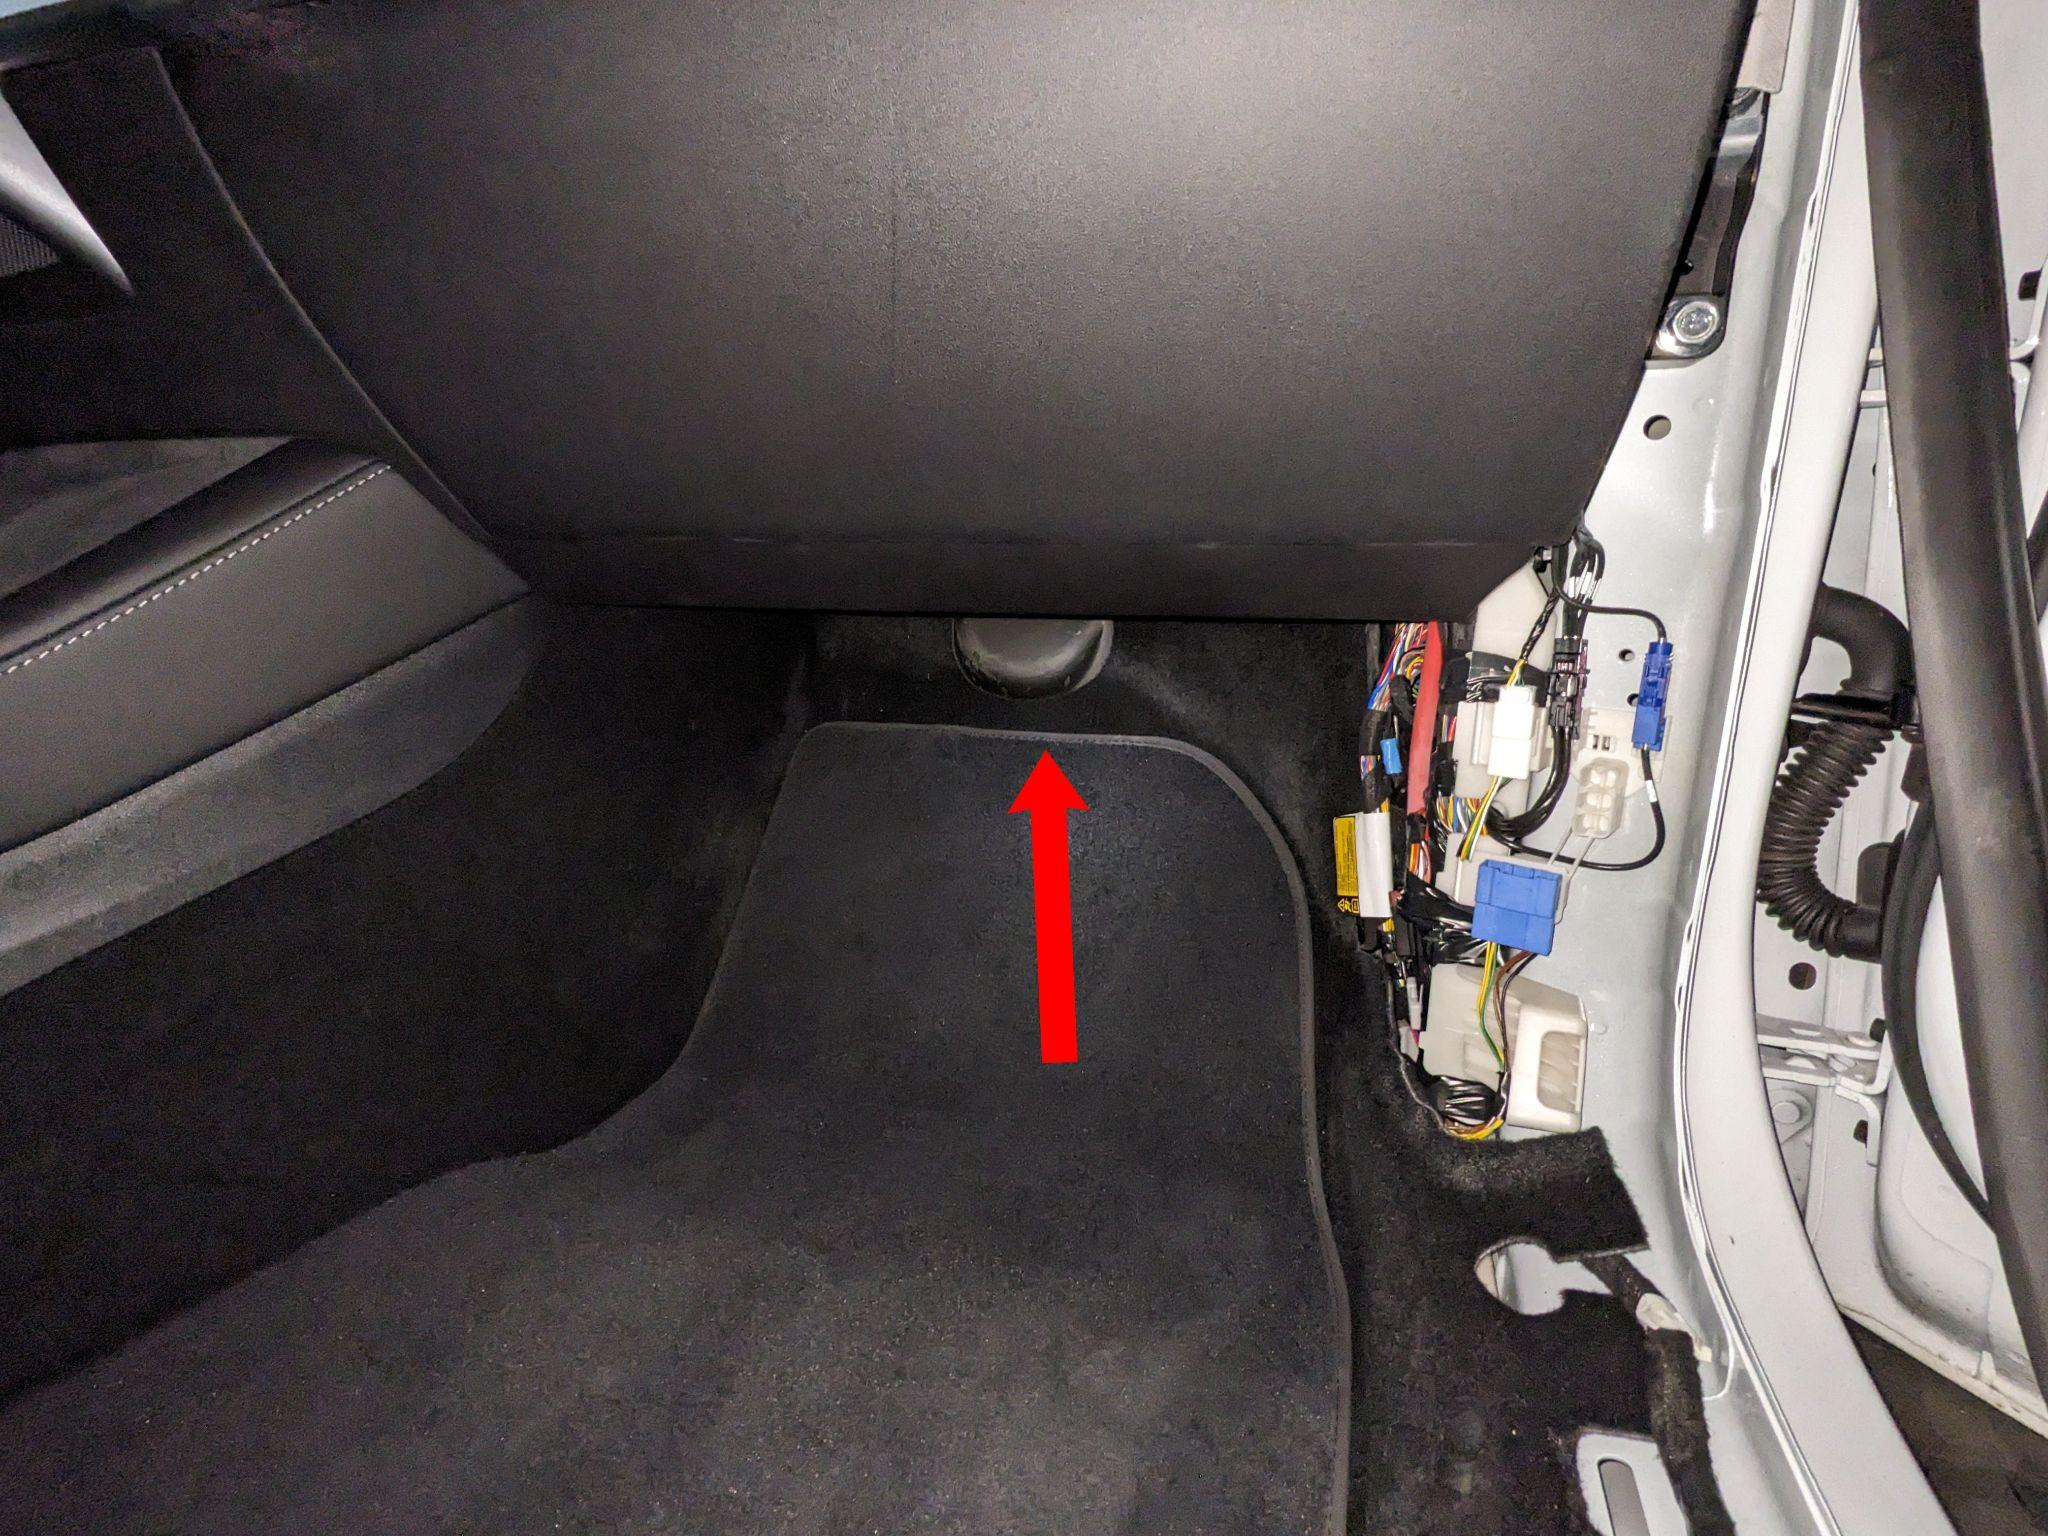
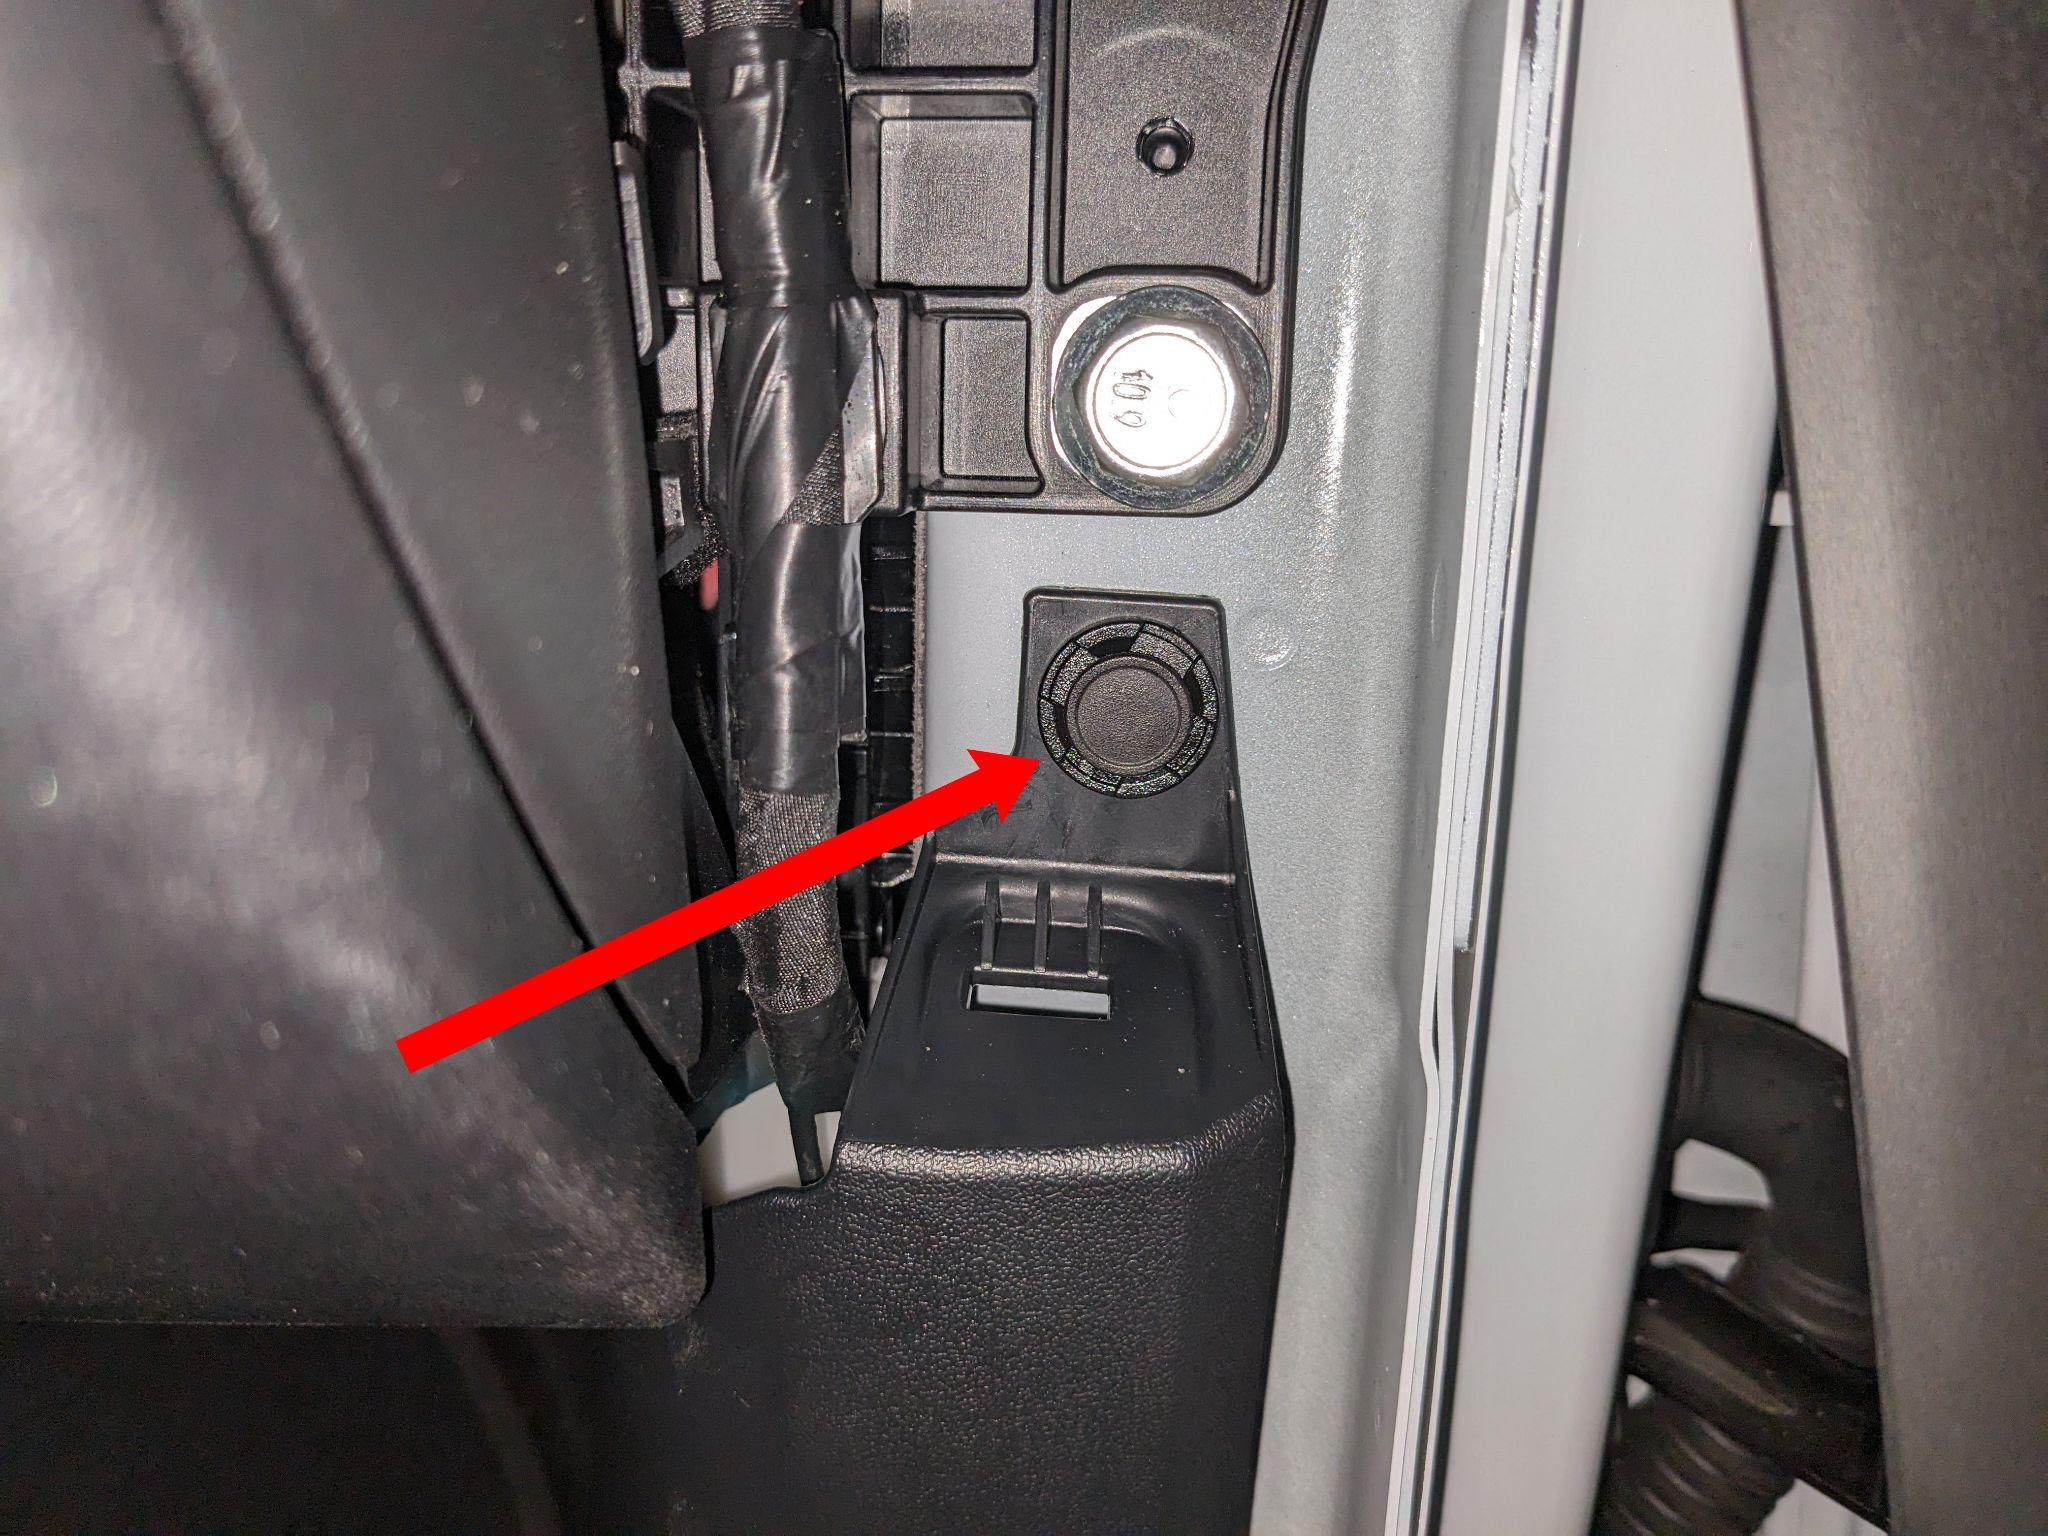
The panel is held by two clips and a Torx screw. After removal, the panel can be pulled down from the front.
Unplug the cables so the panel can be set aside.
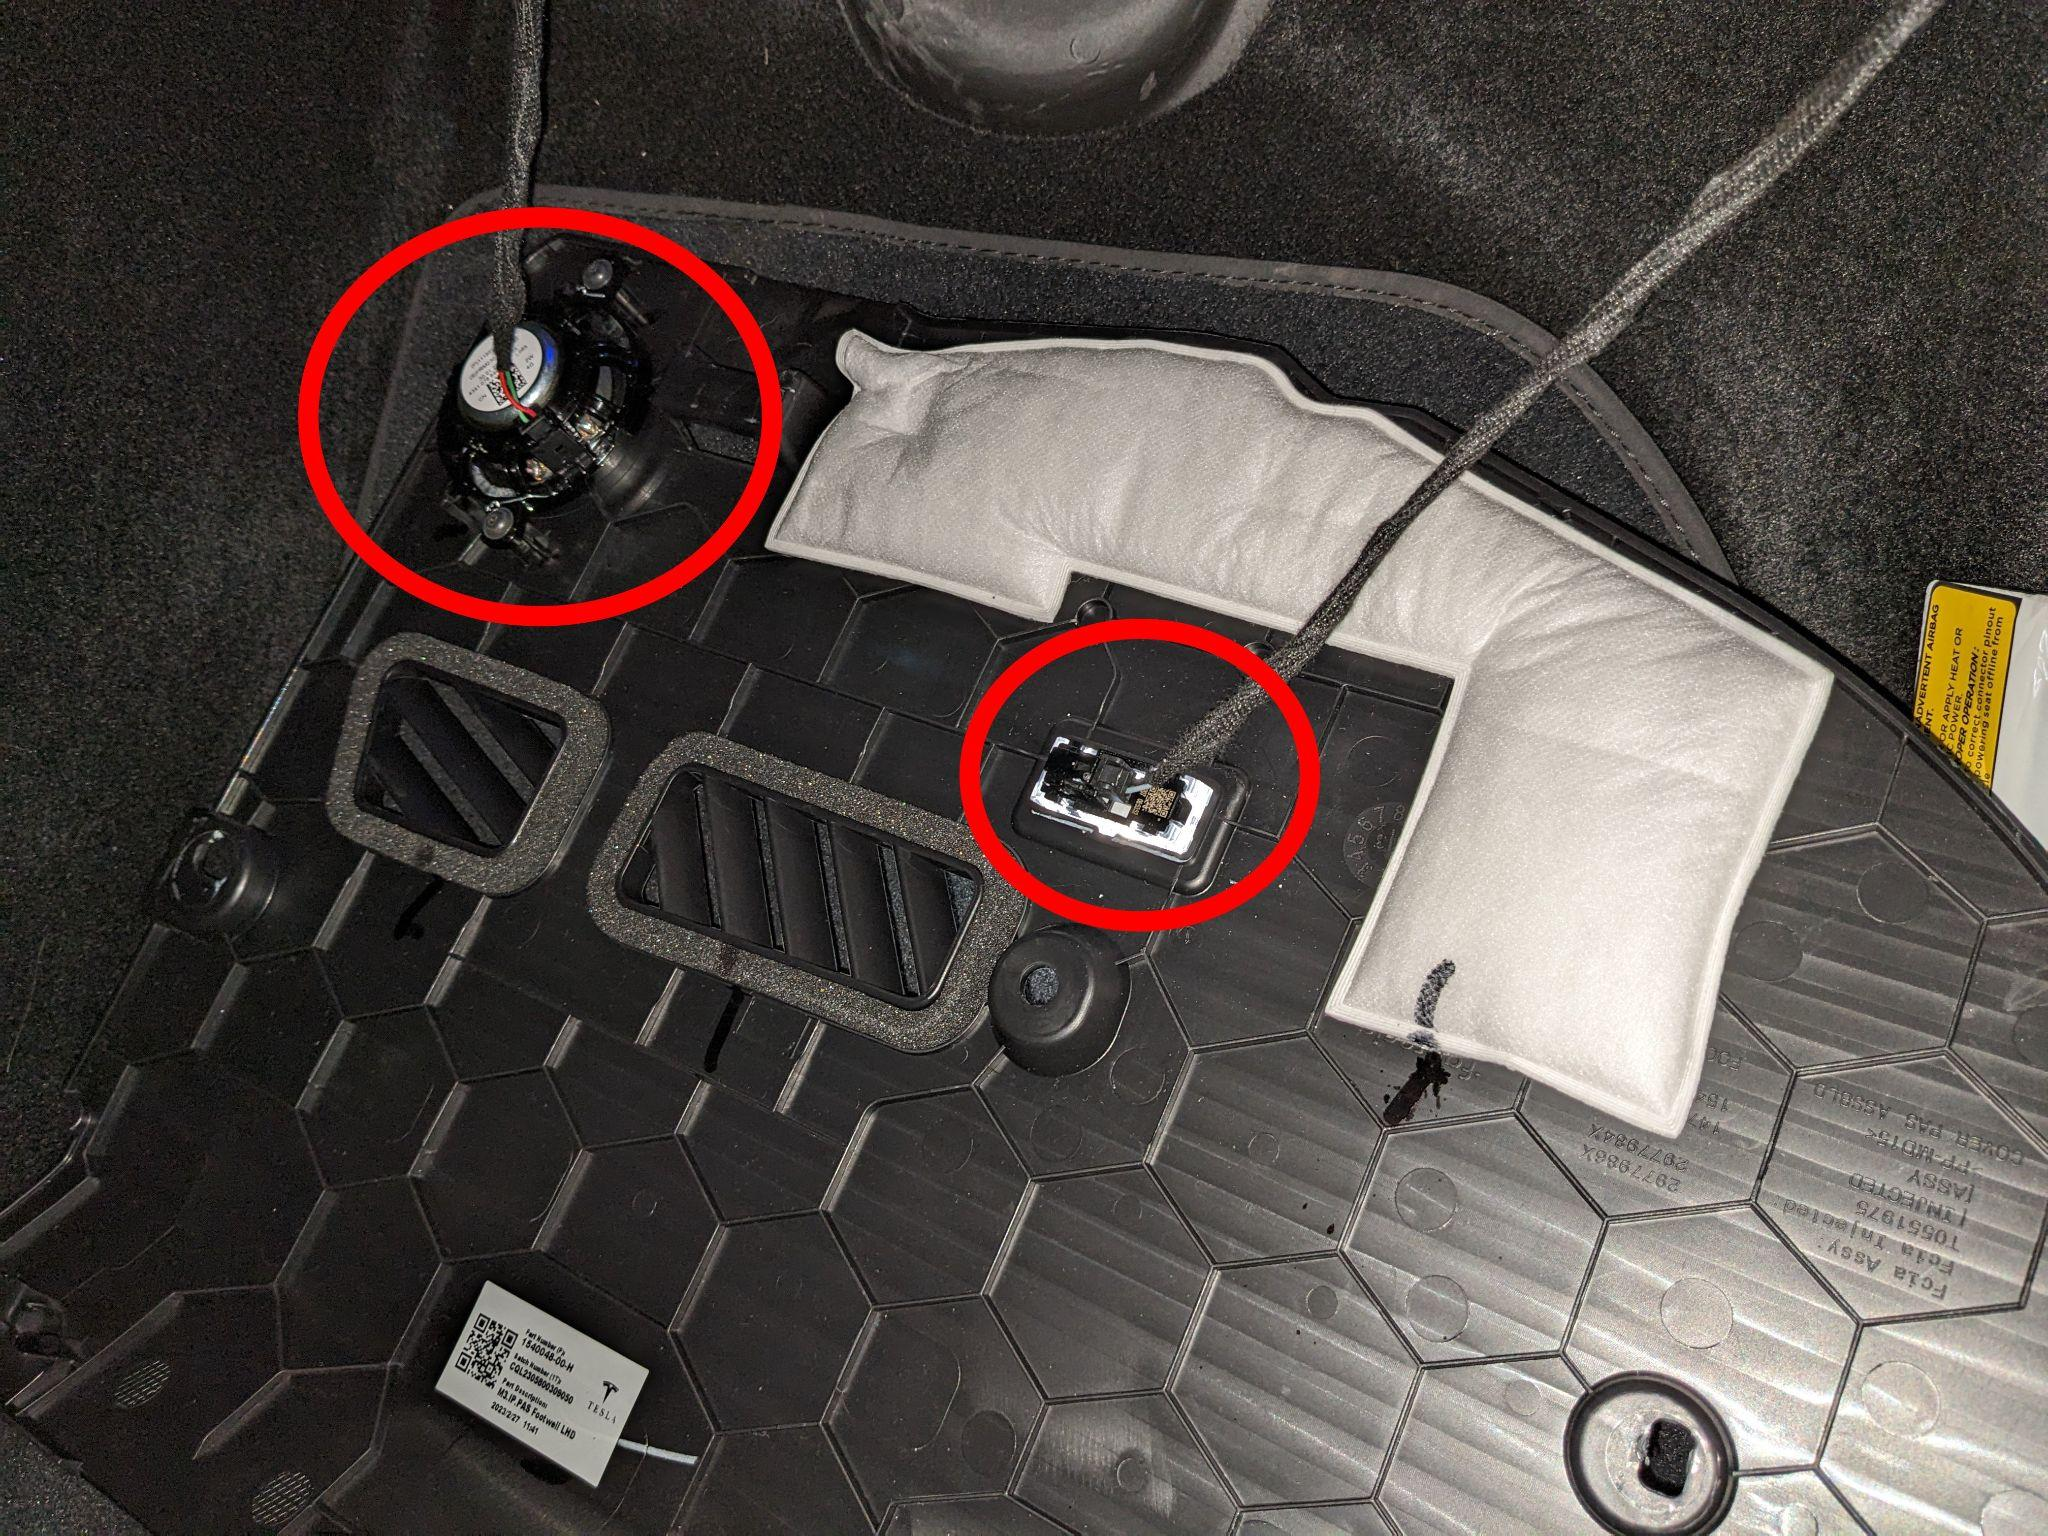
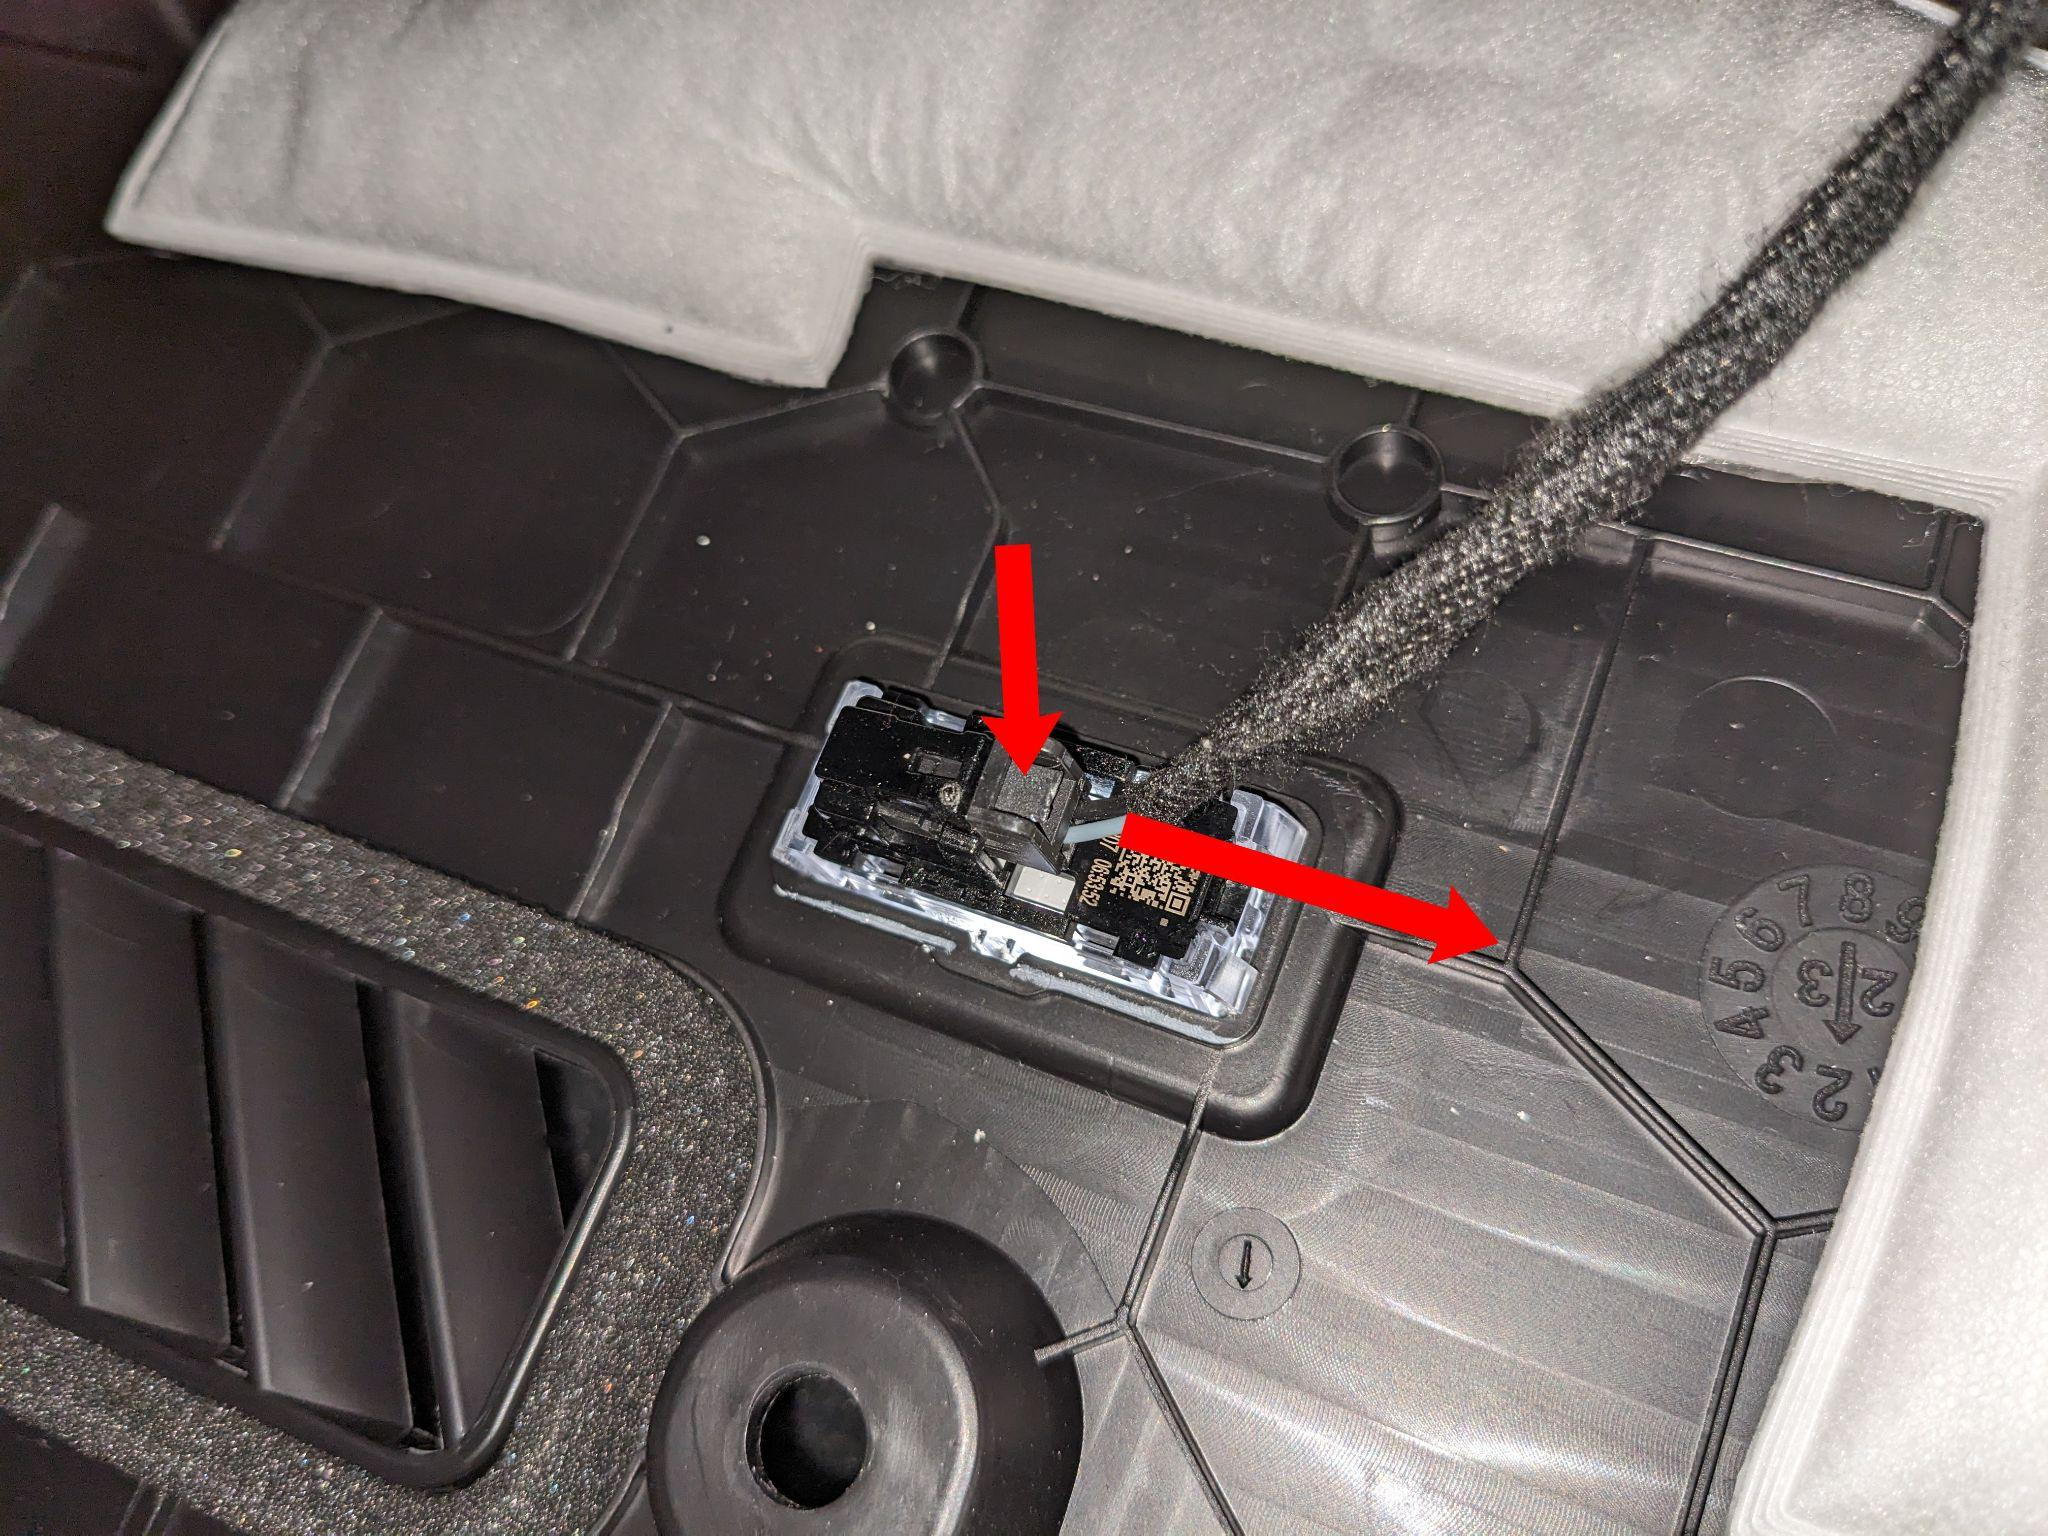
To remove the cable, first press down the tab, then pull the cable to the right.
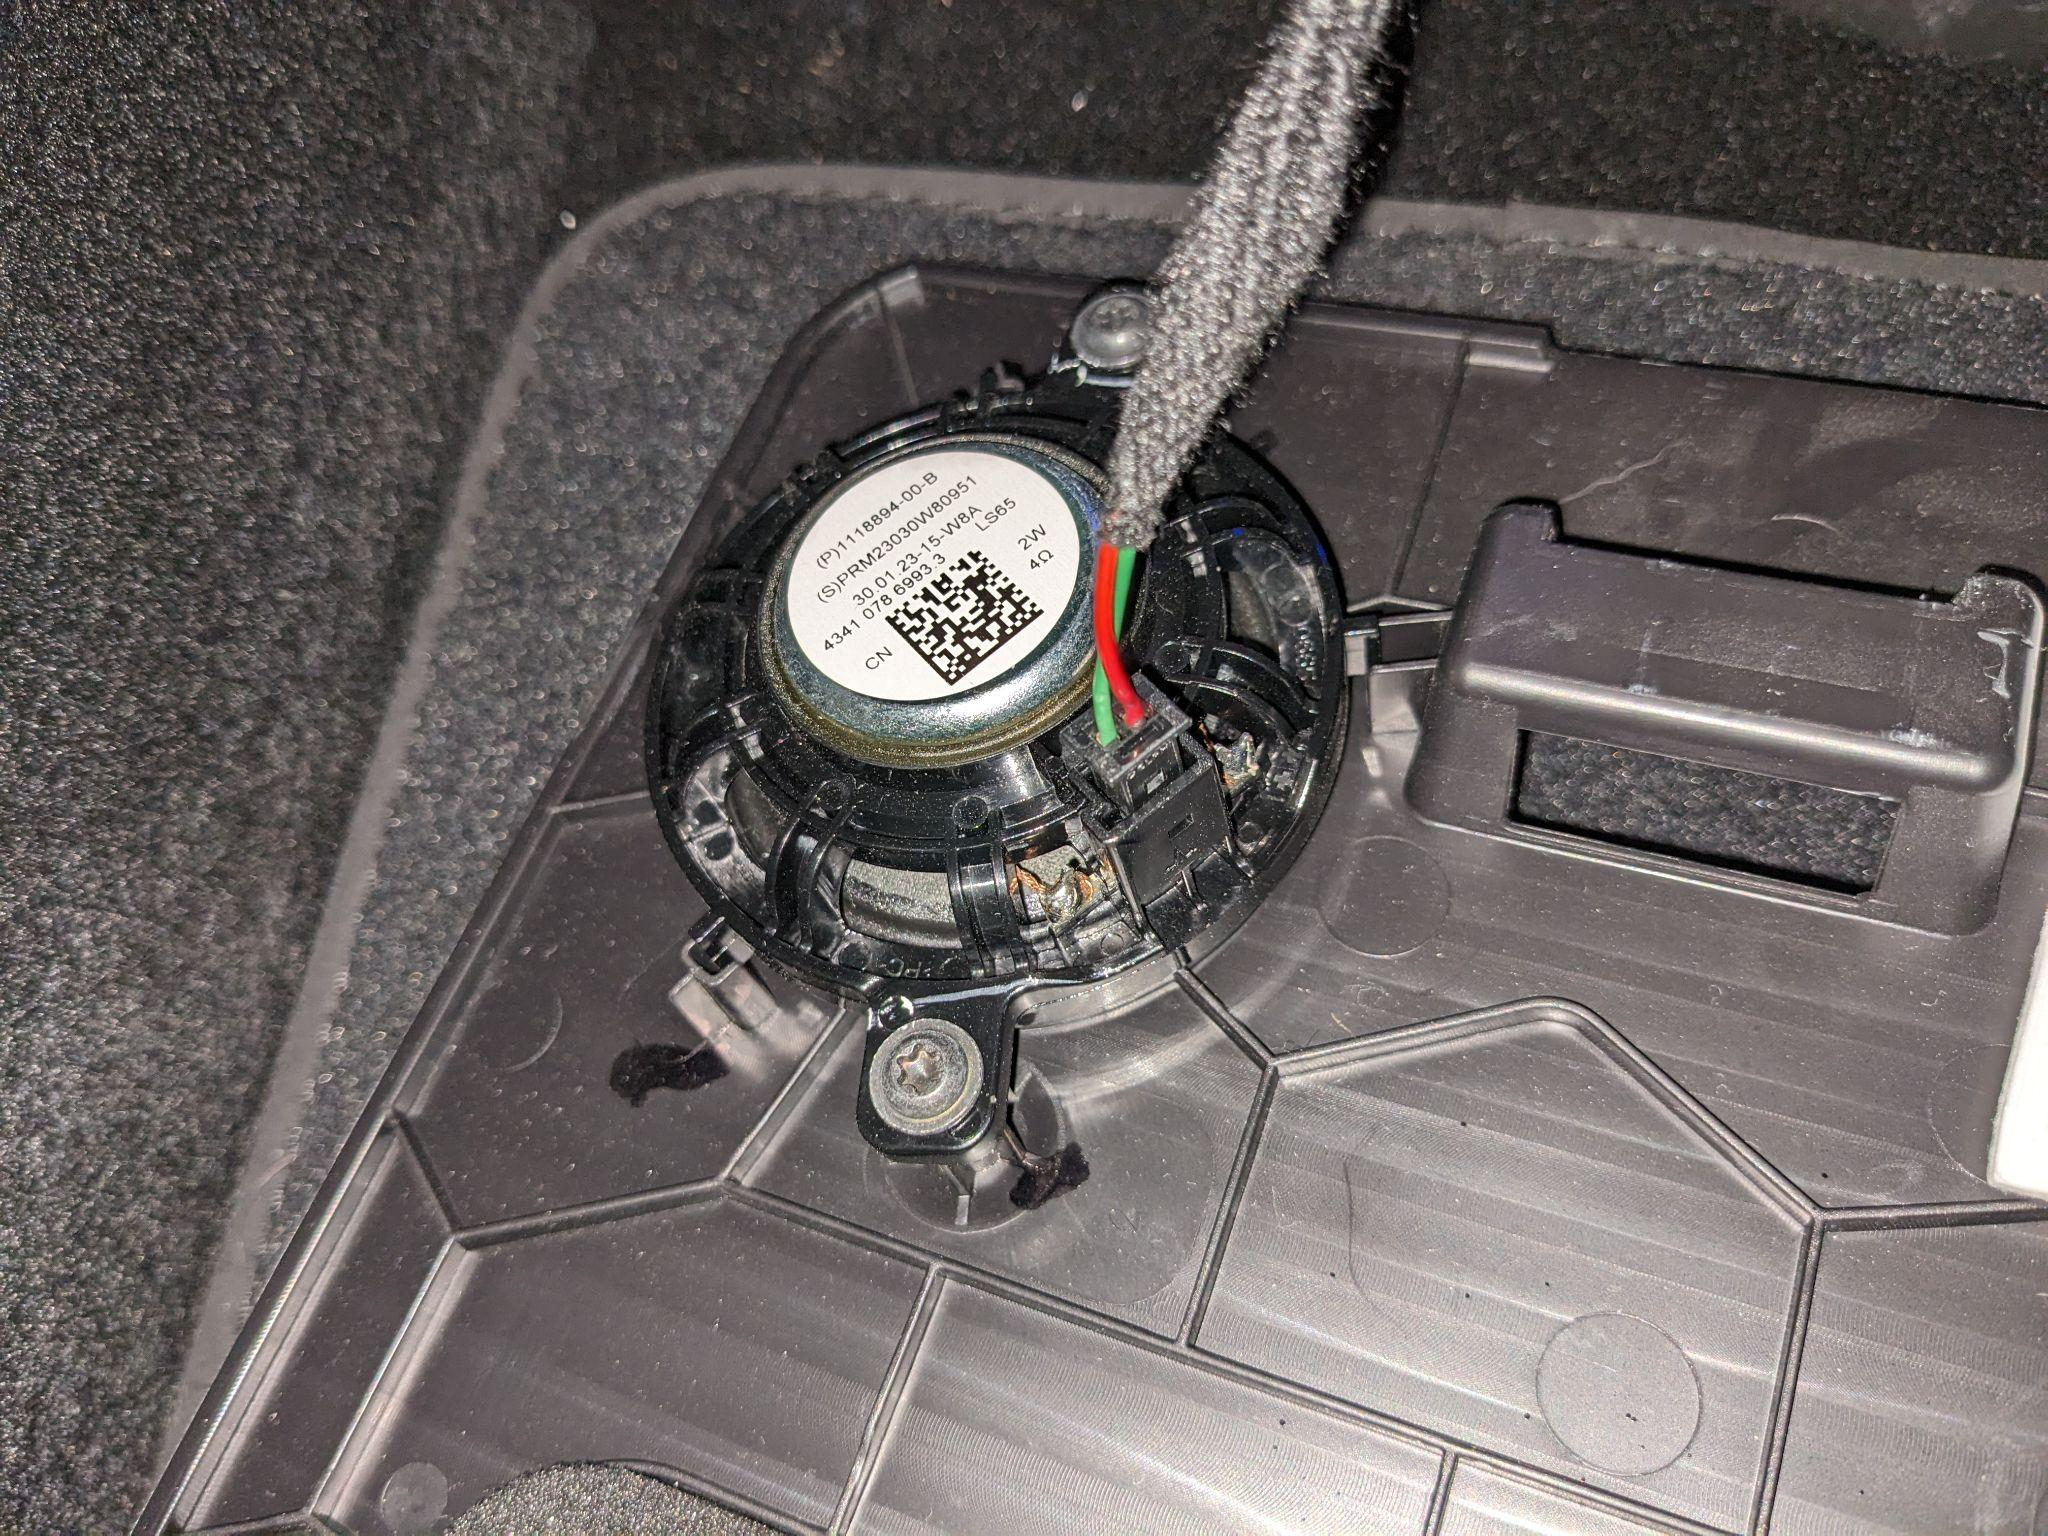
The speaker can be disconnected simply by unplugging the cable.
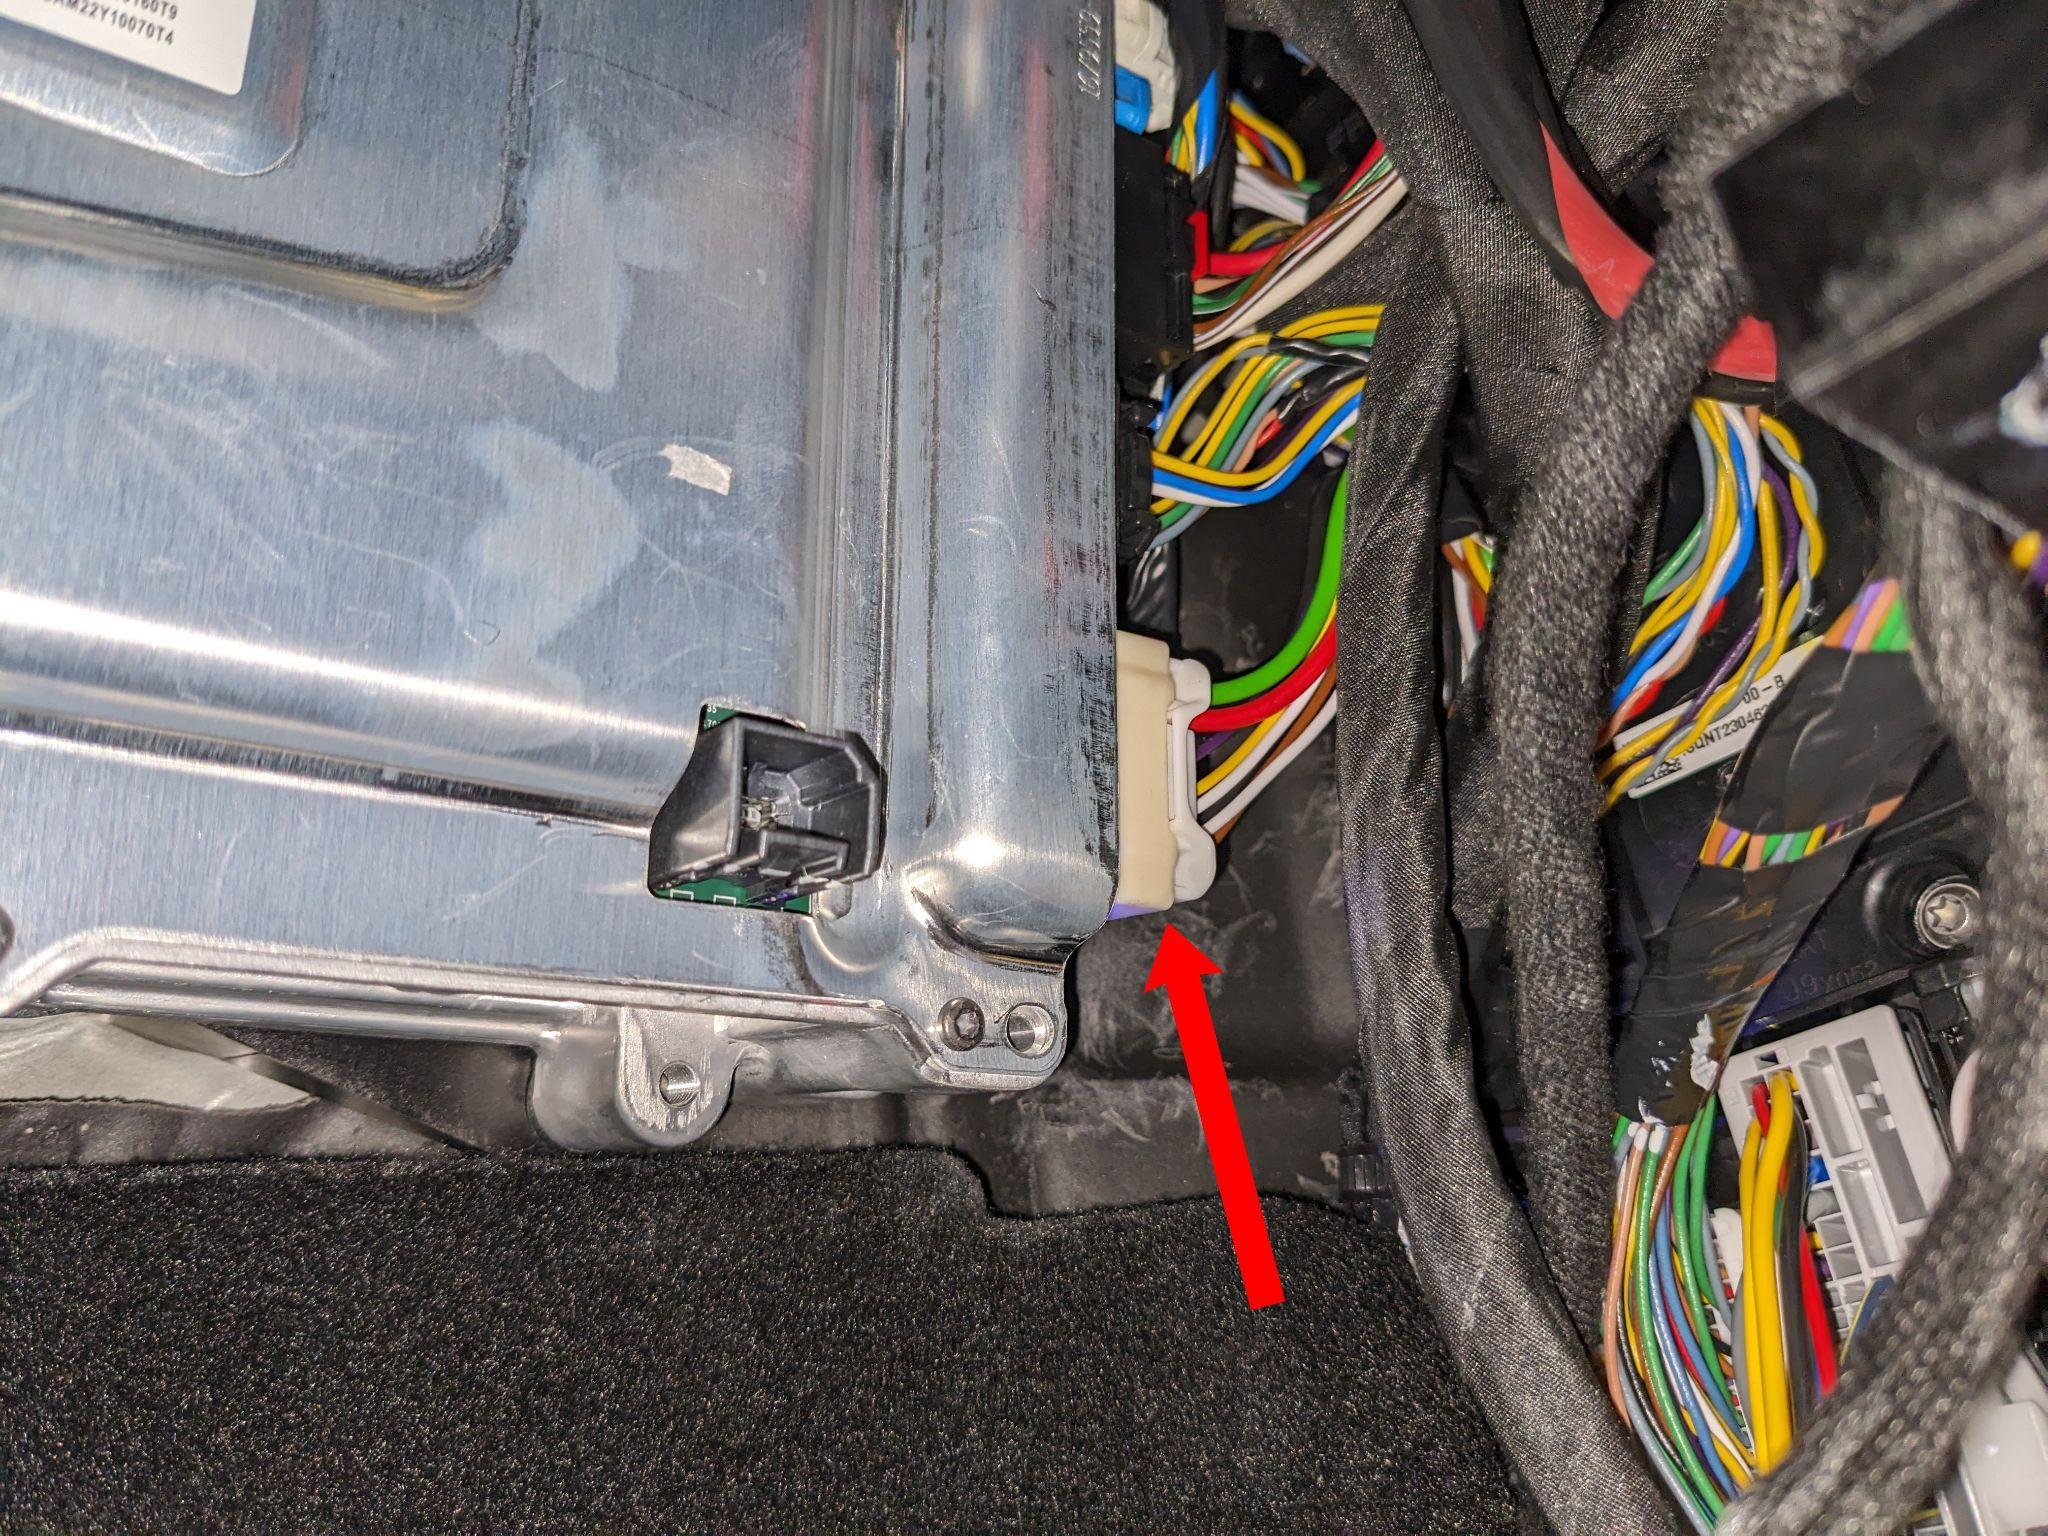
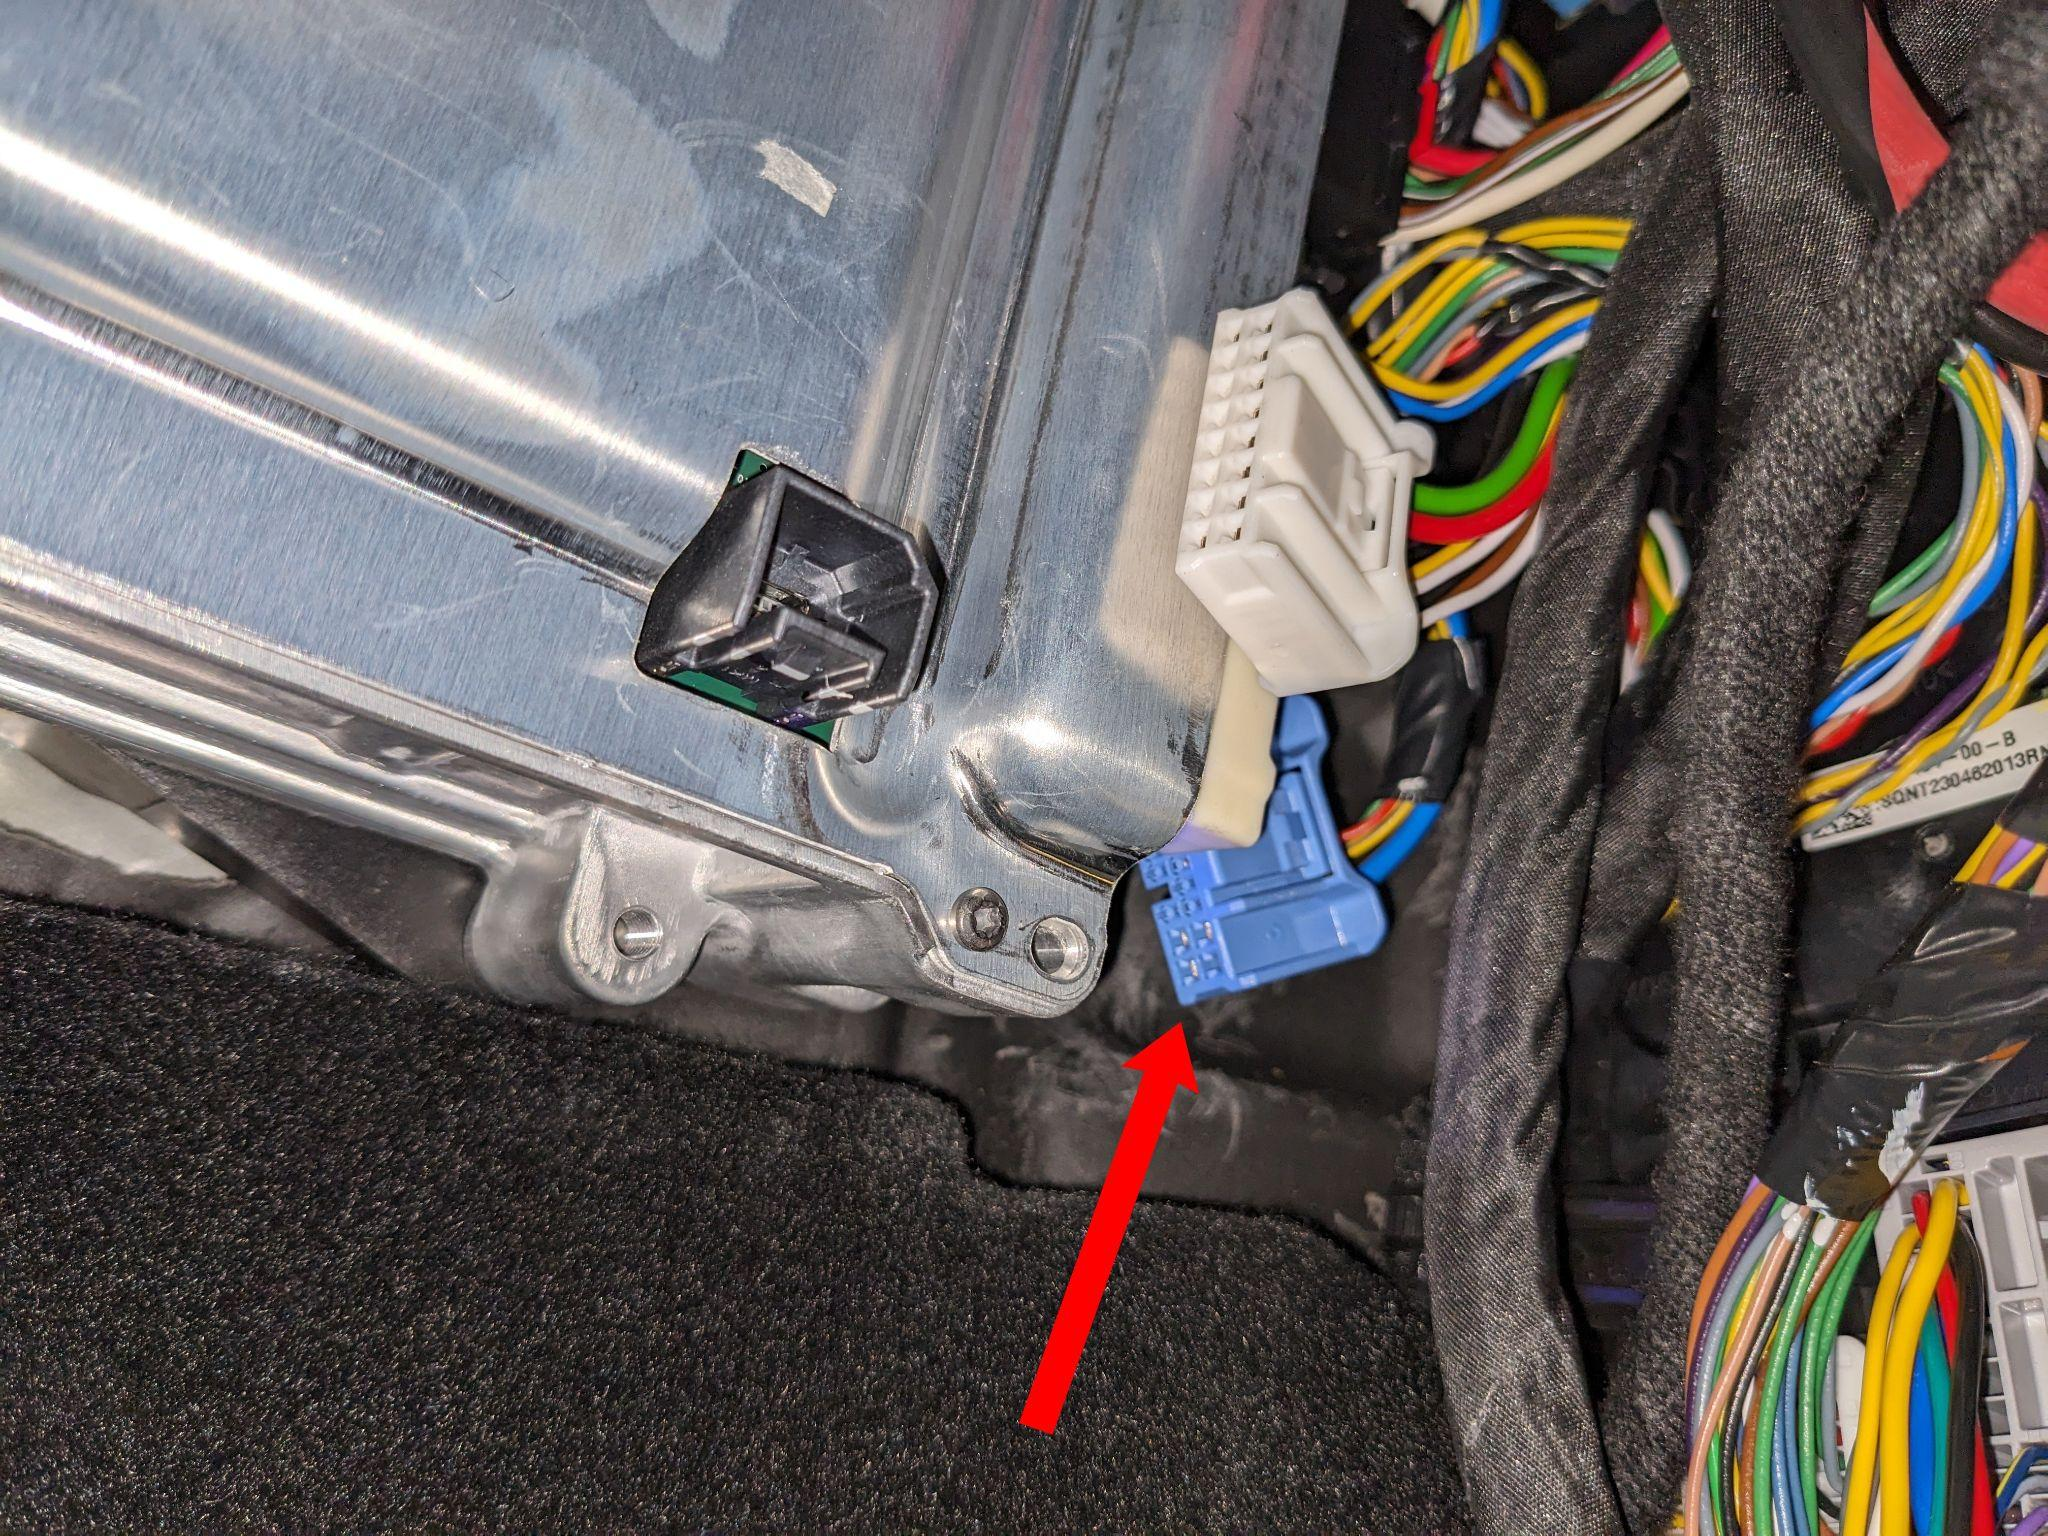
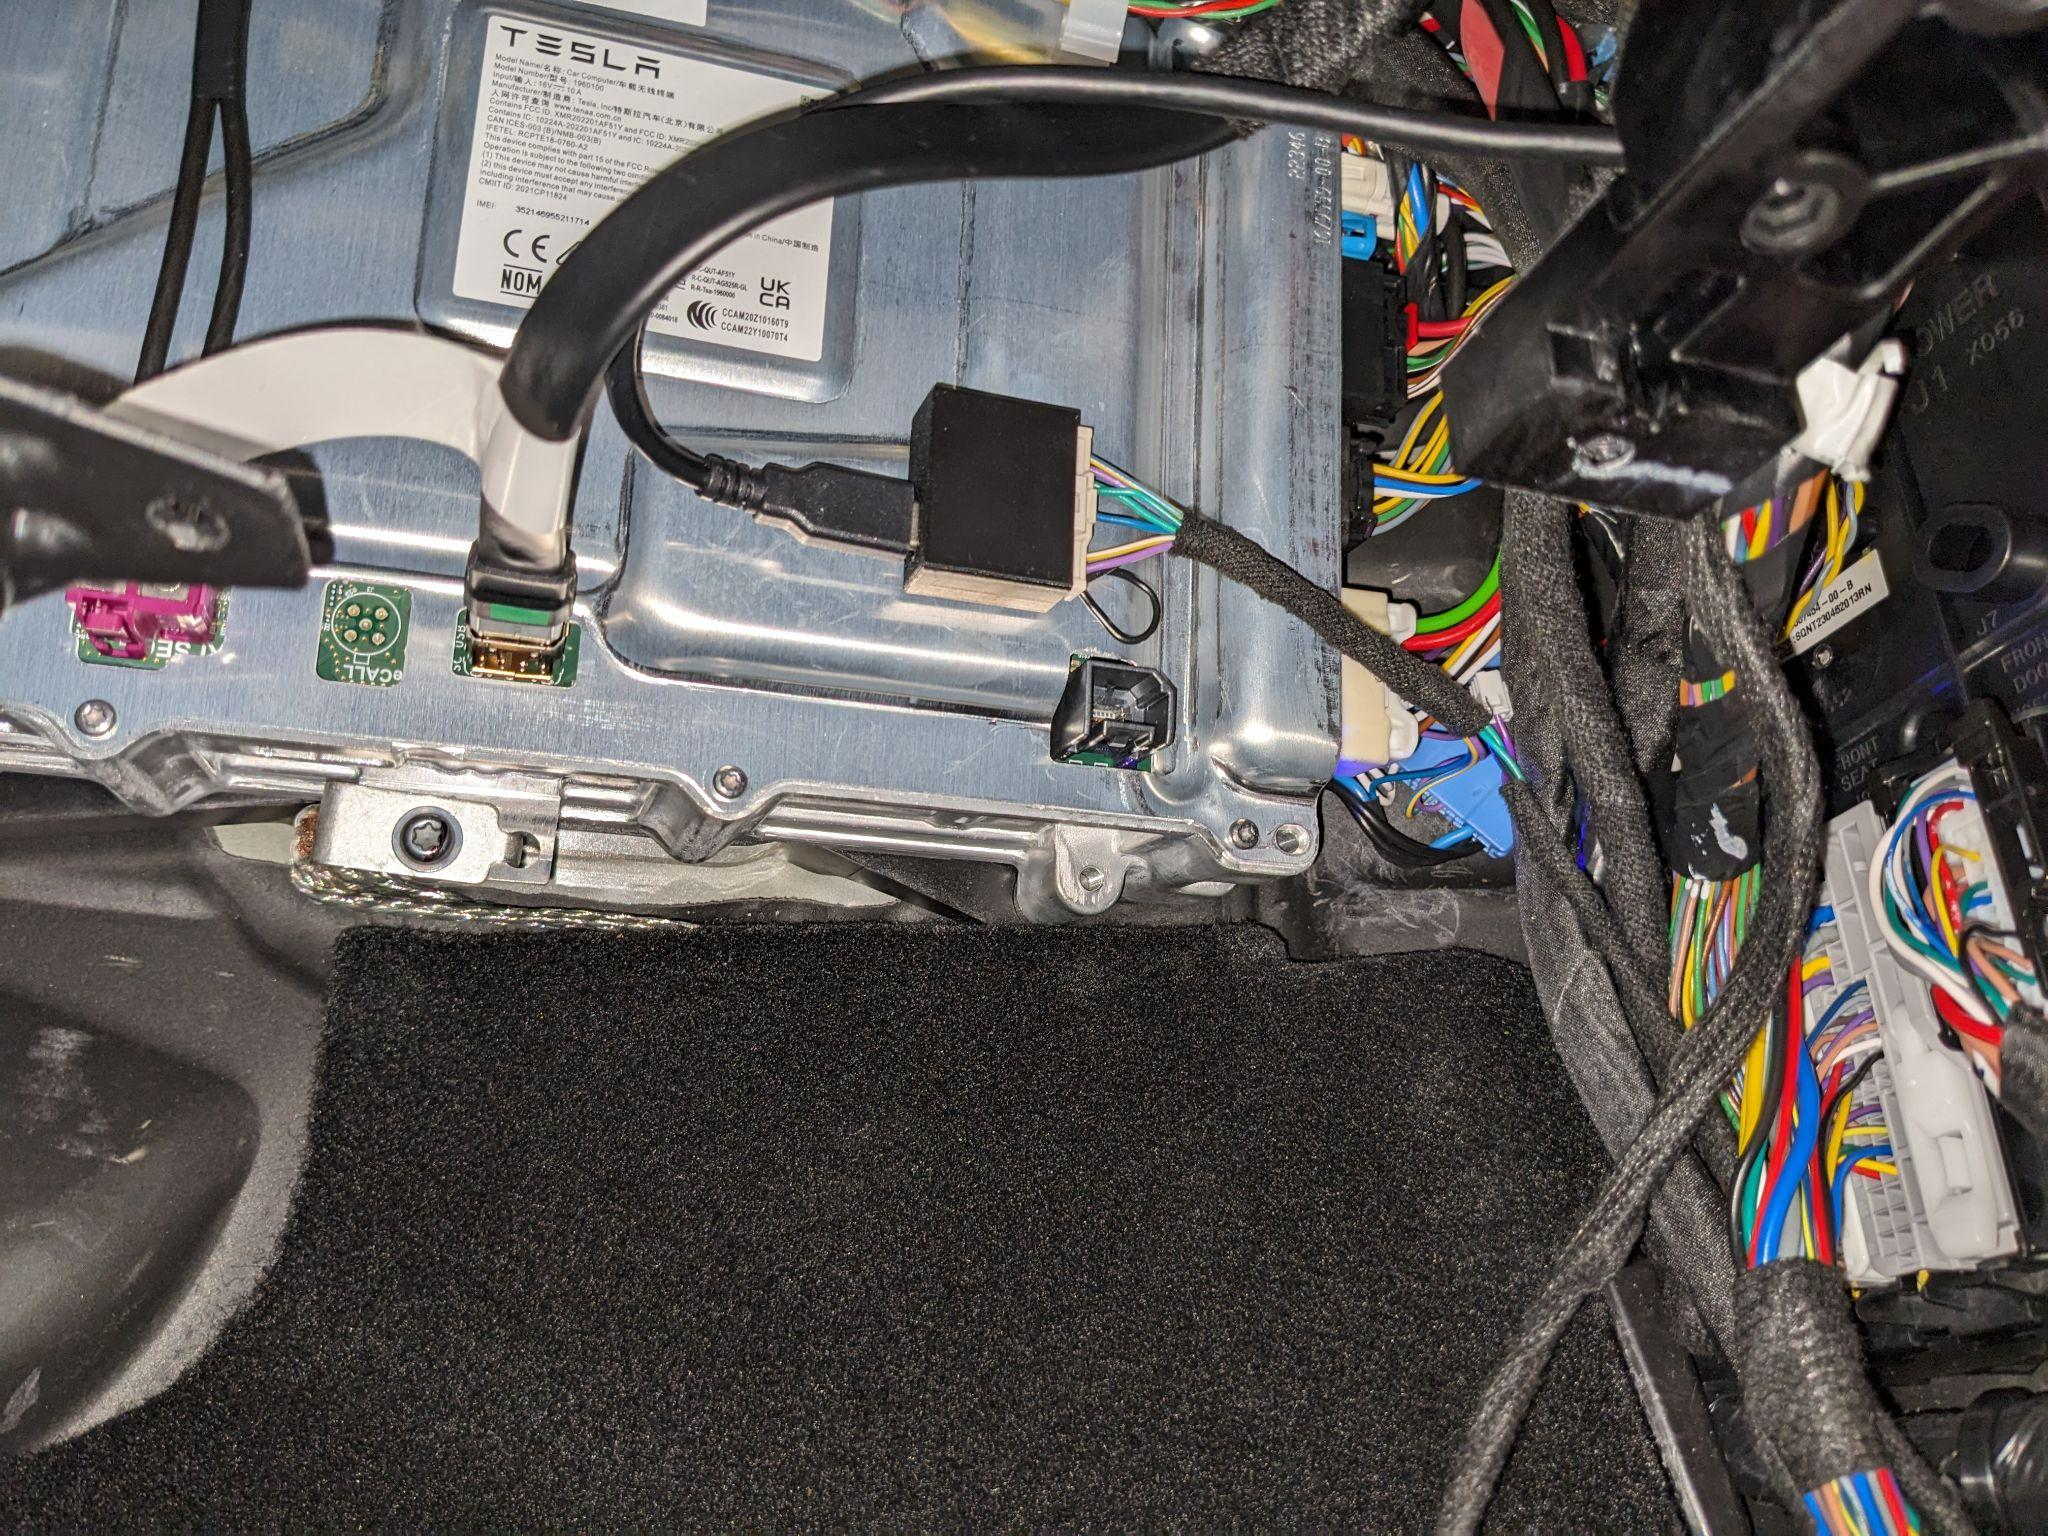
The autopilot computer is now visible. To access the blue connector at the back, first remove the white connector. Press down the tab on both connectors to remove them.
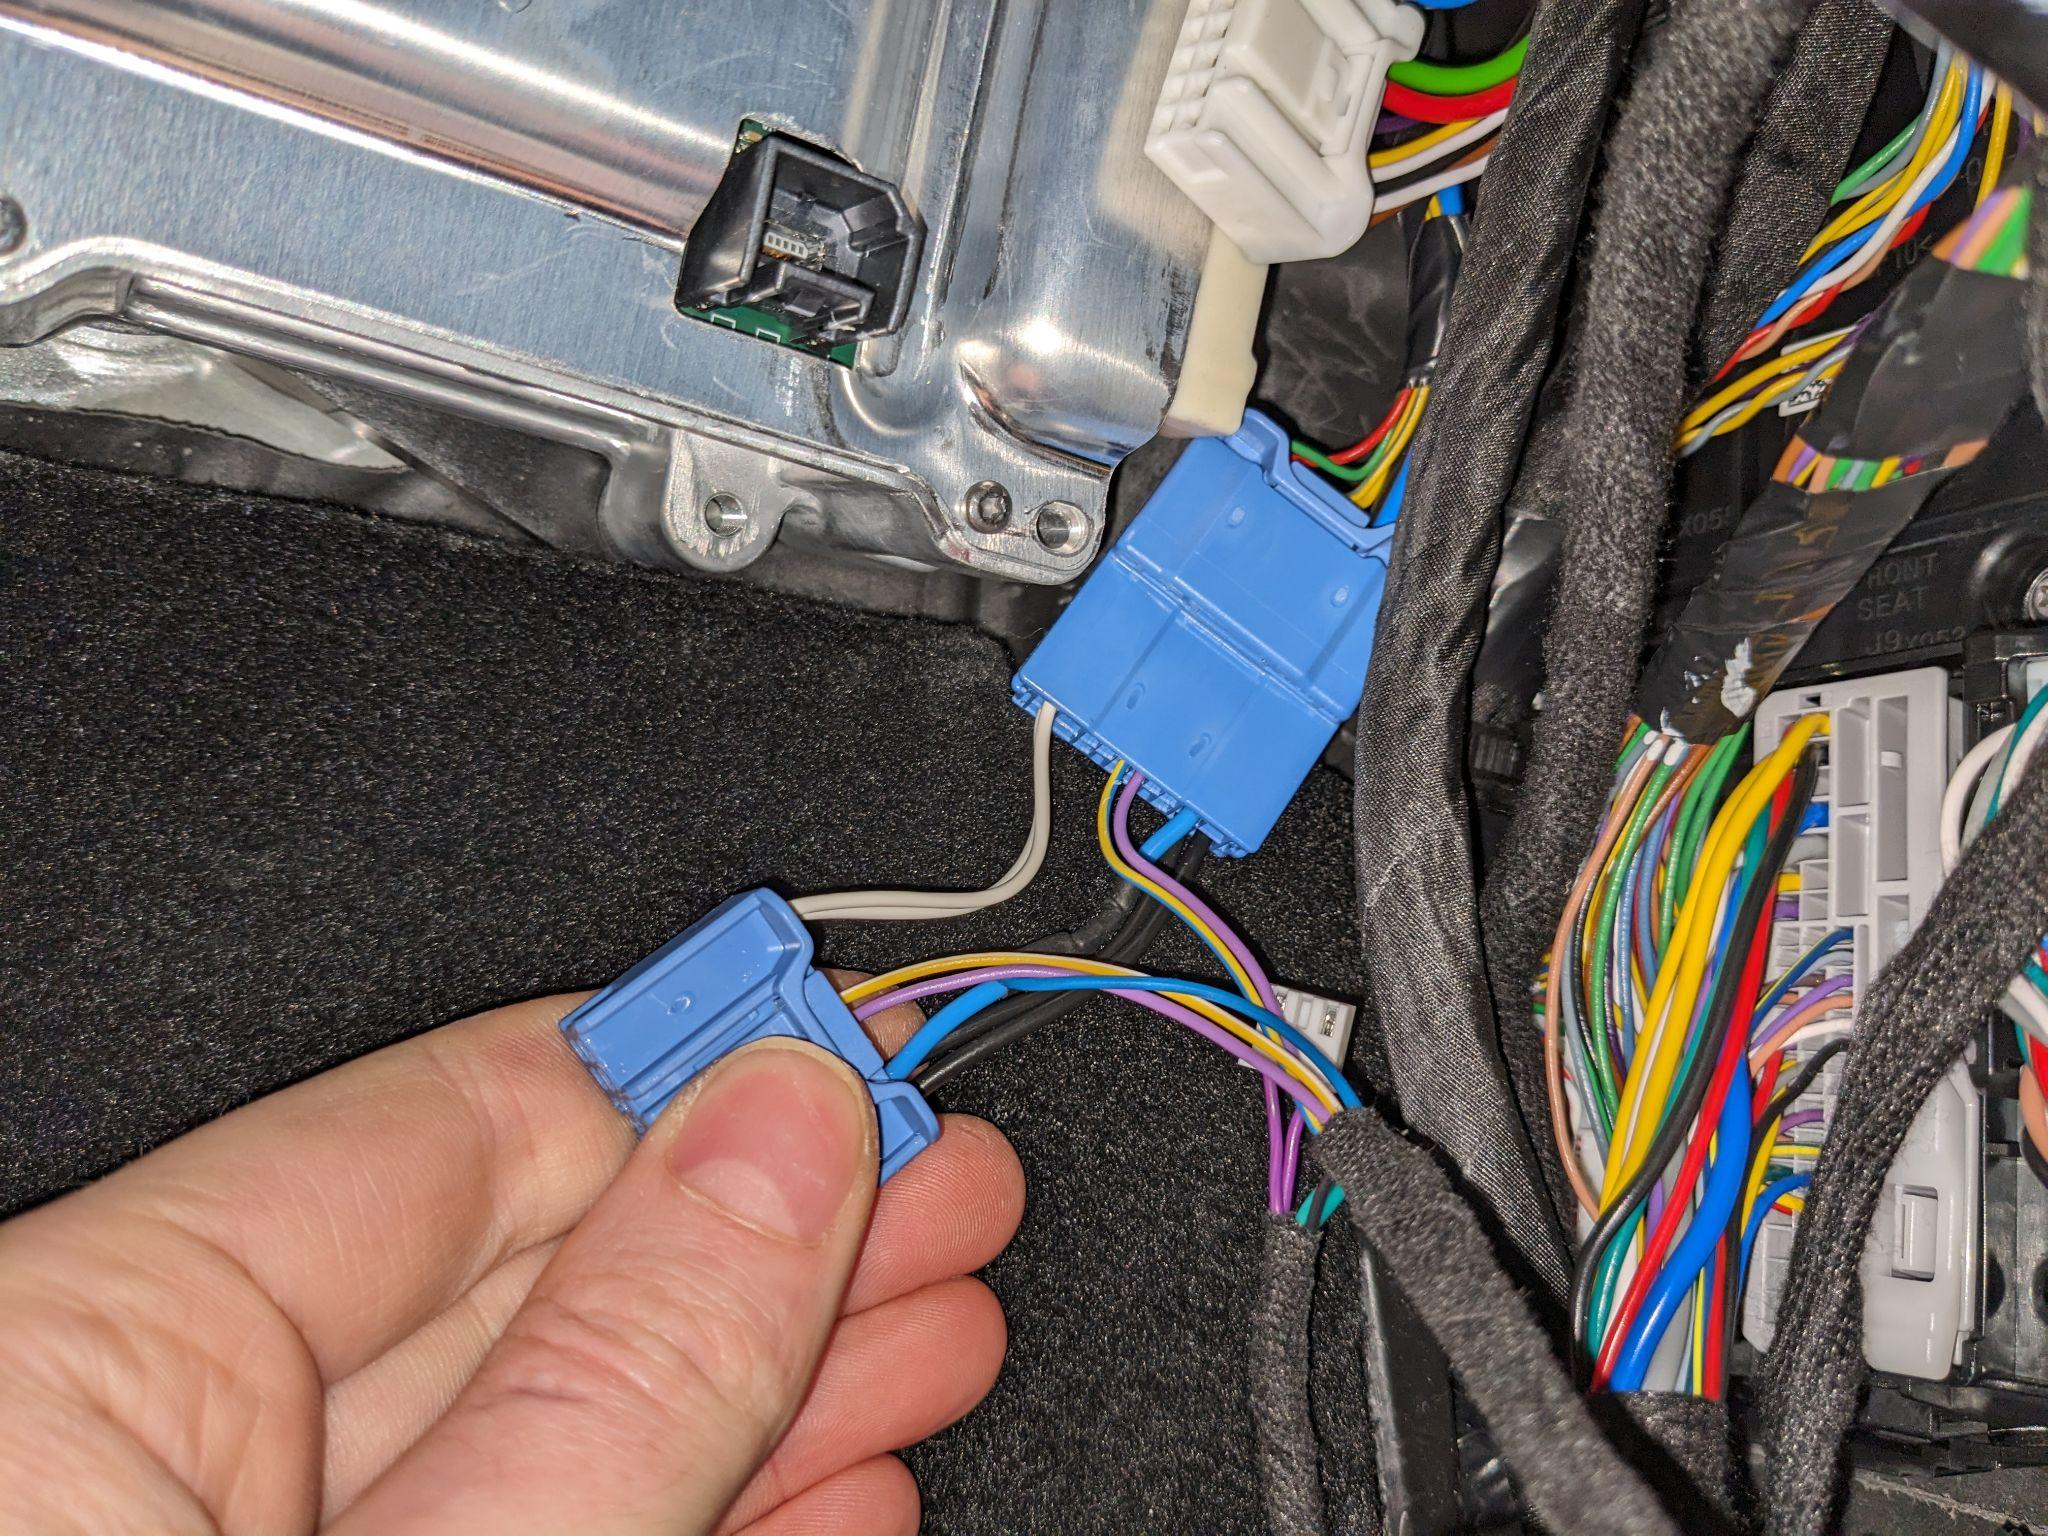
The harness should now be inserted into the blue connector.
Now plug the blue, then the white connector back into the autopilot computer.
The harness box can be connected with the OBD-C cable.
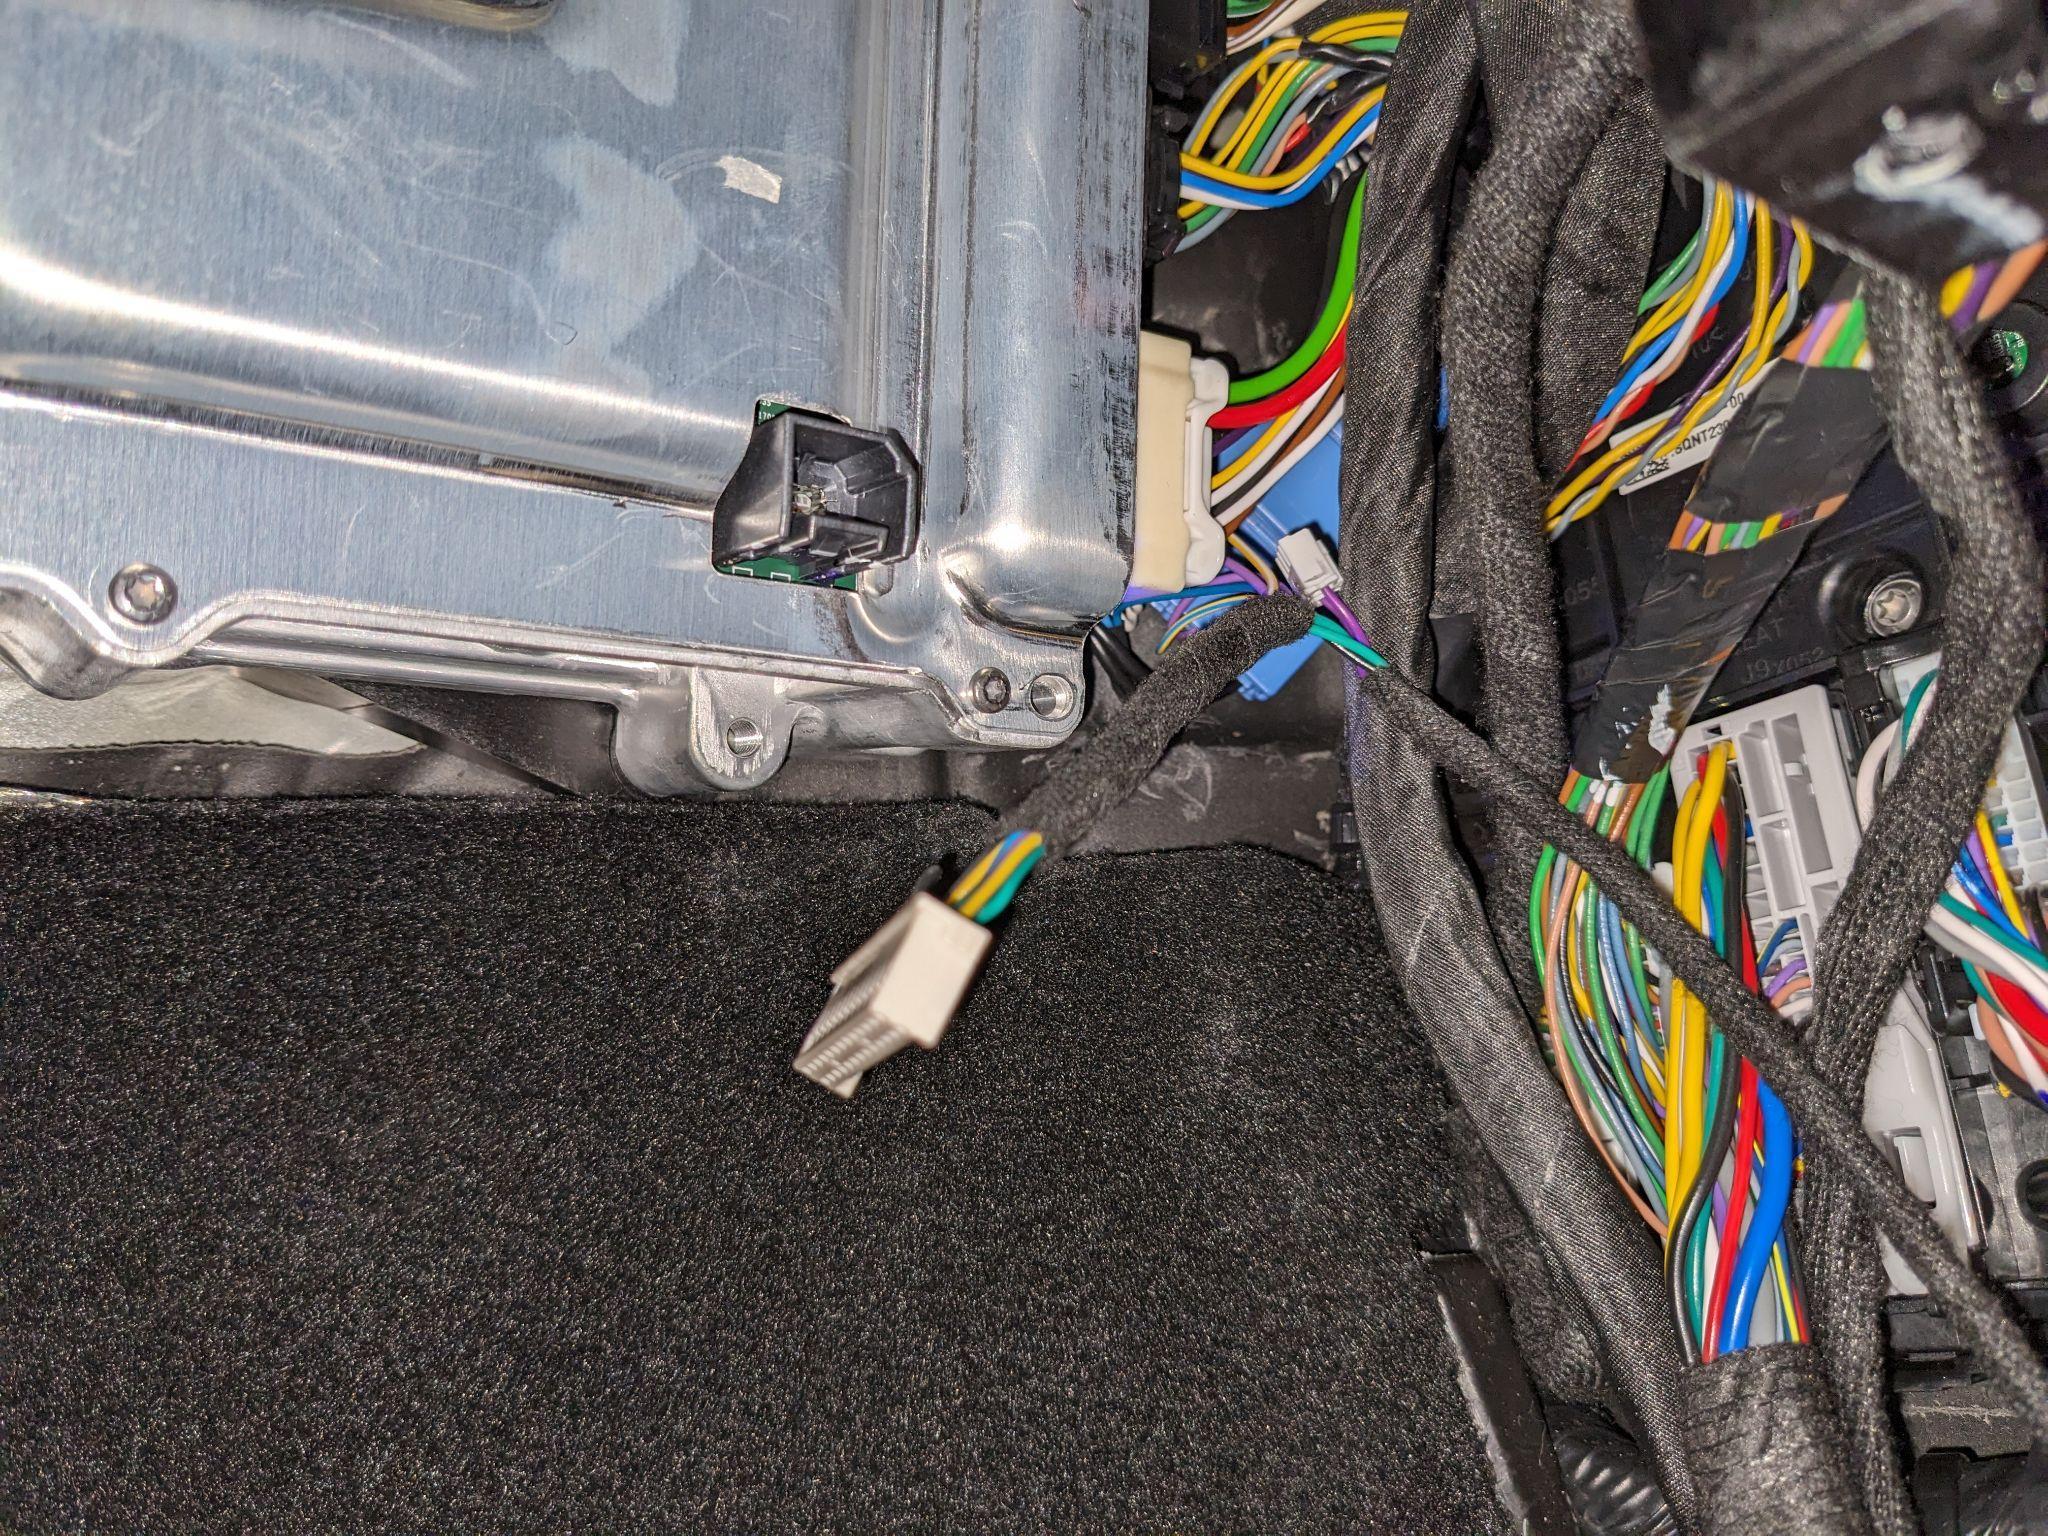
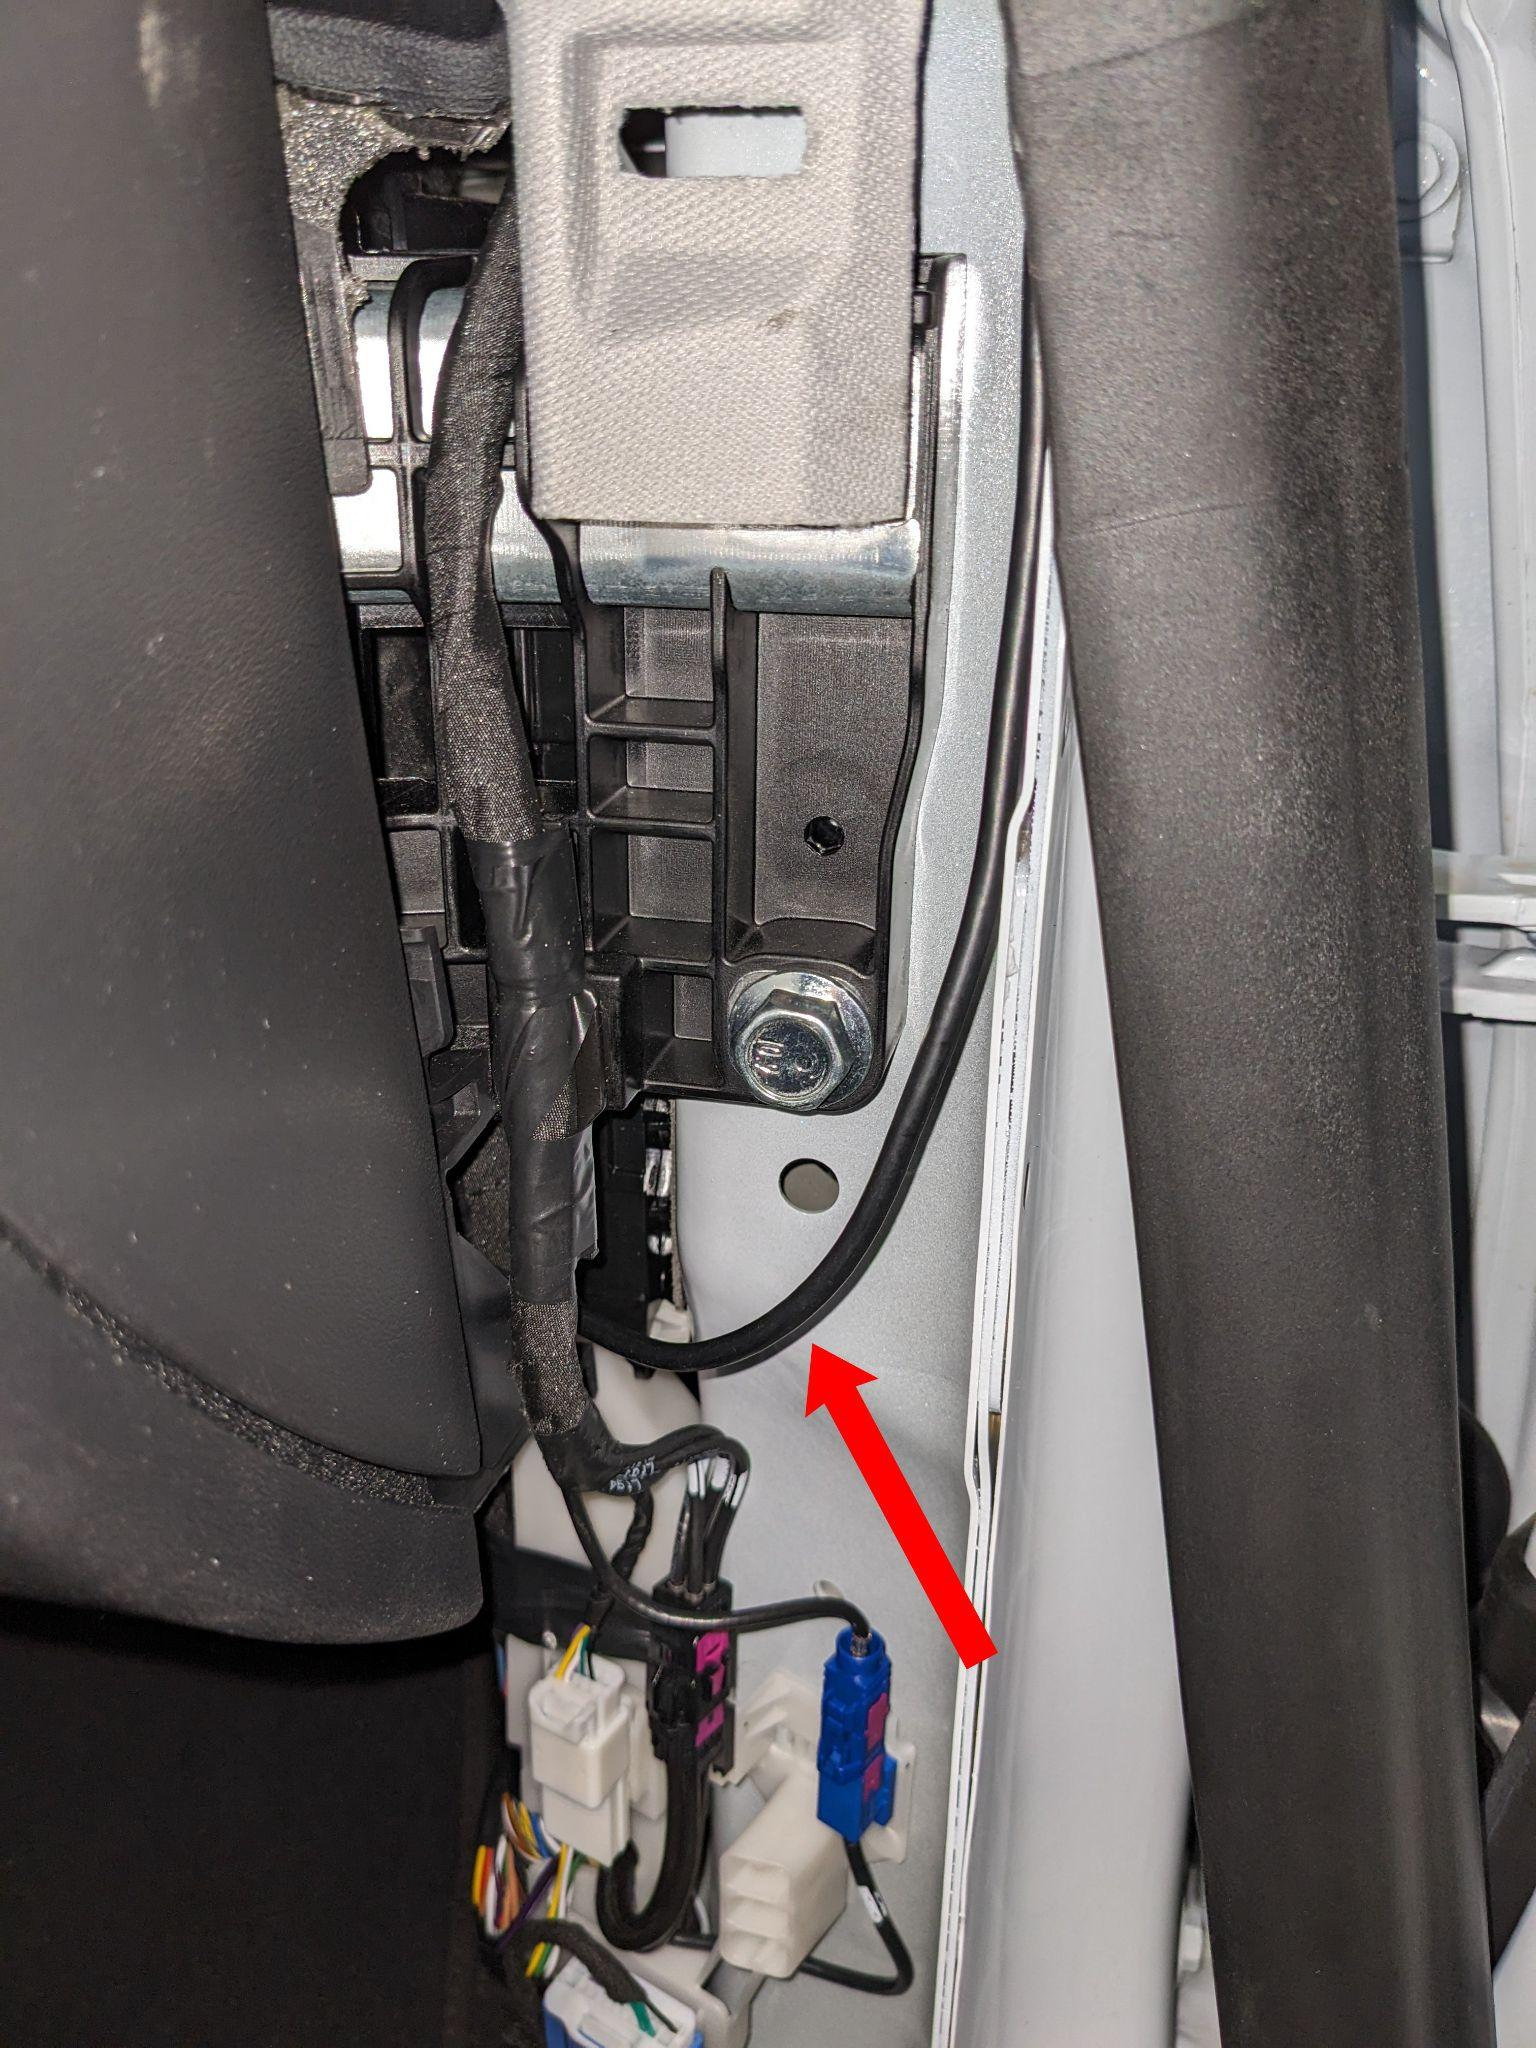
The OBD-C cable can be routed upward, behind the weatherstripping.
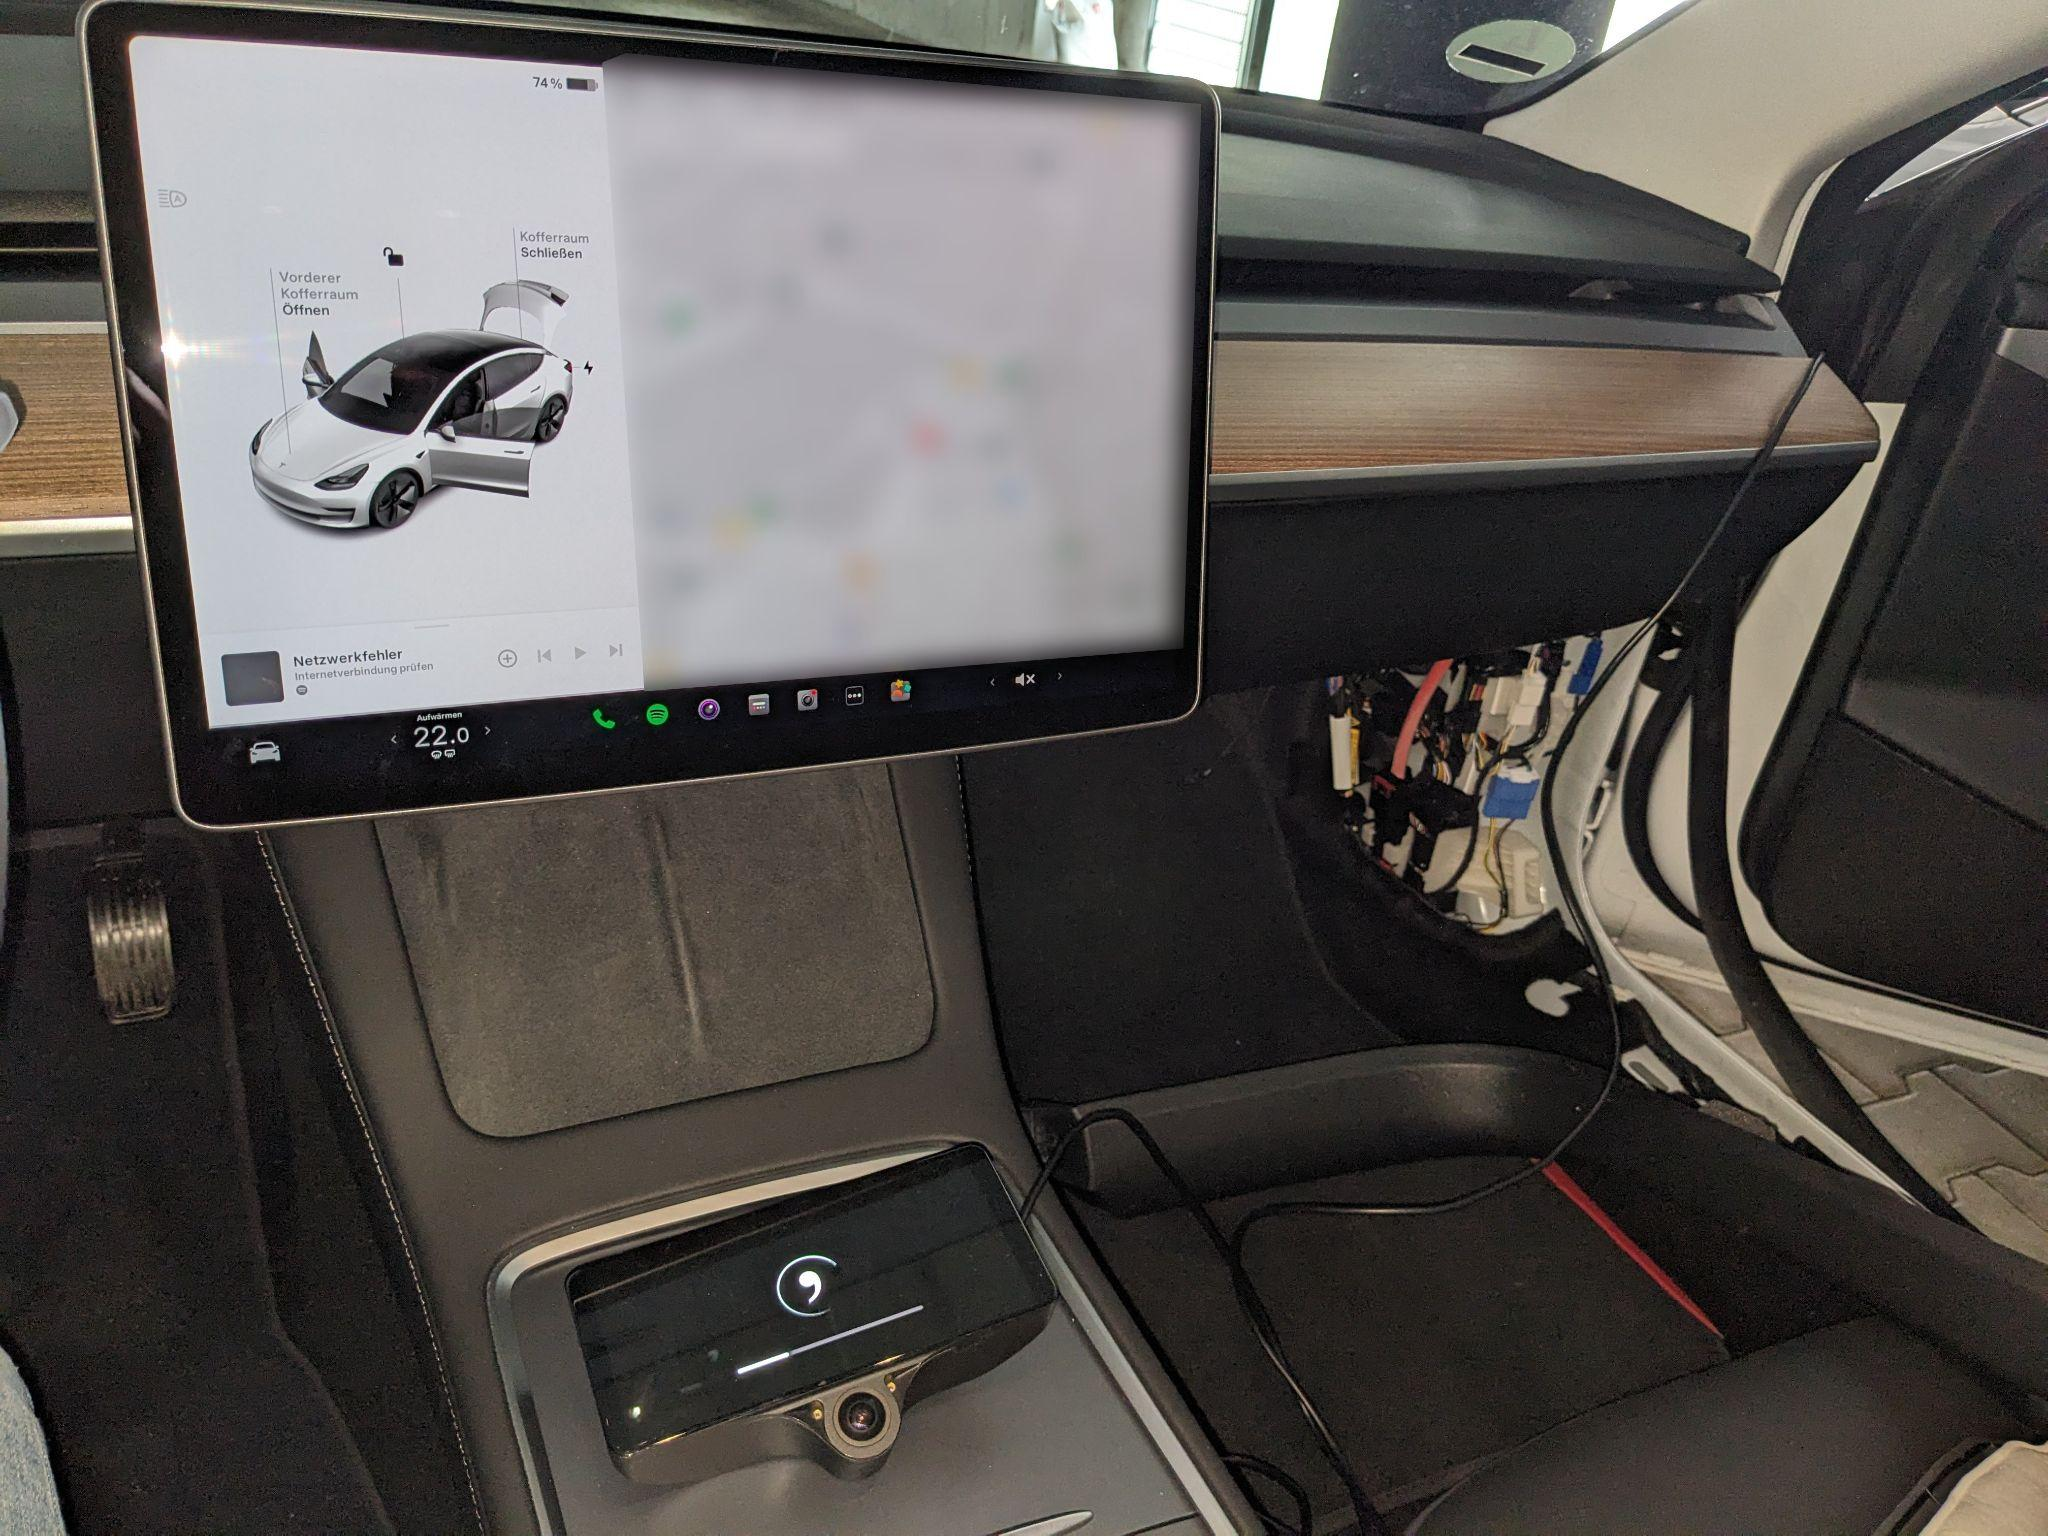
Before reassembly, make sure the device starts up and the car shows no errors. Reassembly is done in reverse order.
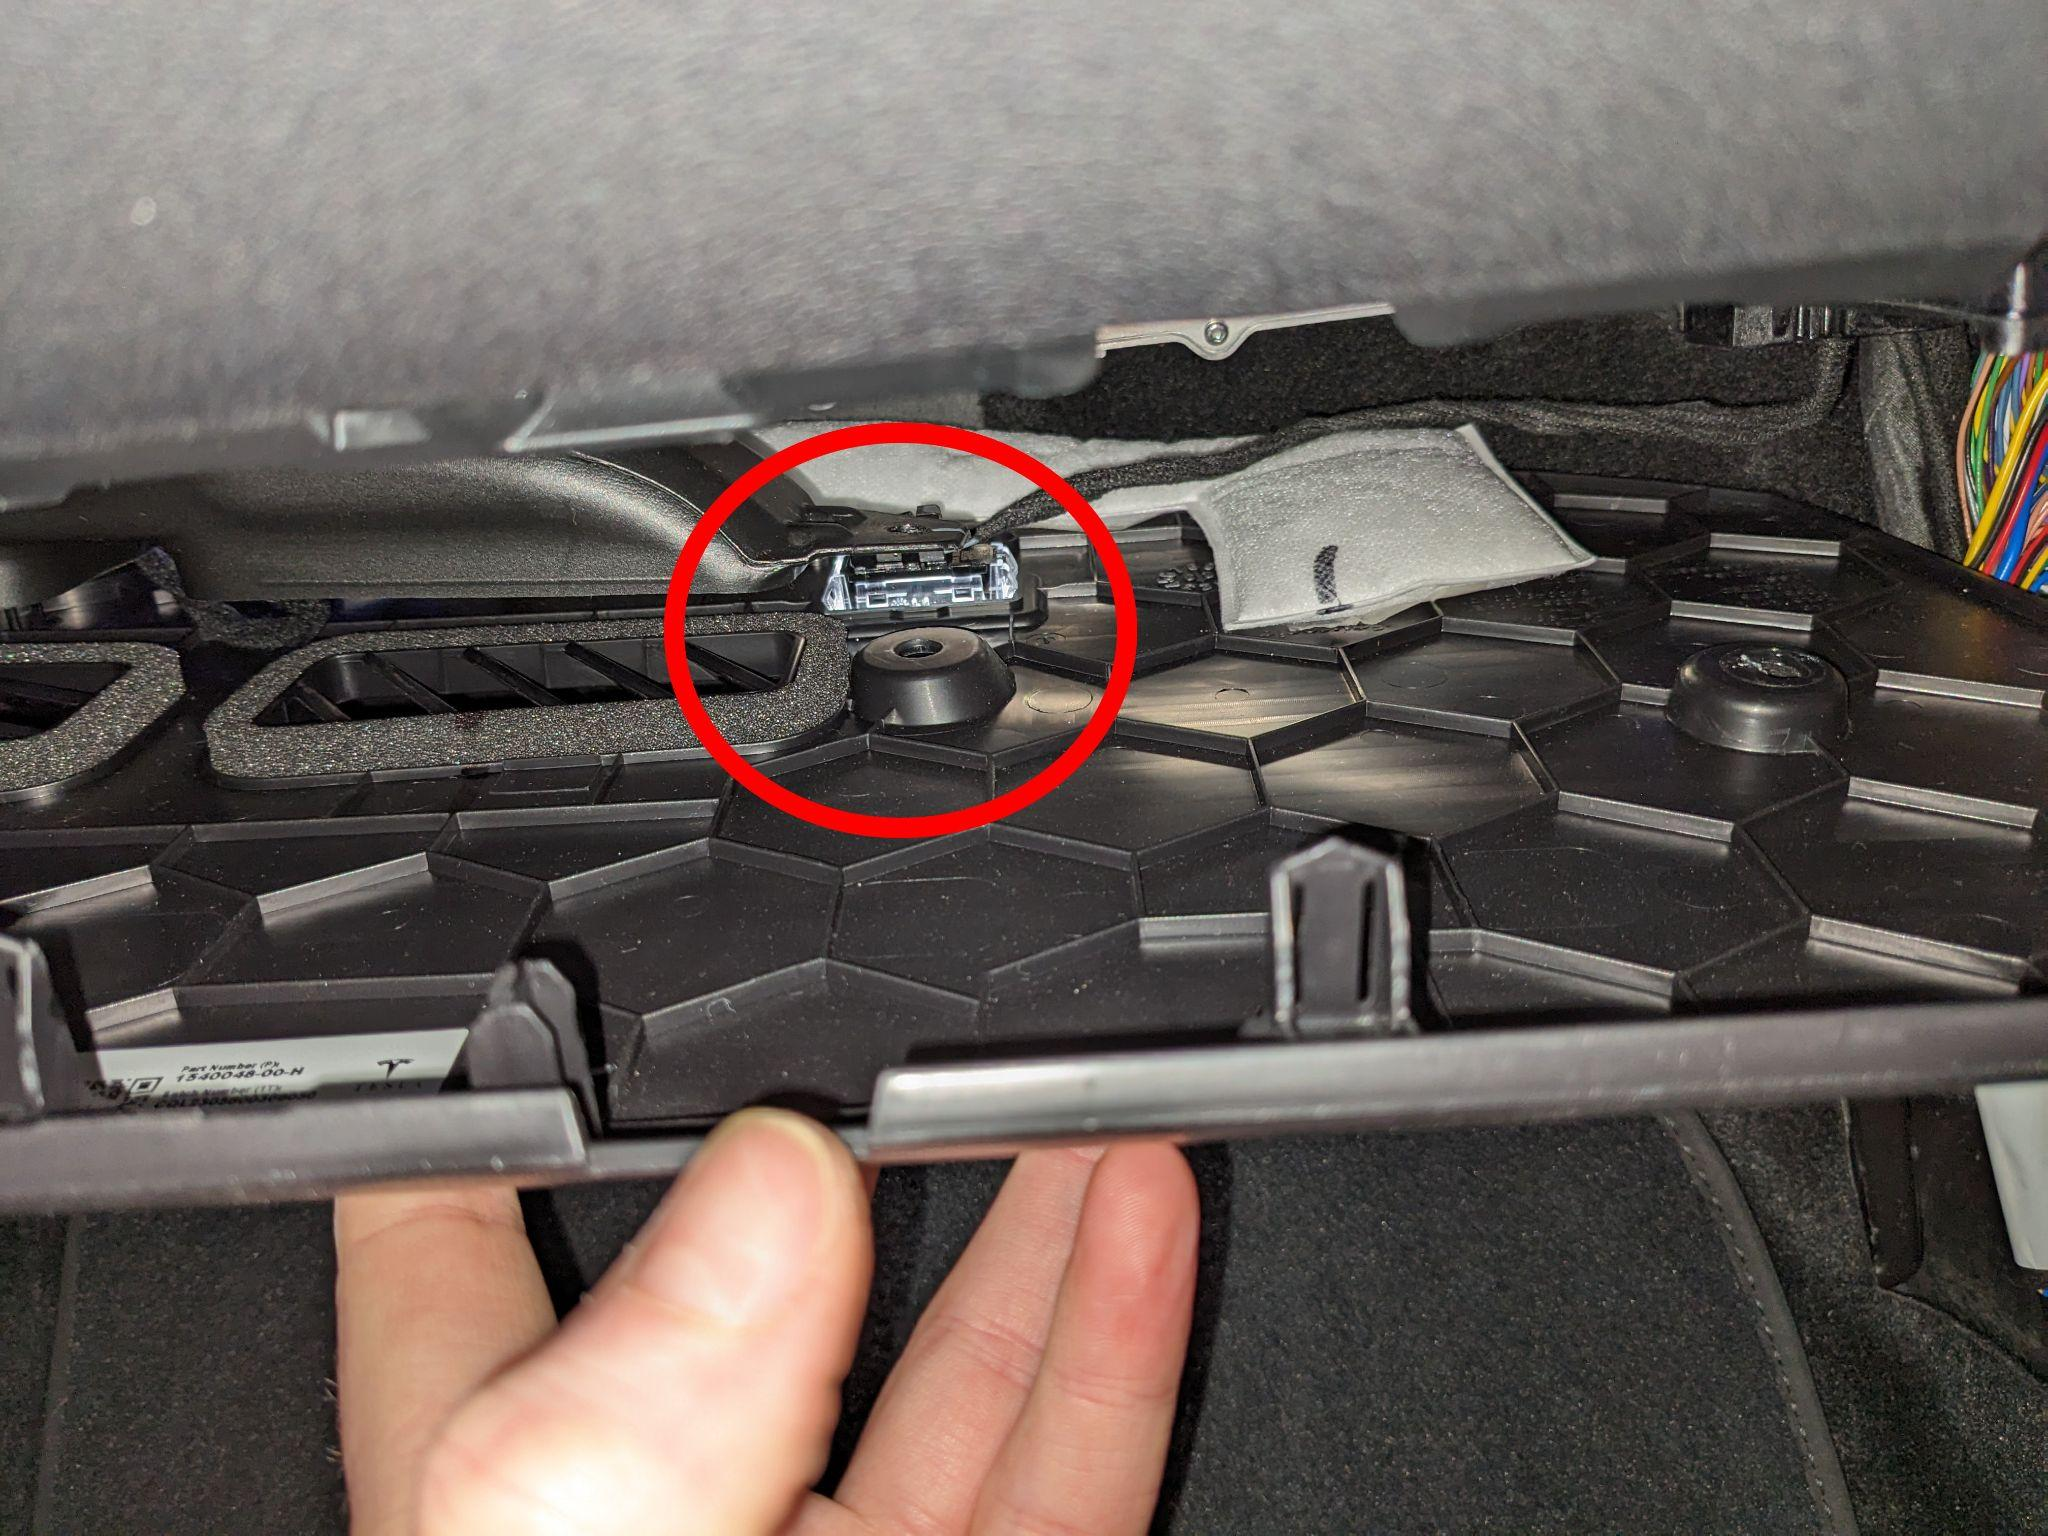
Tip: When reinstalling the footwell panel, insert the panel clip first before the panel fully snaps in, otherwise it will be very difficult to align with the vent hole.
2. Device mounting
Mounting the comma four on the windshield
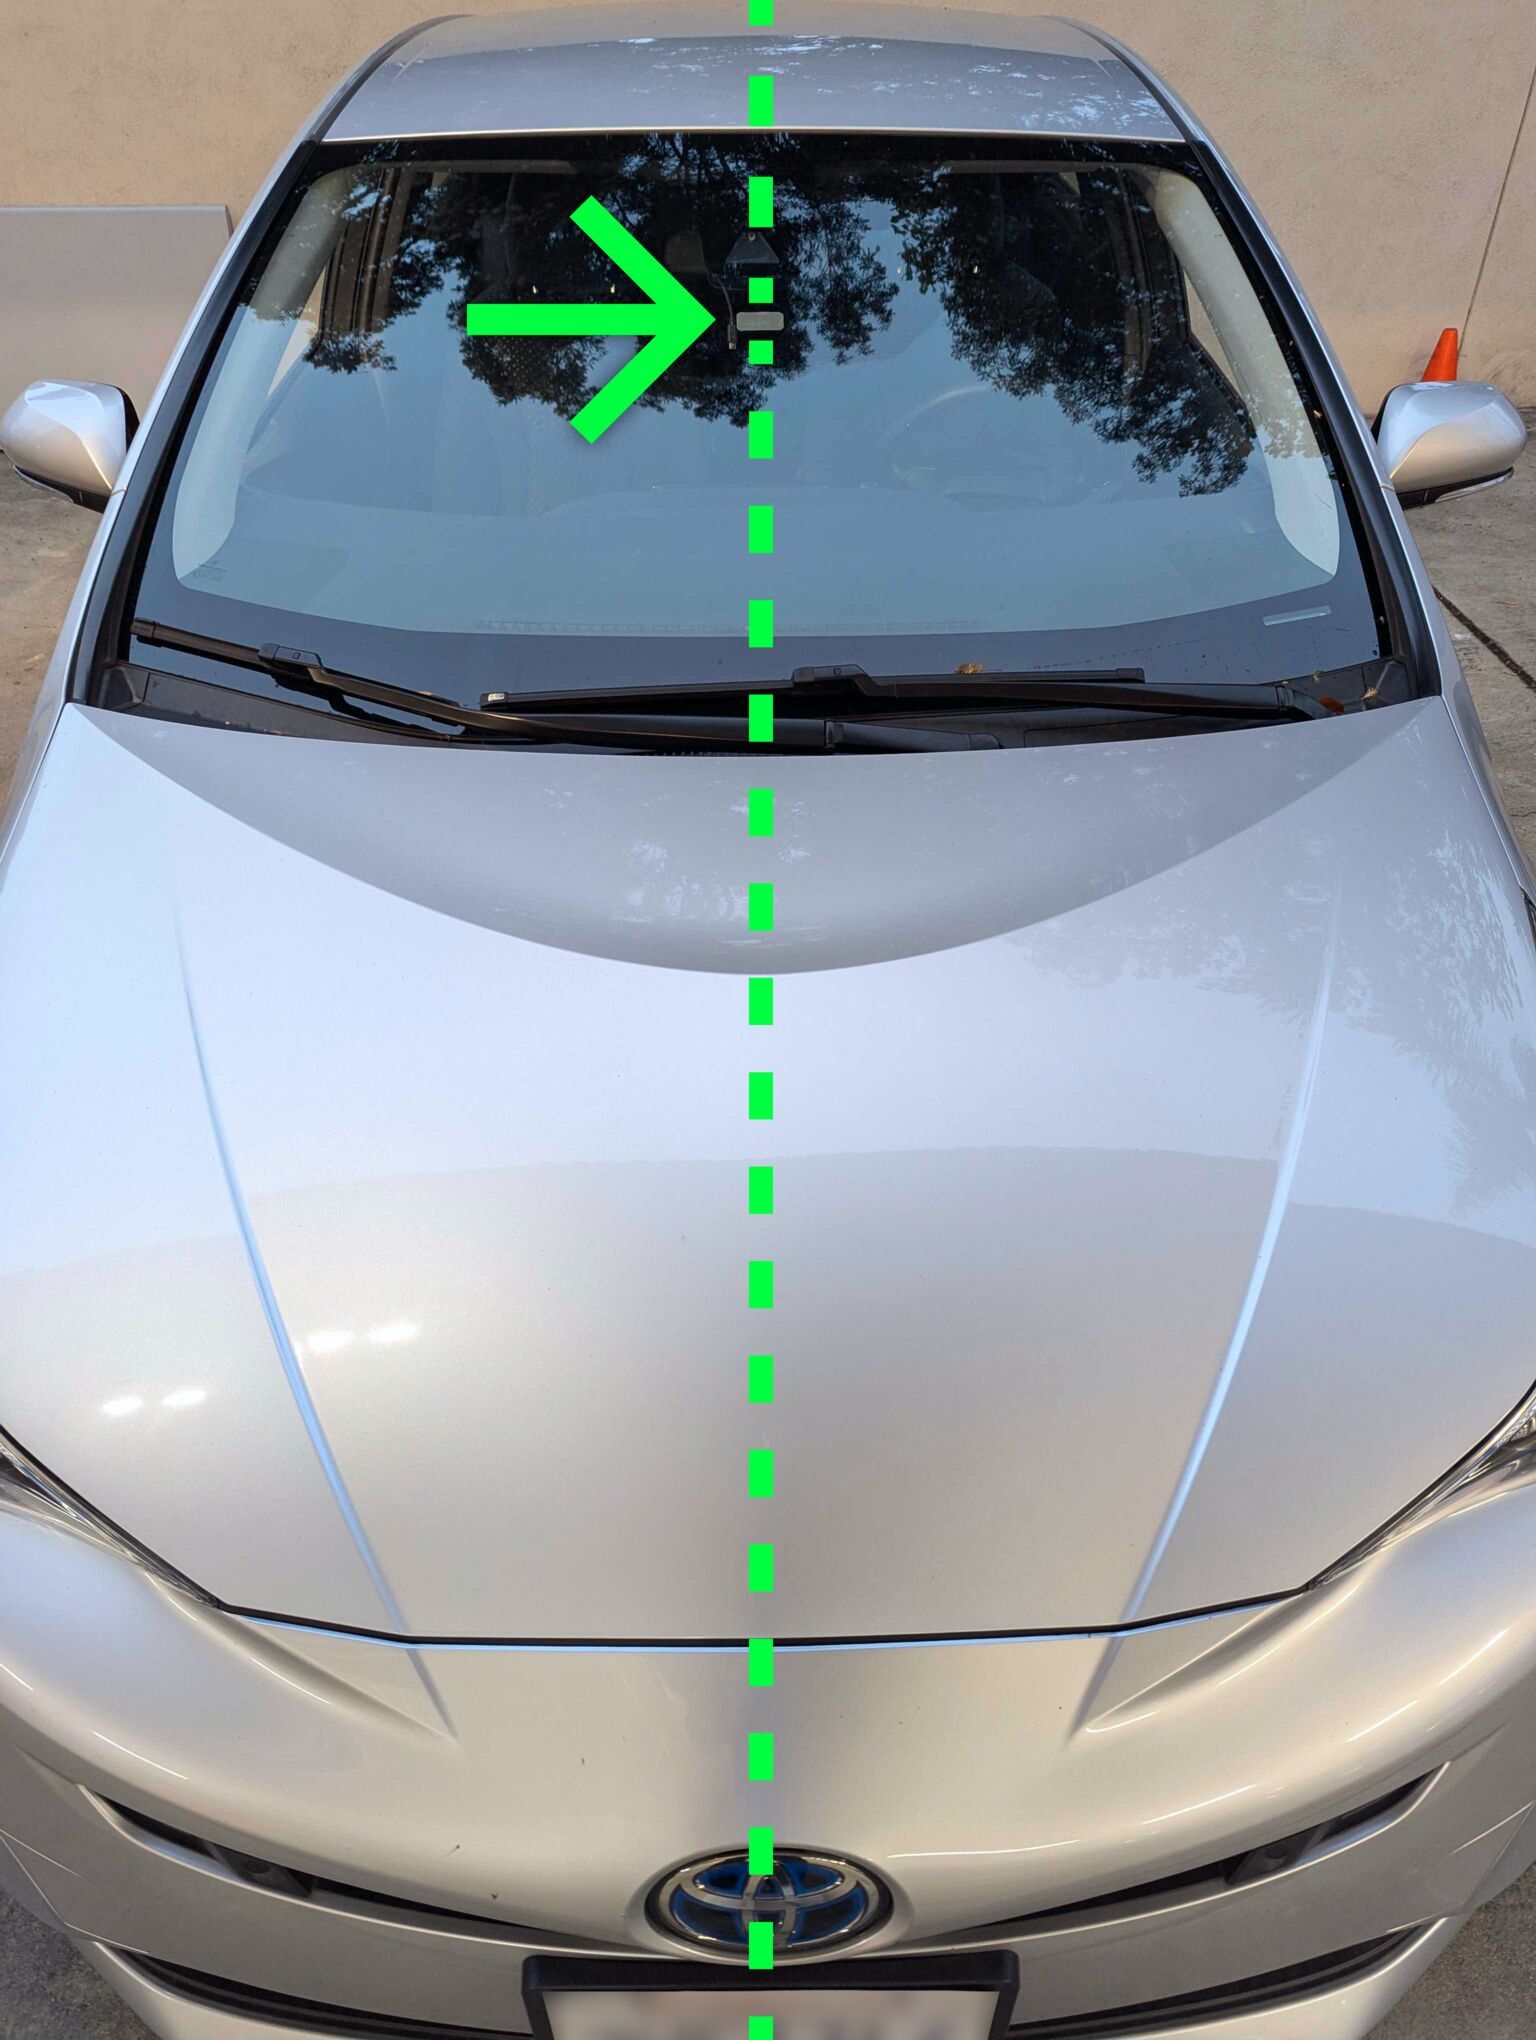
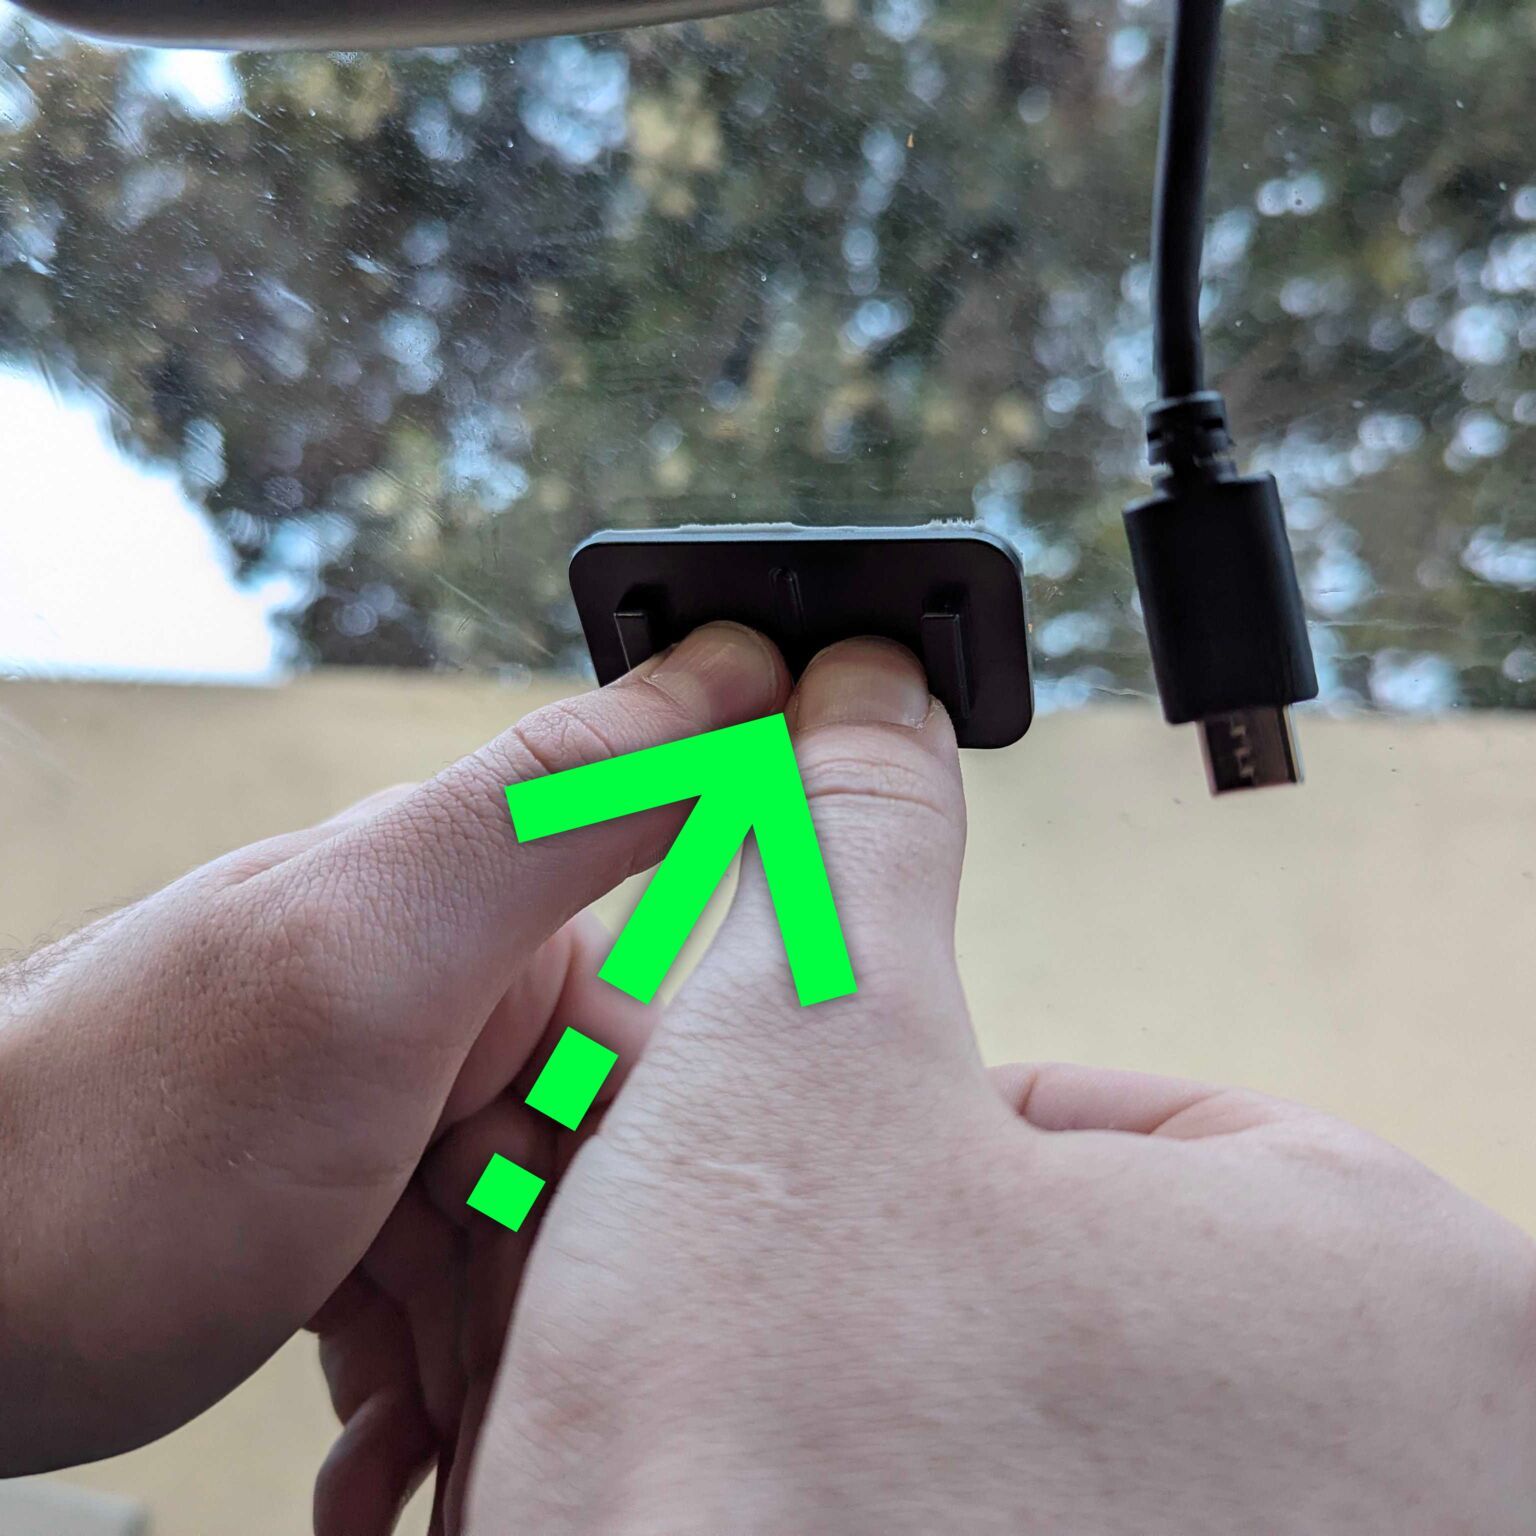
Mounting the bracket on the windshield
Clean the surface with an alcohol wipe. Place the mount centered and high on the windshield — it's important that it's horizontally centered, otherwise the device won't properly detect the lane. Press the 3M adhesive firmly, working from center to edges, avoiding air bubbles.
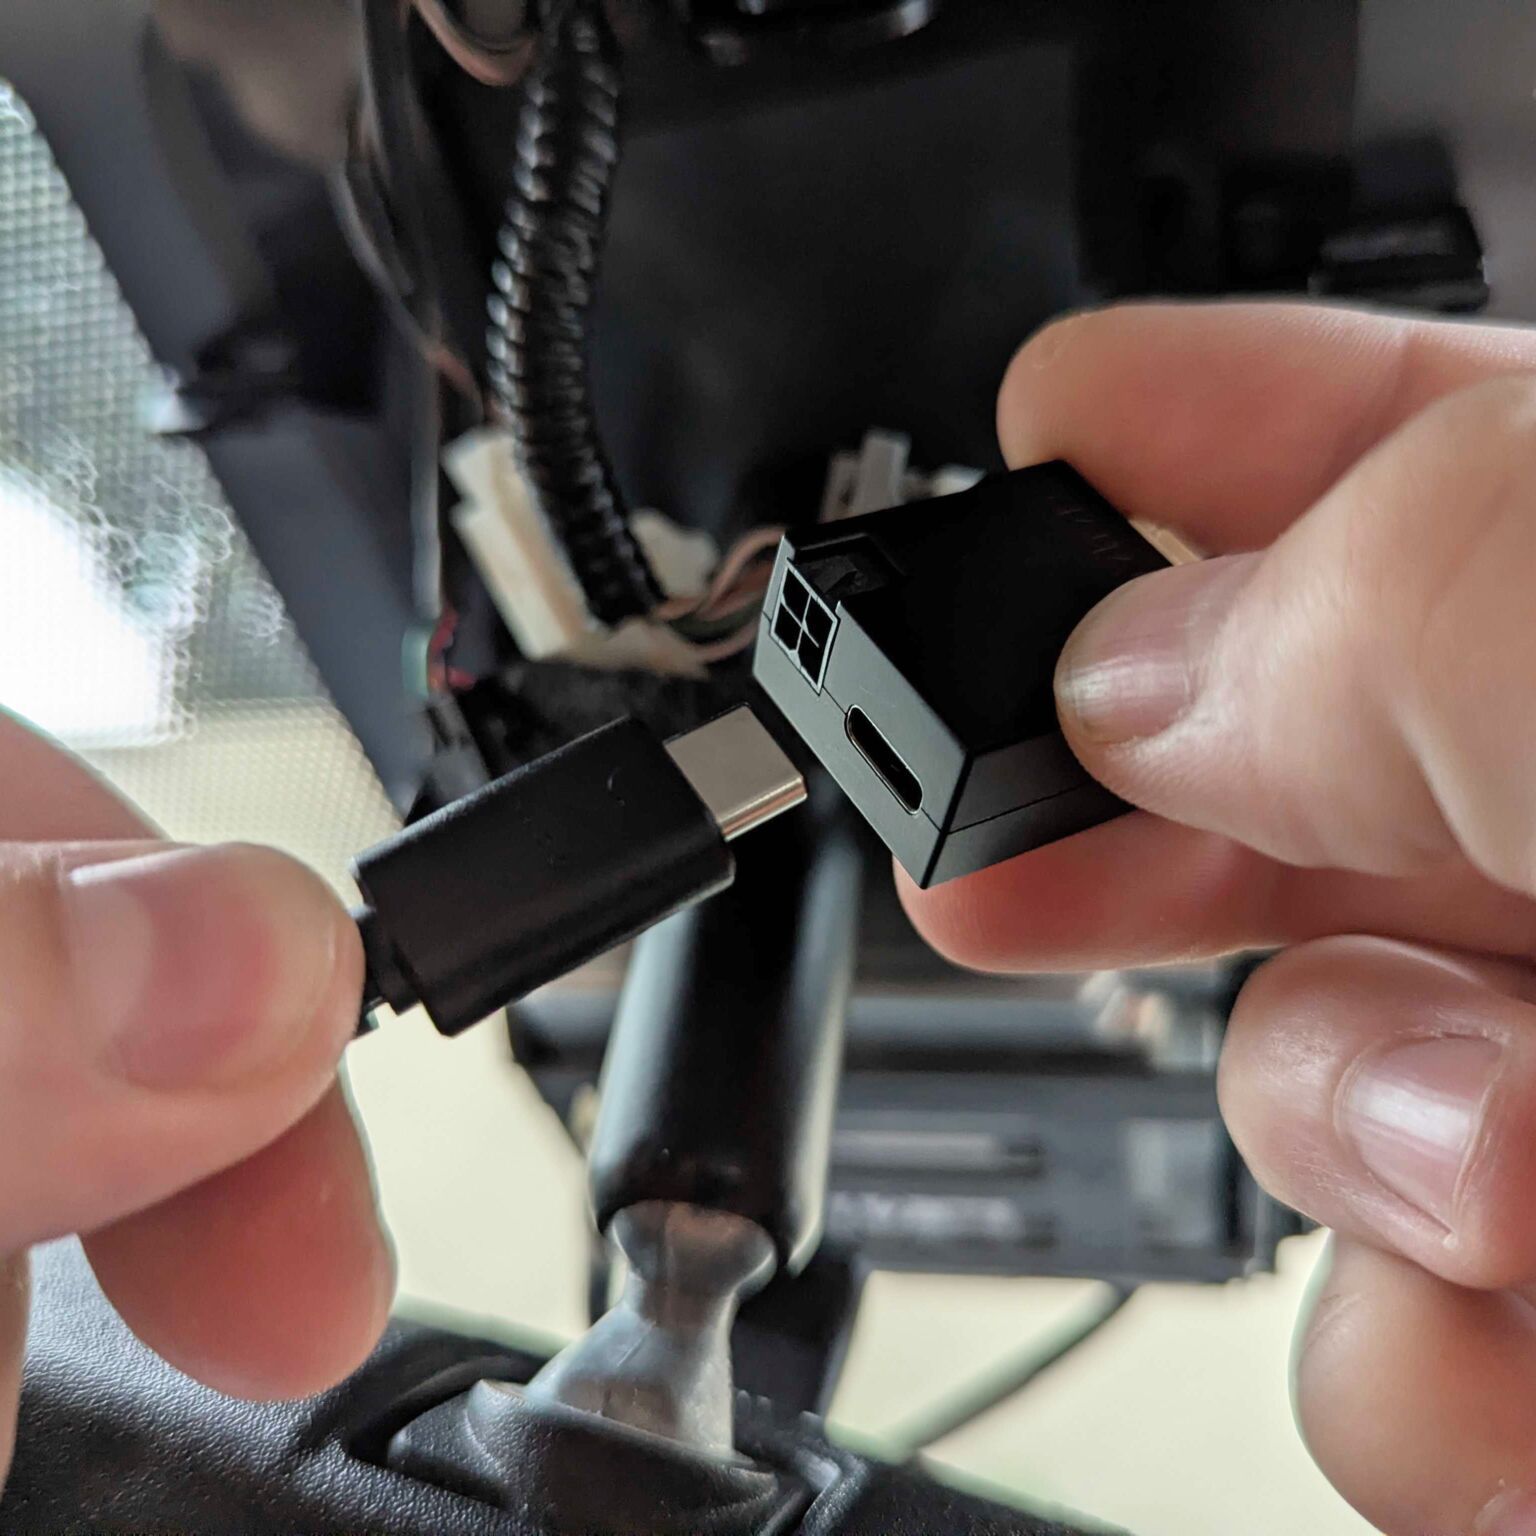
Connecting the OBD-C cable and mounting the device
Connect the OBD-C cable to the harness box — make sure it's fully pushed in. Connect the other end of the OBD-C cable to the comma four, then snap the device into the mount. Verify the device sits securely in the mount.
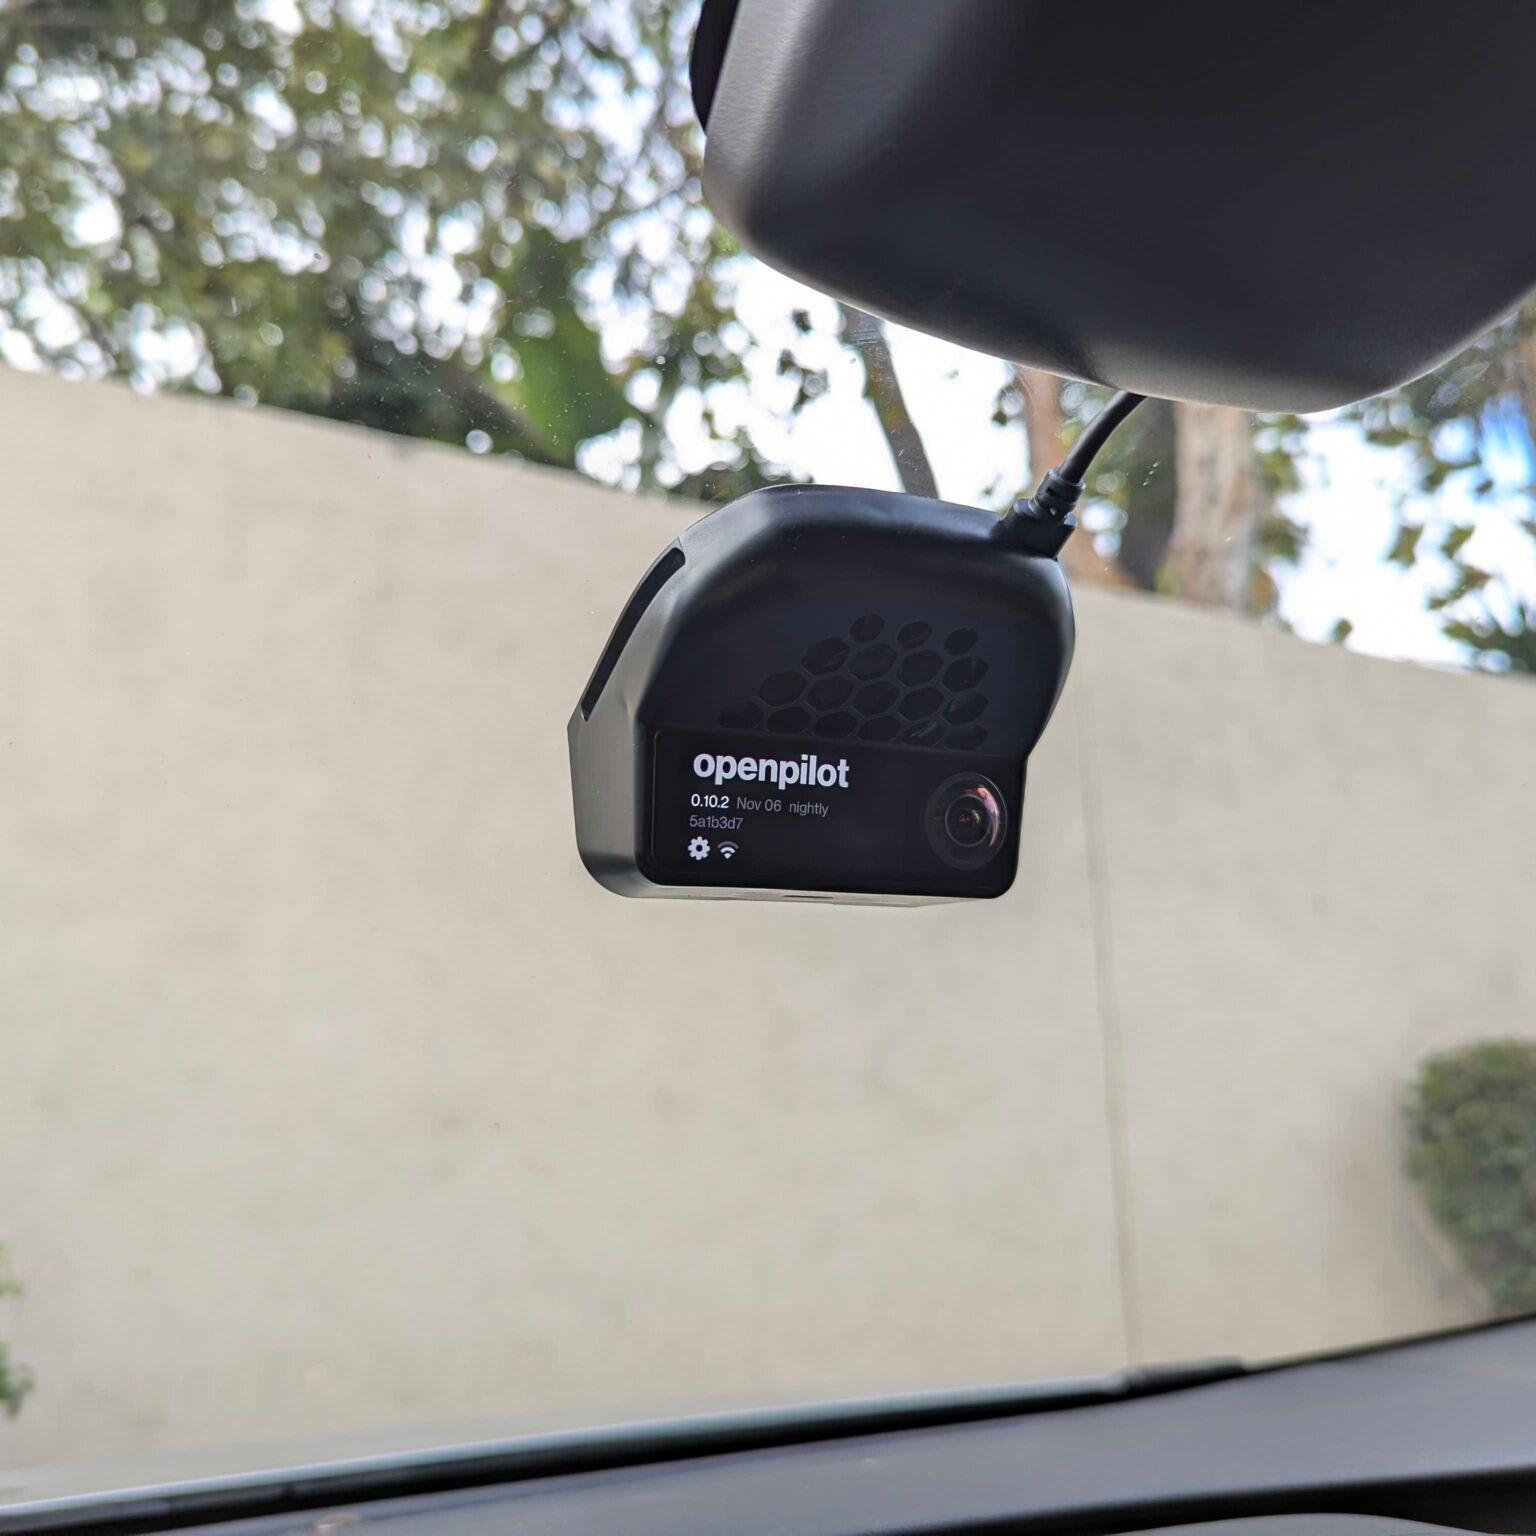
Enjoy openpilot!
We recommend disabling the factory Autopilot for openpilot use. Only leave ACC enabled.